


Automating Power Platform solution deployment has always been a topic of my interest. Recently, a friend of mine encountered an issue with GitHub Actions for the Microsoft Power Platform. Essentially, he was frustrated that there wasn't an action available for updating the solution version. I found this surprising because the action actually exists in Power Platform Build Tools for Azure DevOps and I happened to use that several times.
Then I had an idea: why not run the Power Platform CLI directly in the GitHub Actions workflow? Let me put my Devops engineer hat on and show you how I did that.
Before we start, two key concepts we need to understand:
Each Power Platform GitHub Action(or Power Platform build tools task) is a wrapper of a Power Platform CLI command. The Power Platform CLI contains various commands related to environment and application lifecycle, administration, authentication and works with Dataverse environments, solution packages, portals, code components .etc.
GitHub Actions is a CI/CD Platform that allows you to automate your build, test and deployment pipeline. Each pipeline might have one or many Runners which are the virtual machines created to run all the pipeline tasks.
With those concepts in mind, I plan to install Power Platform CLI in the runner machine and run the Power Platform CLI command through Powershell script during the actions workflow execution. Below are the steps I will be followed:
Create a Solution in a Development environment.
Create GitHub Actions workflows to build and release the solution from a Dev environment to a Production environment.
Create a PowerShell script to install Power Platform CLI and then run the CLI command.
Create a new action in the workflow to call the PowerShell script.
Create a Solution and Create GitHub Actions workflows
I am not going to write too much on these two steps as Microsoft has provided detailed steps here:
Build an app for GitHub Actions
Automate Deployment using GitHub Actions (To be able to follow along below steps, you have to do all steps until(including) this section)
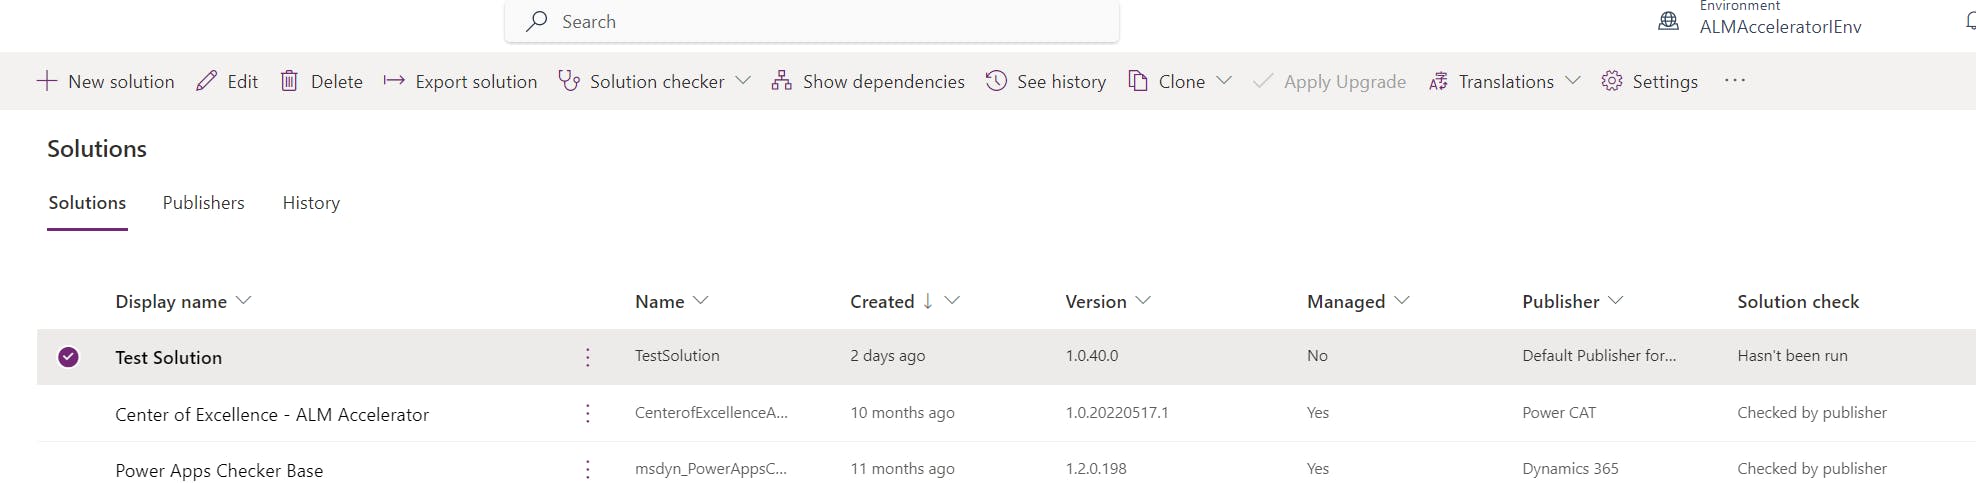
After you've done all steps you should have:
- A solution in your dev environment
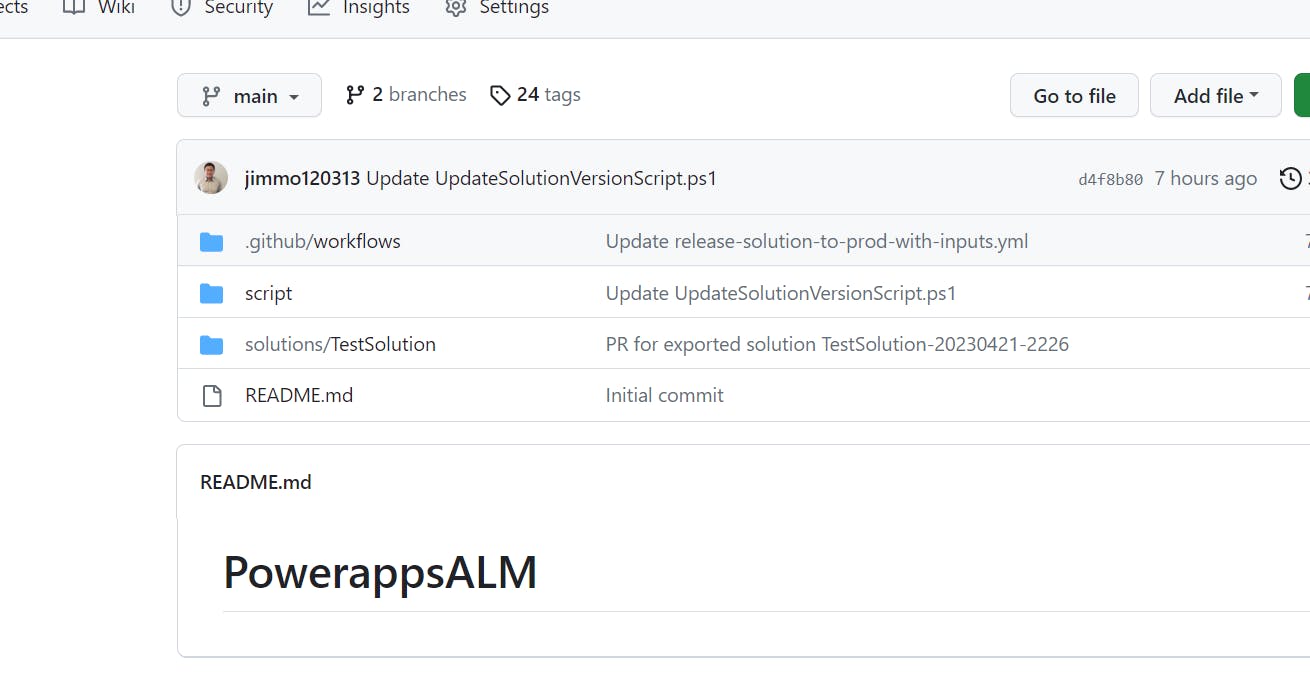
Your Github Repository with two folders.
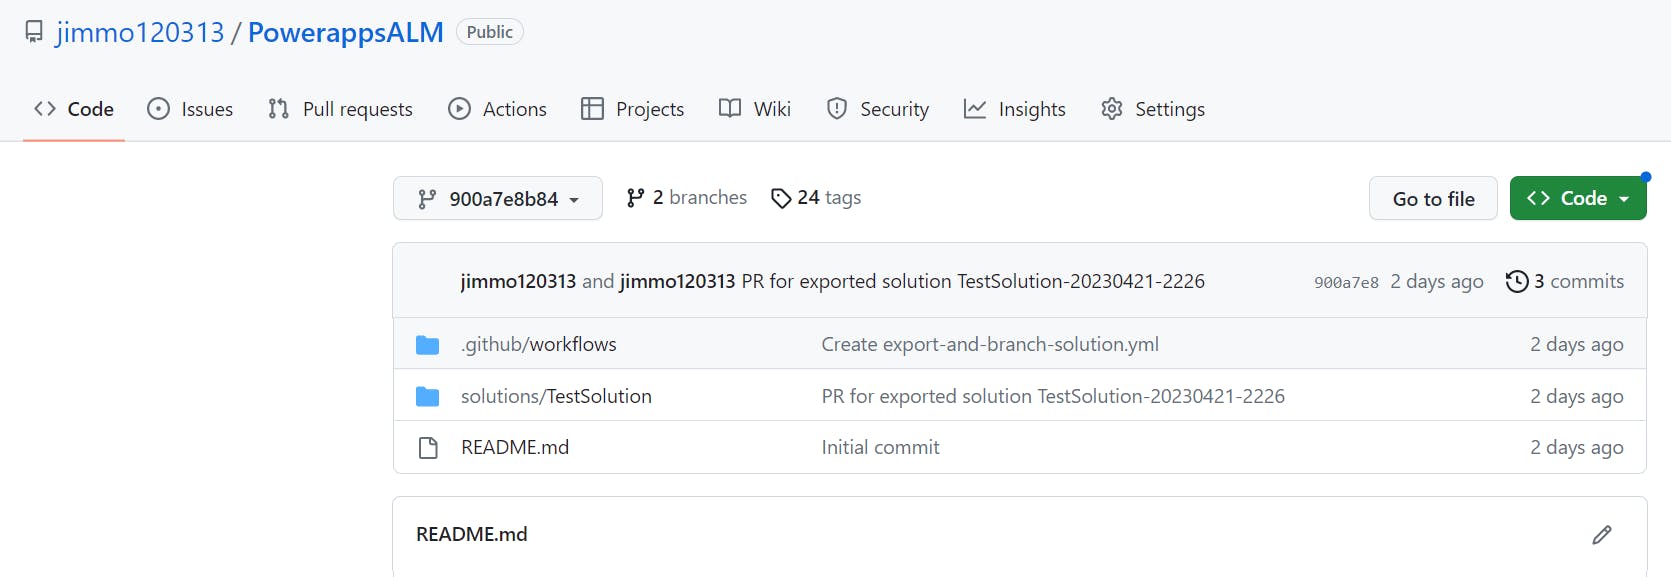
Within .github/workflows/ folder, you should have at least three .yml files:
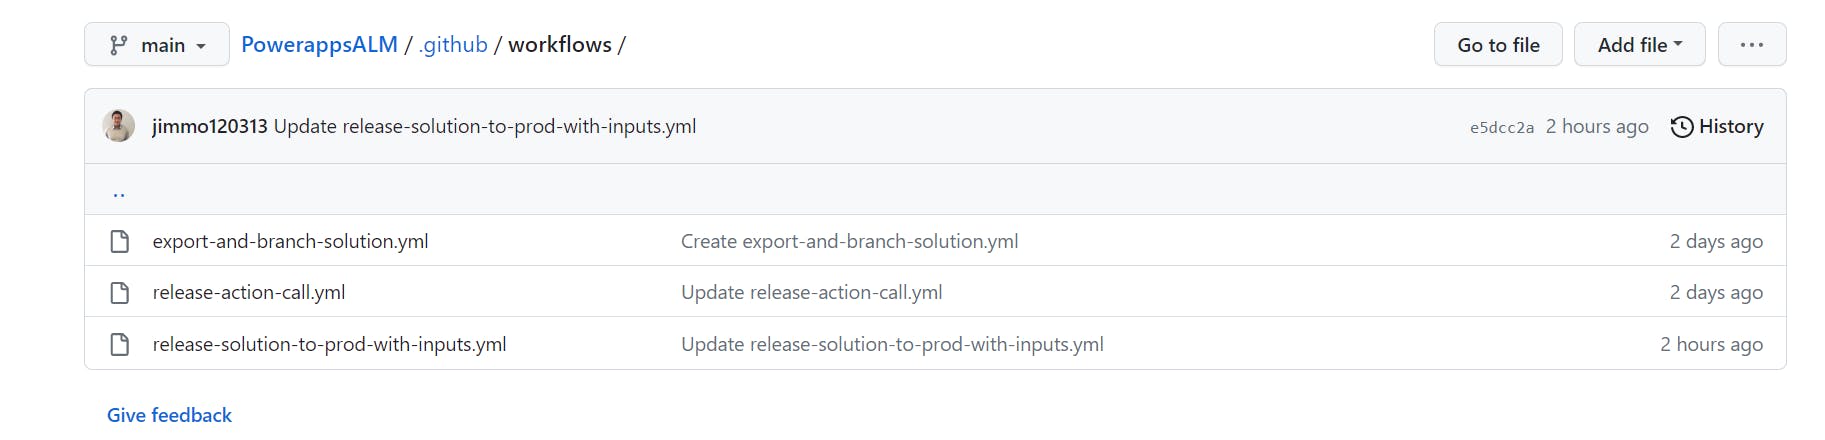
export-and-branch-solution.yml file defines GitHub workflow that export solution from your development environment and save source code in your repository.
release-action-call.yml define the solution release workflow which will trigger the child workflow defined in release-solution-to-prod-with-intpus.yml
Your solution should exist in your production environment:
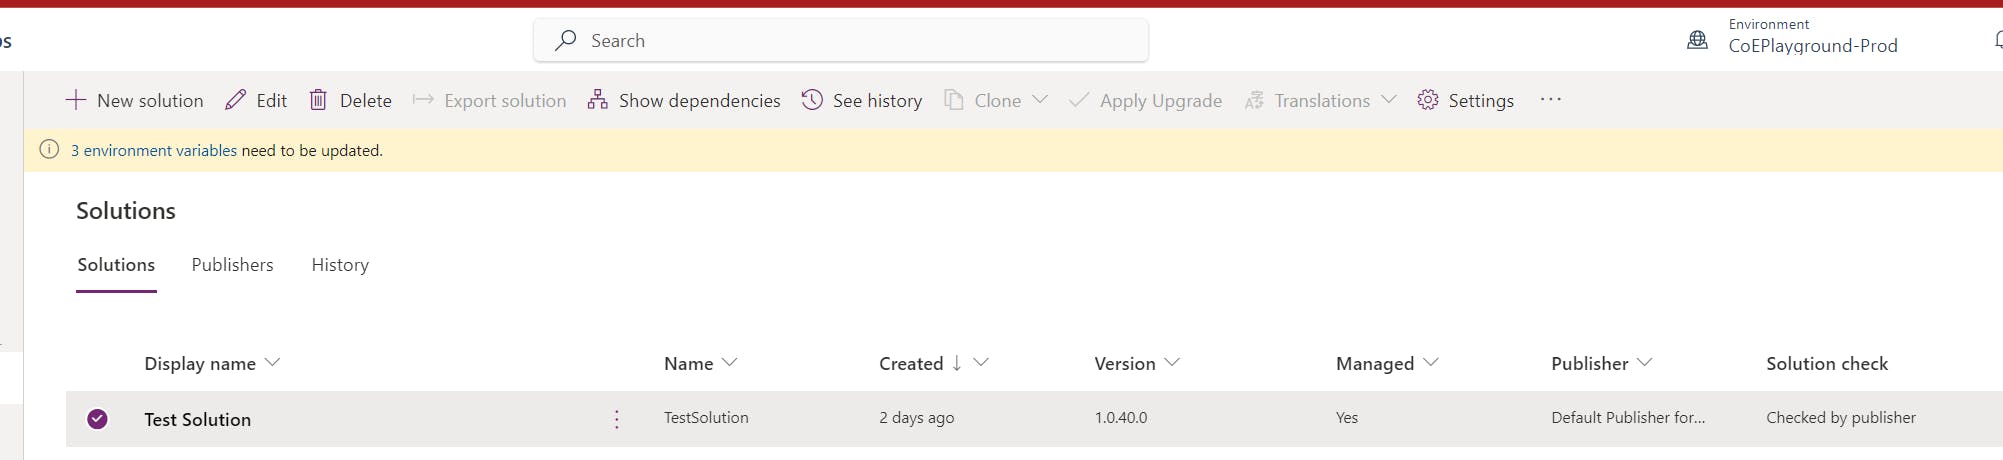
If everything is in place, then congratulations🎉🎉🎉🎉🎉🎉🎉 you've just learnt how to automate your power platform solution build and release using GitHub Actions.
Create a PowerShell script to install Power Platform CLI and then run the CLI command
Let's try to update existing .yml files and see how we can call a Power Platform CLI command to update the solution build version before we deploy it to the Production environment.
The CLI command we are trying to use has been documented here
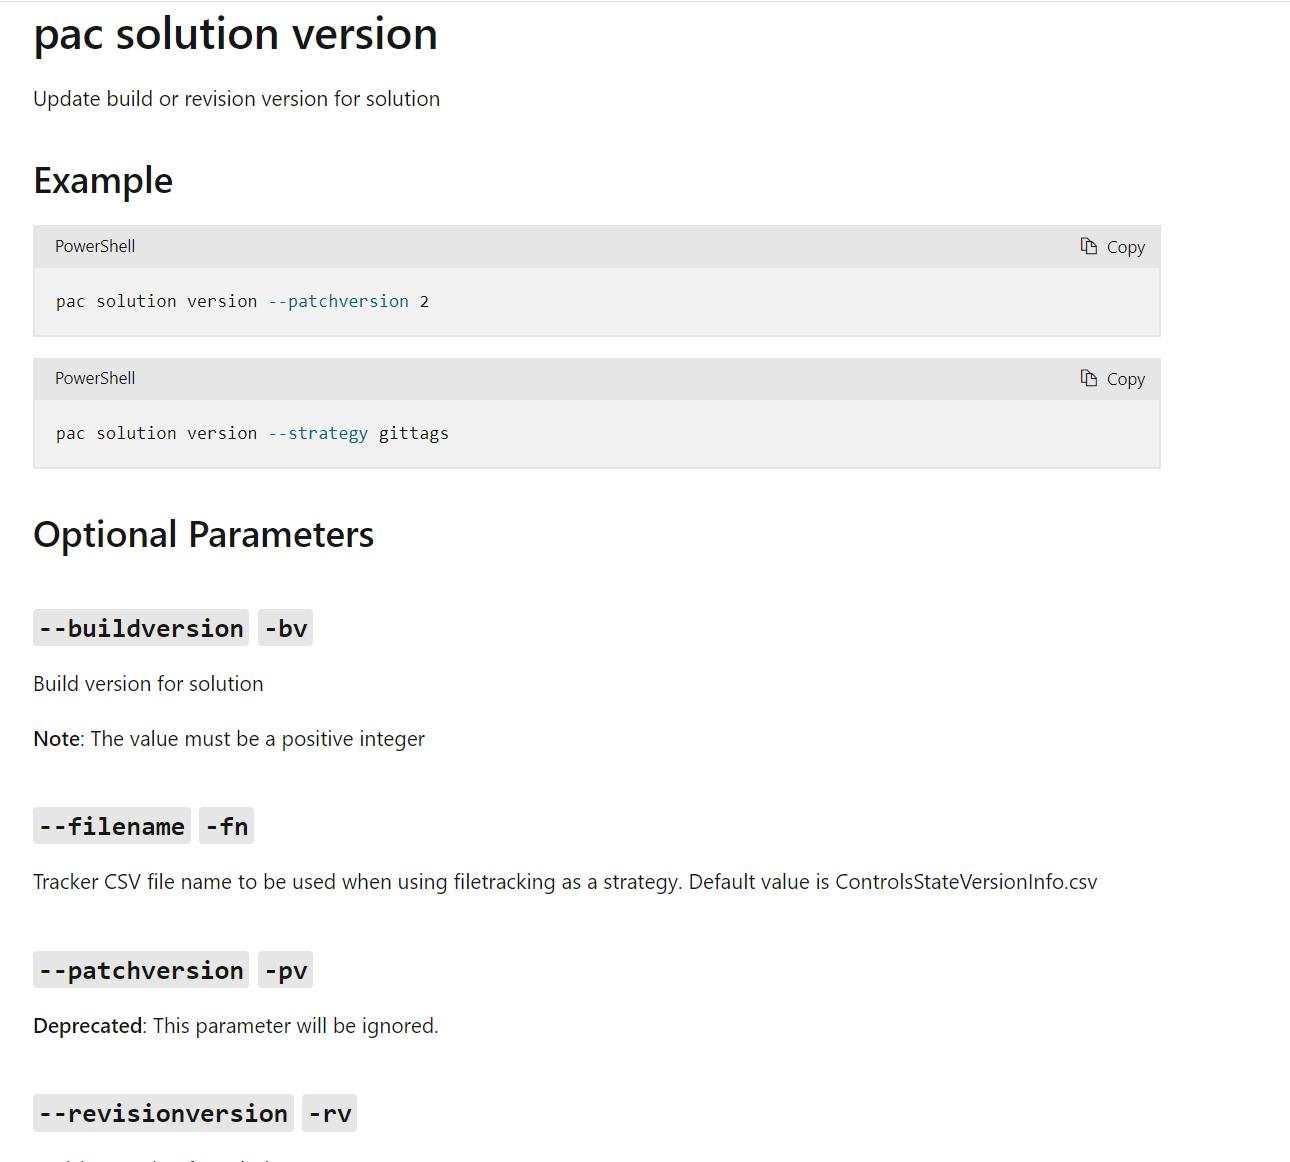
Let's test it out locally if you've never used it before:
Install Power Platform CLI on your local machine by following this link.
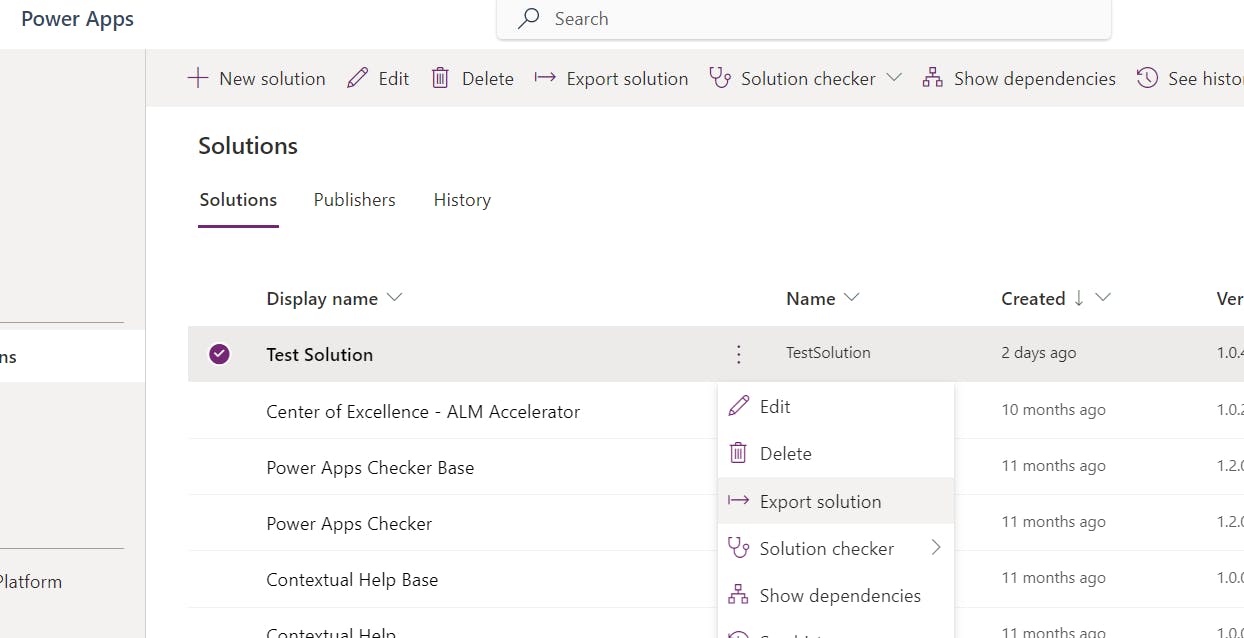
Download your solution as a managed solution from the Development environment:
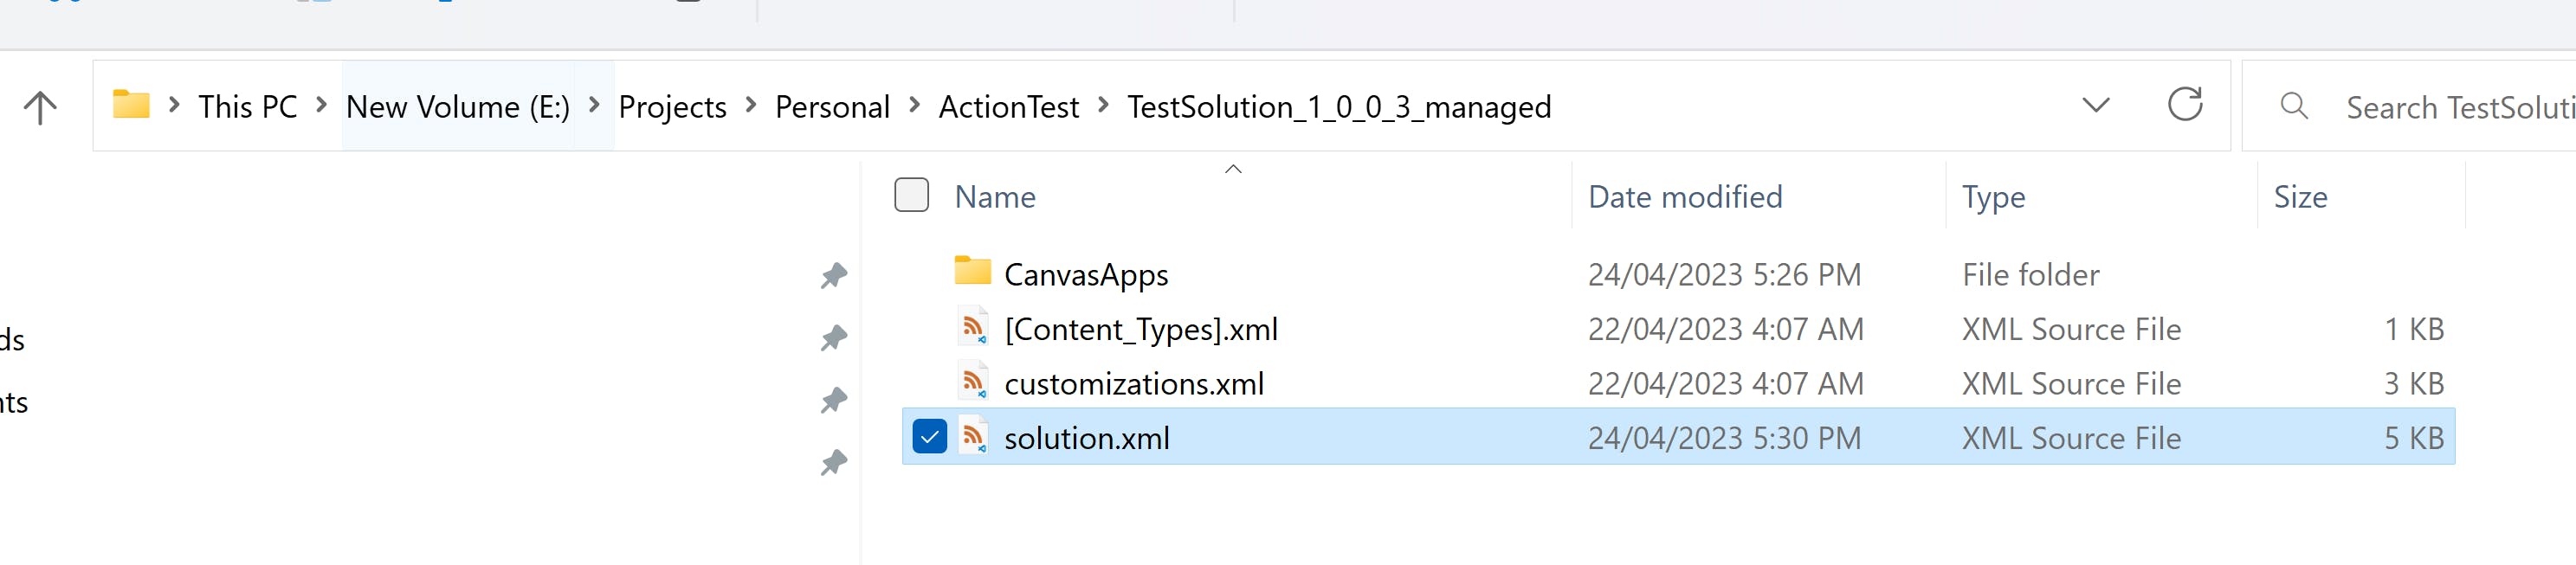
unzip your solution file:

Start your PowerShell ISE as admin and run the below script:
$path = 'E:\Projects\Personal\ActionTest\TestSolution_1_0_0_3_managed'pac solution version --buildversion 60 --solutionPath $path(Here, I am updating the build version to 60. Please Update $path with your solution folder Path)
You should see the below output once runs successfully

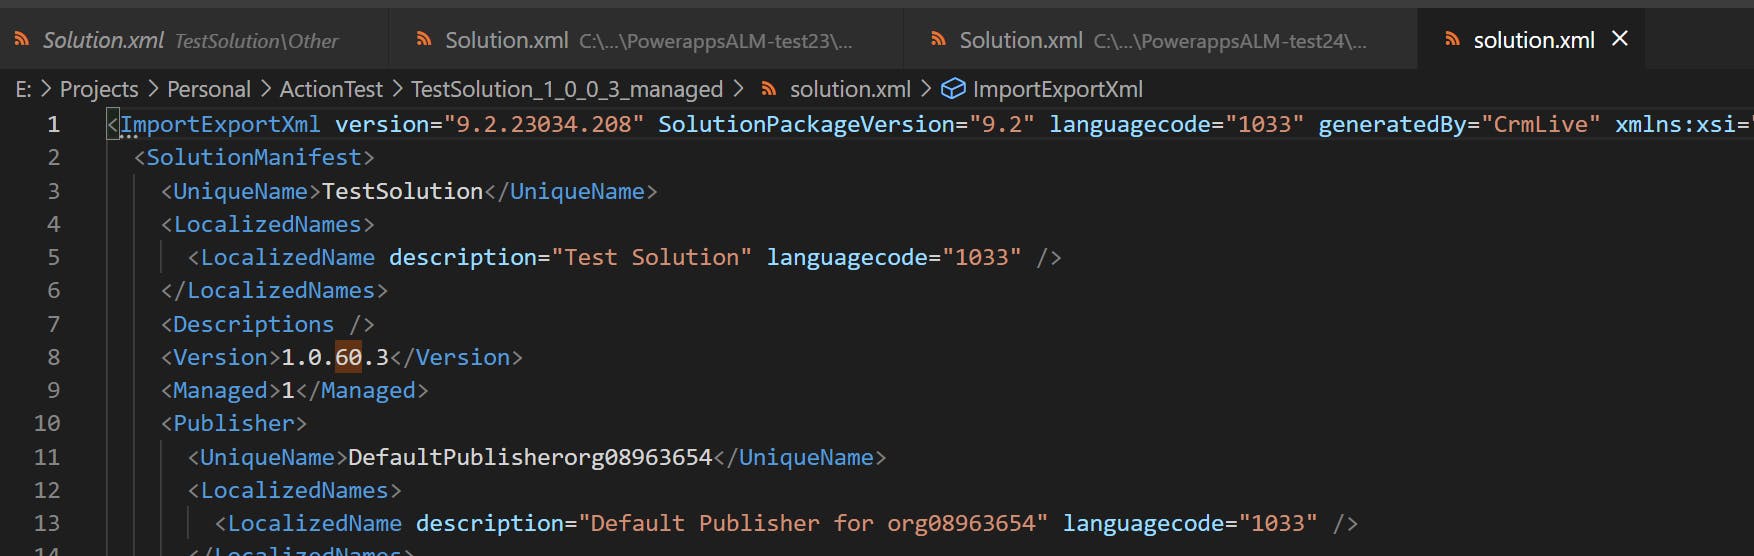
Now back to the solution file and take a look at the solution.xml file. You should find the build version digit has been updated to 60
So that's how the command works. Pretty straightforward which makes it the perfect candidate for us to test out the CLI in the GitHub runner machine.
Next, let's create a PowerShell script that will install the CLI and execute the command we just tested:
param( $path, $buildversion, $workspacePath )Invoke-WebRequest -Urihttps://aka.ms/PowerAppsCLI-OutFile $workspacePath\PACInstaller.msidir$argementList = "/I "+$workspacePath+"\PACInstaller.msi /quiet" $p = Start-Process msiexec.exe -Wait -NoNewWindow -Passthru -ArgumentList $argementList -RedirectStandardOutput stdout.txt -RedirectStandardError stderr.txt dir$env:Path = [System.Environment]::GetEnvironmentVariable("Path","Machine") + ";" + [System.Environment]::GetEnvironmentVariable("Path","User")pac solution version --buildversion $buildversion --solutionPath $path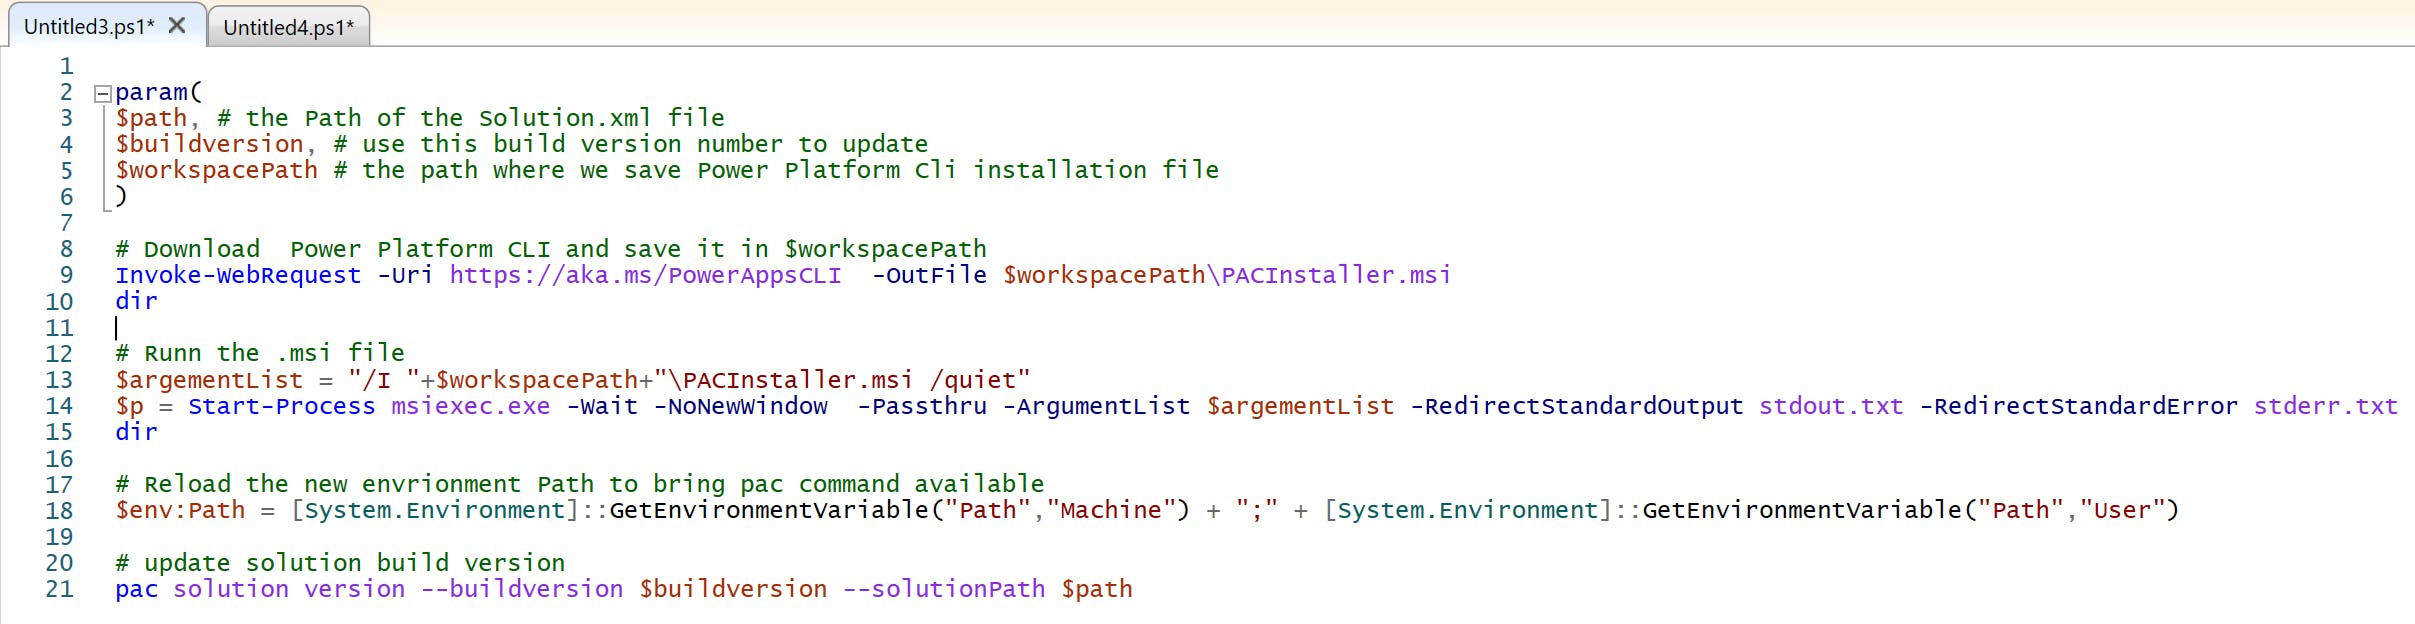
Line 14 is the script to run the CLI installation file once it is downloaded through line 9. Click here for a detailed description of each parameter for the Start-Prcess command.
Line 18 will help to reload the new environment Path after we install the Power Platform CLI. Without that line, the pac command in line 21 won't be available for the same PowerShell instance. You can copy the script from my repo.
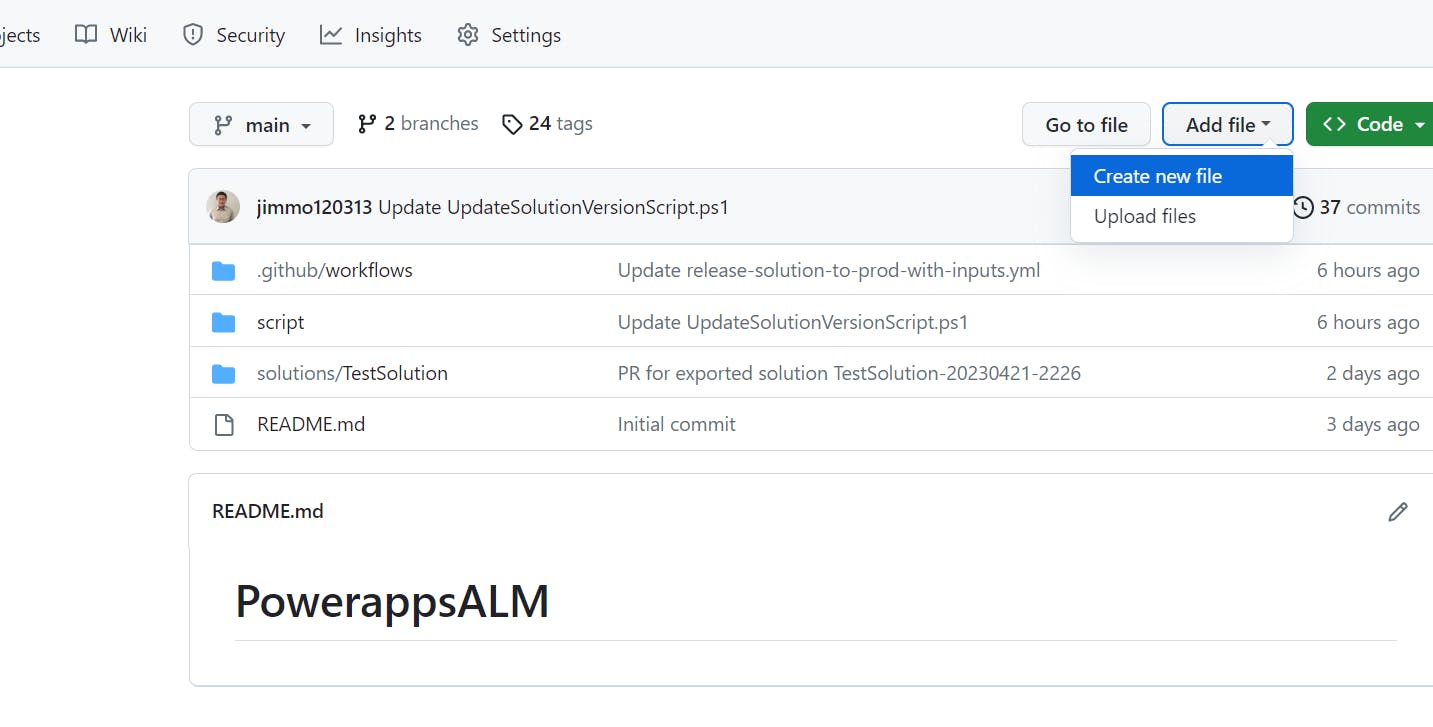
Copy the whole script and head back to your git repo. To save time, we are going to commit the file to the repo main branch directly. Click on create files:
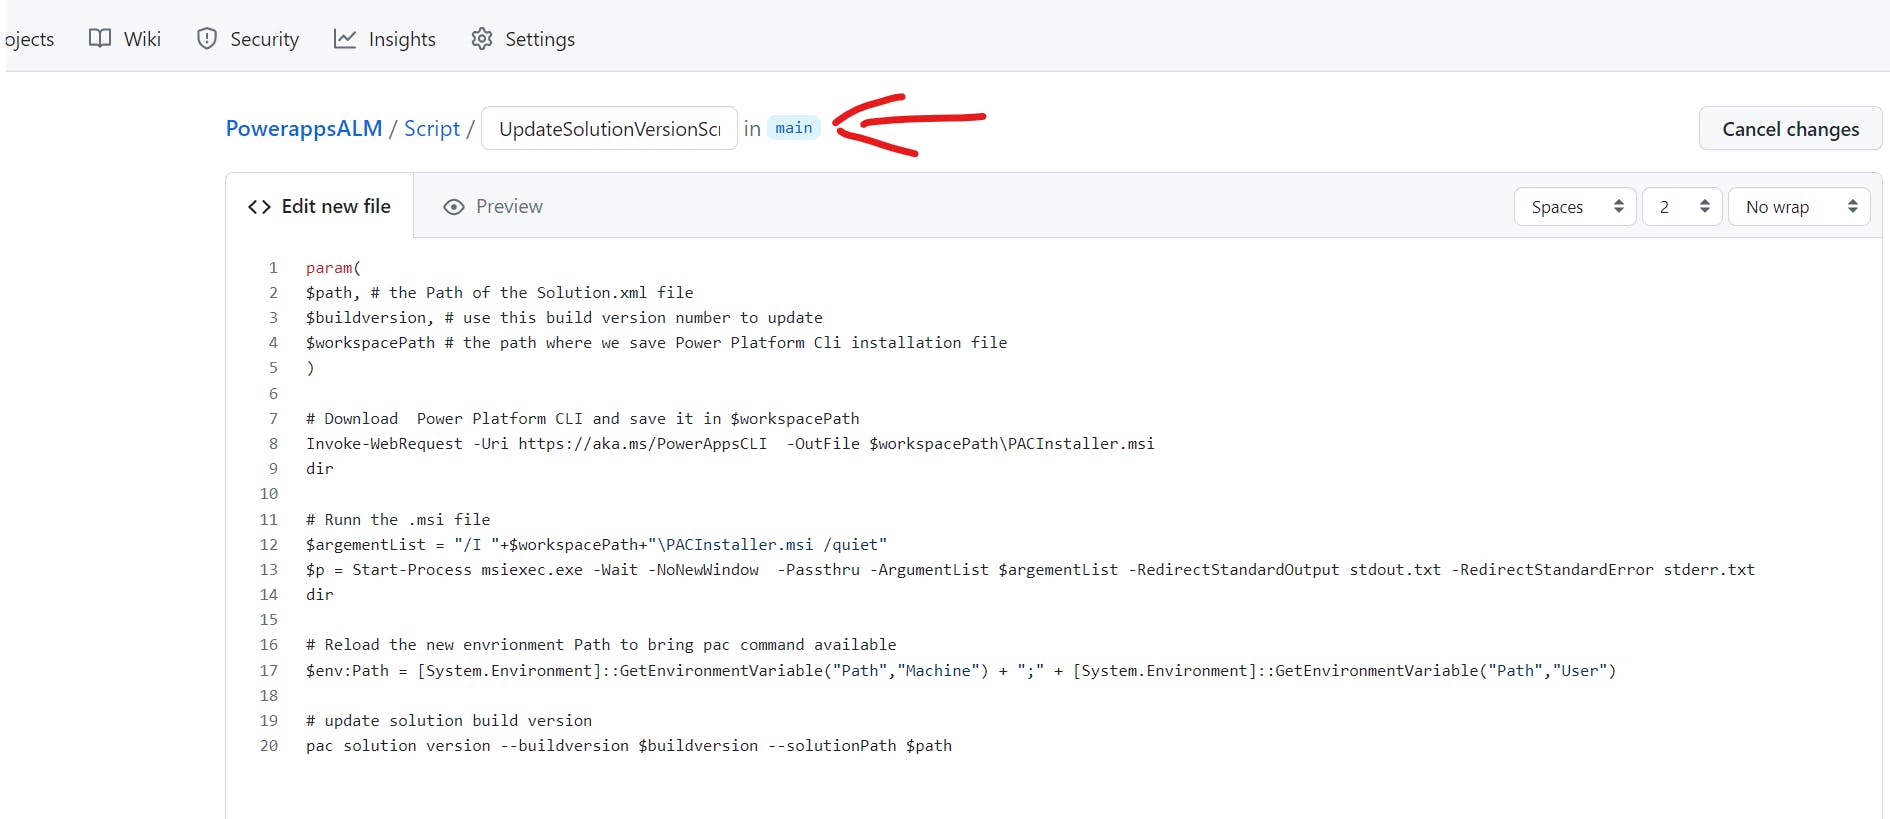
type /script/ to create a new folder called script under the main repo and provide a file name after it. Then copy the whole PowerShell script below:
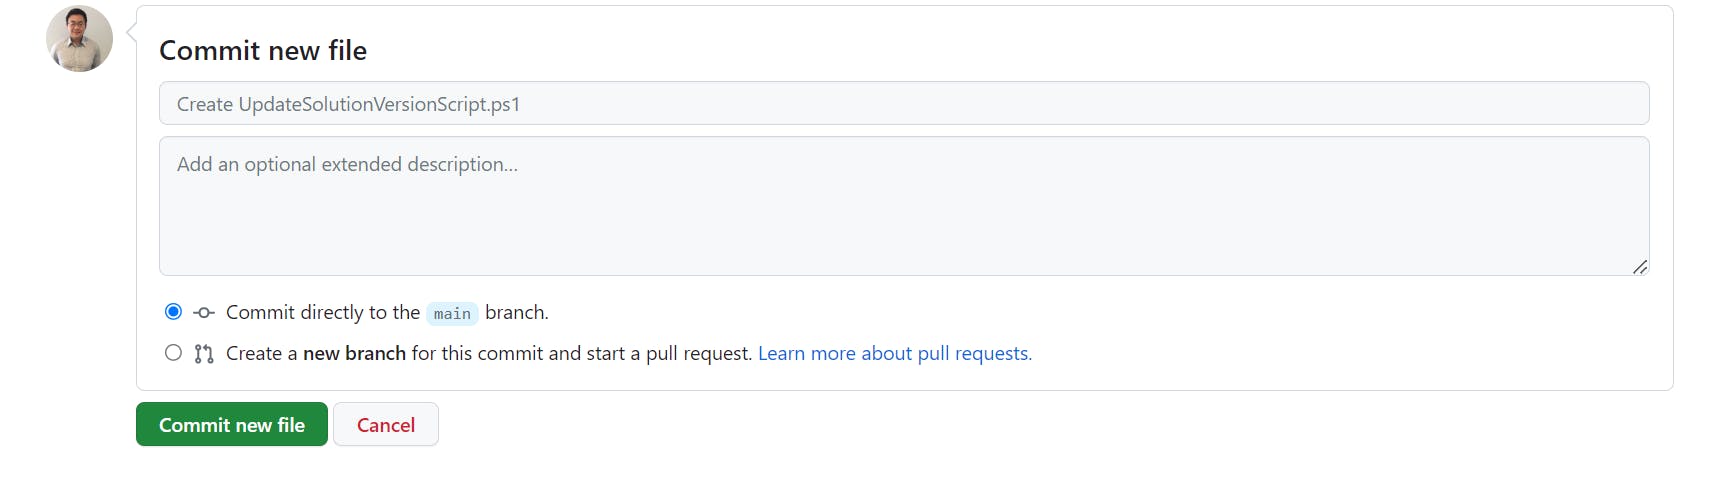
Click Commit new file
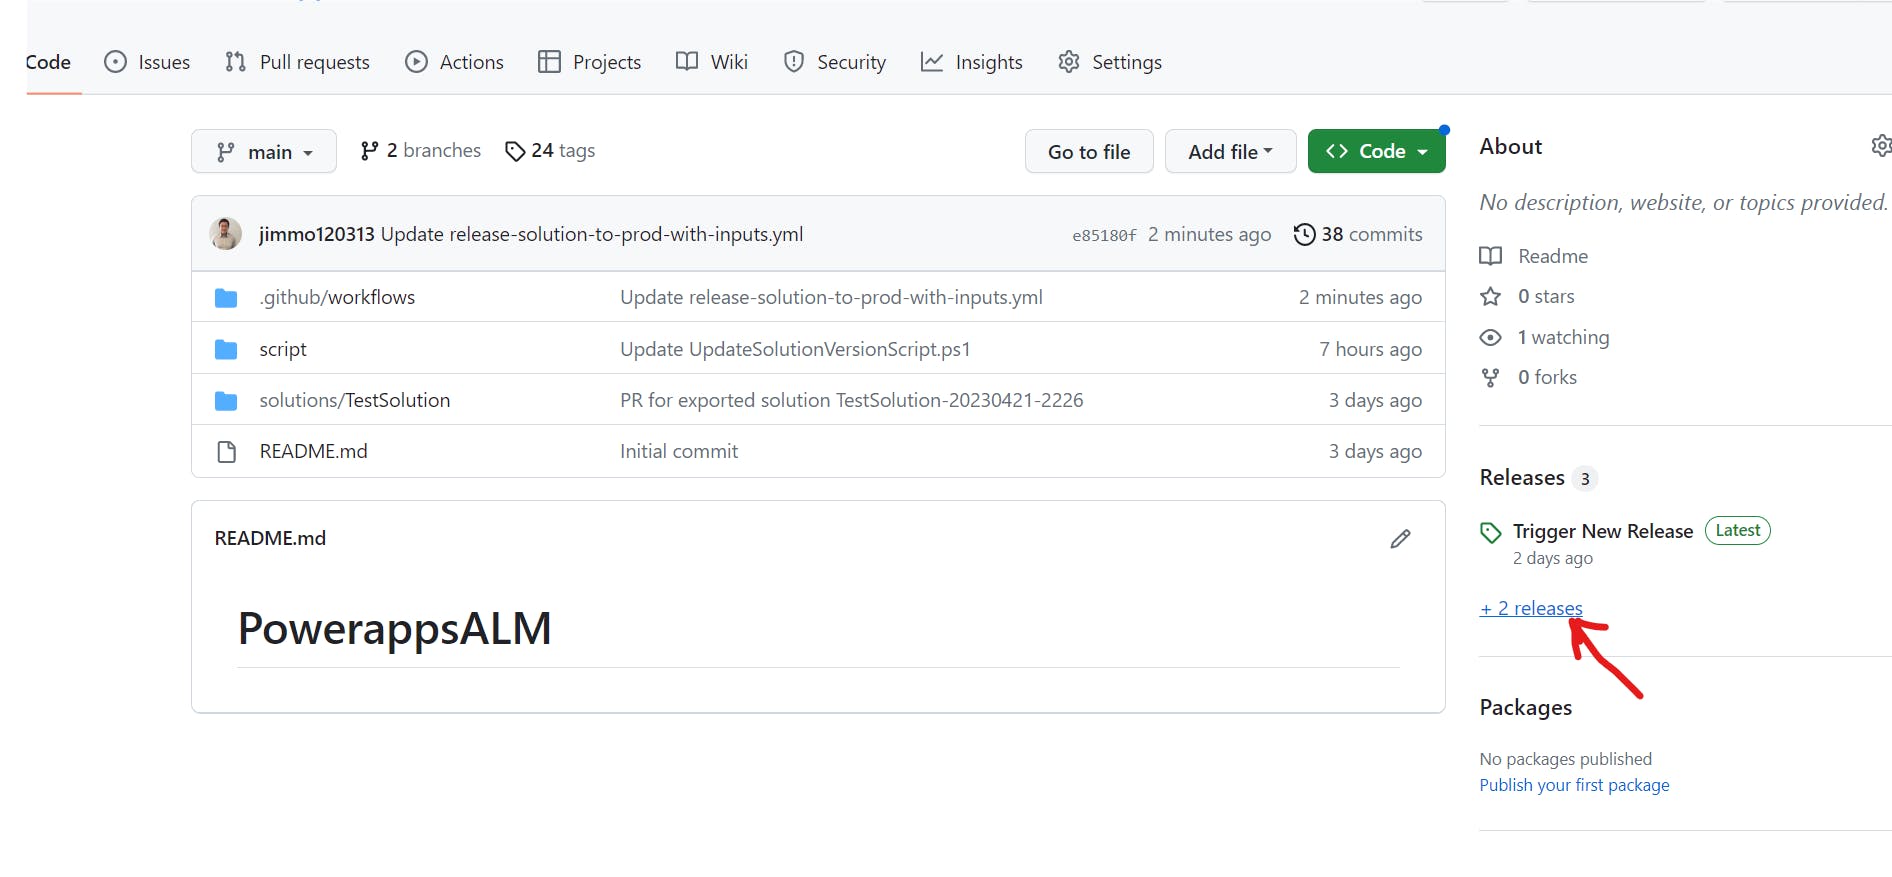
Back to the repo main page, you should now see a new folder created:
Create a new action in the workflow to call the Powershell script
In your repo main branch, click on .github/workflows folder and select the release-solution-to-prod-with-inputs.yml file. Click on the pen icon to edit the file
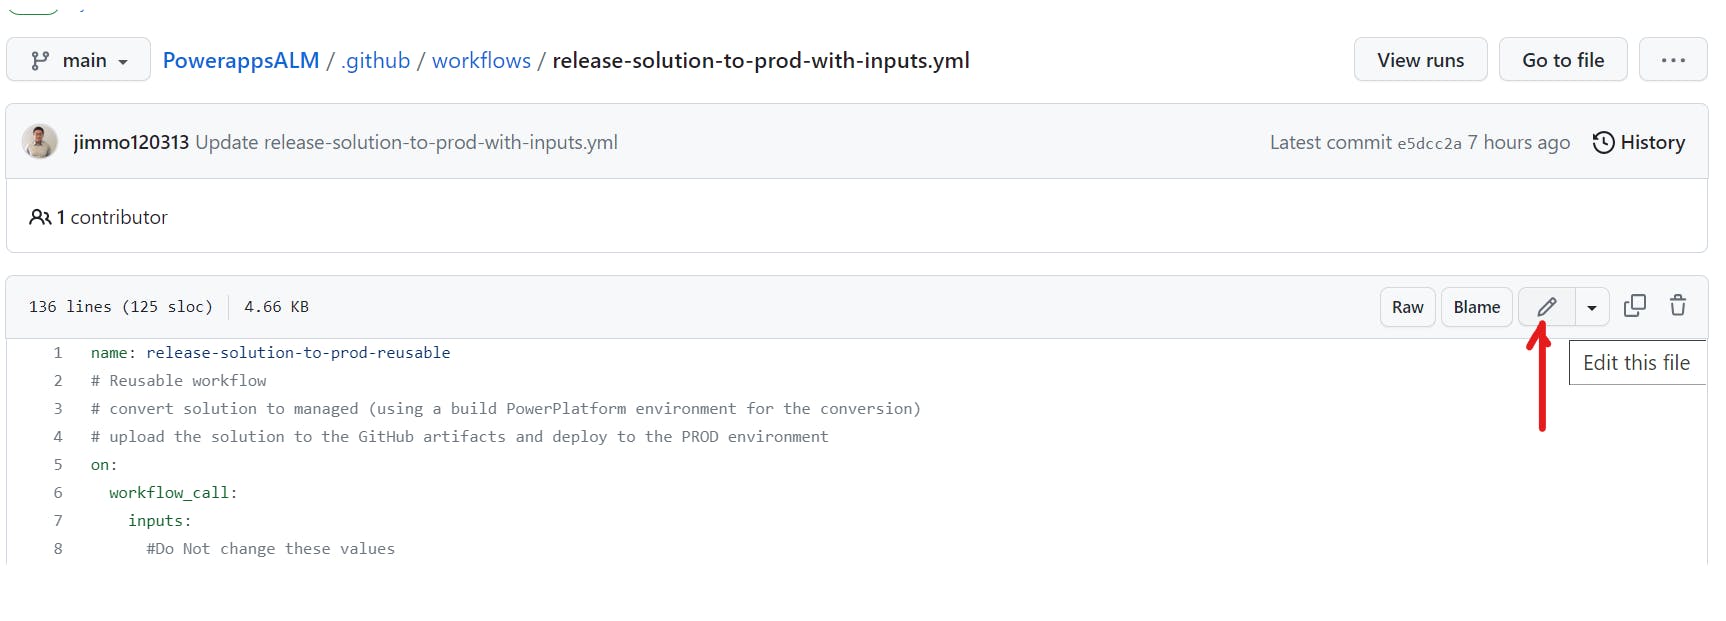
Before Pack solution step, add a new step called Update Version to update the solution build version before the solution folder is converted into .zip file.
name: Update Versionshell: pwshrun: |echo ${{ github.workspace }}.\script\UpdateSolutionVersionScript.ps1 -path ${{ inputs.solution_source_folder}}/${{ inputs.solution_name }} -buildversion 40 -workspacePath ${{ github.workspace }}
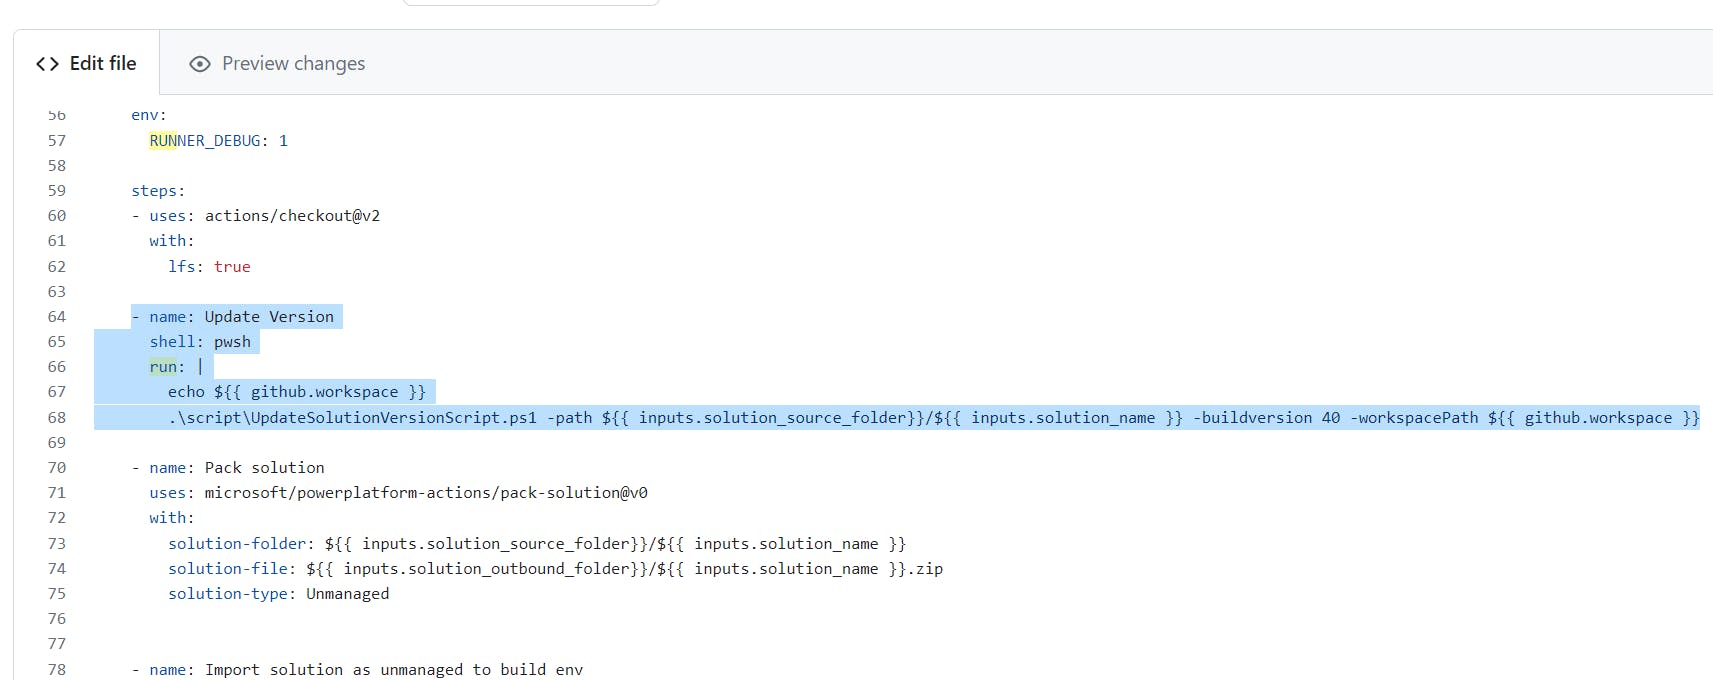
For testing purposes, we can hardcode the -buildversion to 40 for now.
Line 68 is going to run the PowerShell script stored under the newly created script folder with three parameter values.
${{inputs.solution_source_folder}} refer to the solution folder which contains the solution.xml file.
${{ github.workspace }} refer to the default working directory on the runner for steps, and the default location of your repository when using the checkout action. We are going to store the CLI installation file in the root folder.
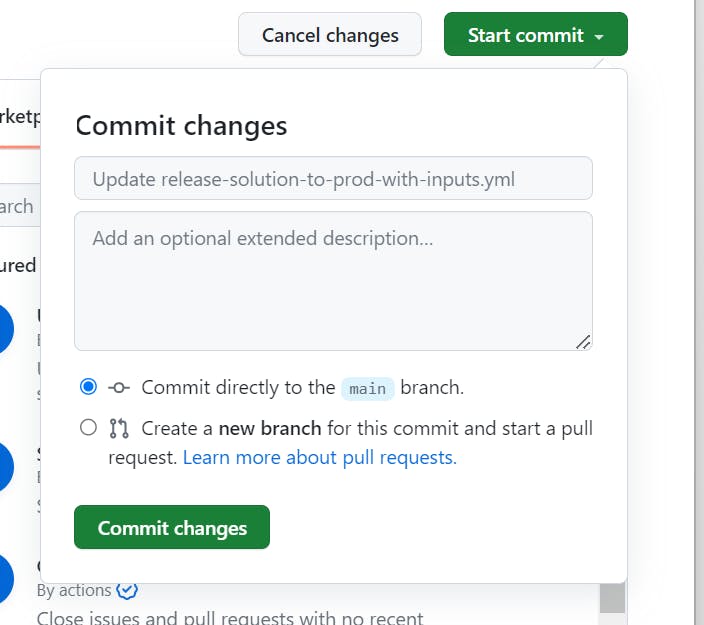
Click on the Start commit button to save the change to the main repo
Let's create a new release to test the change.
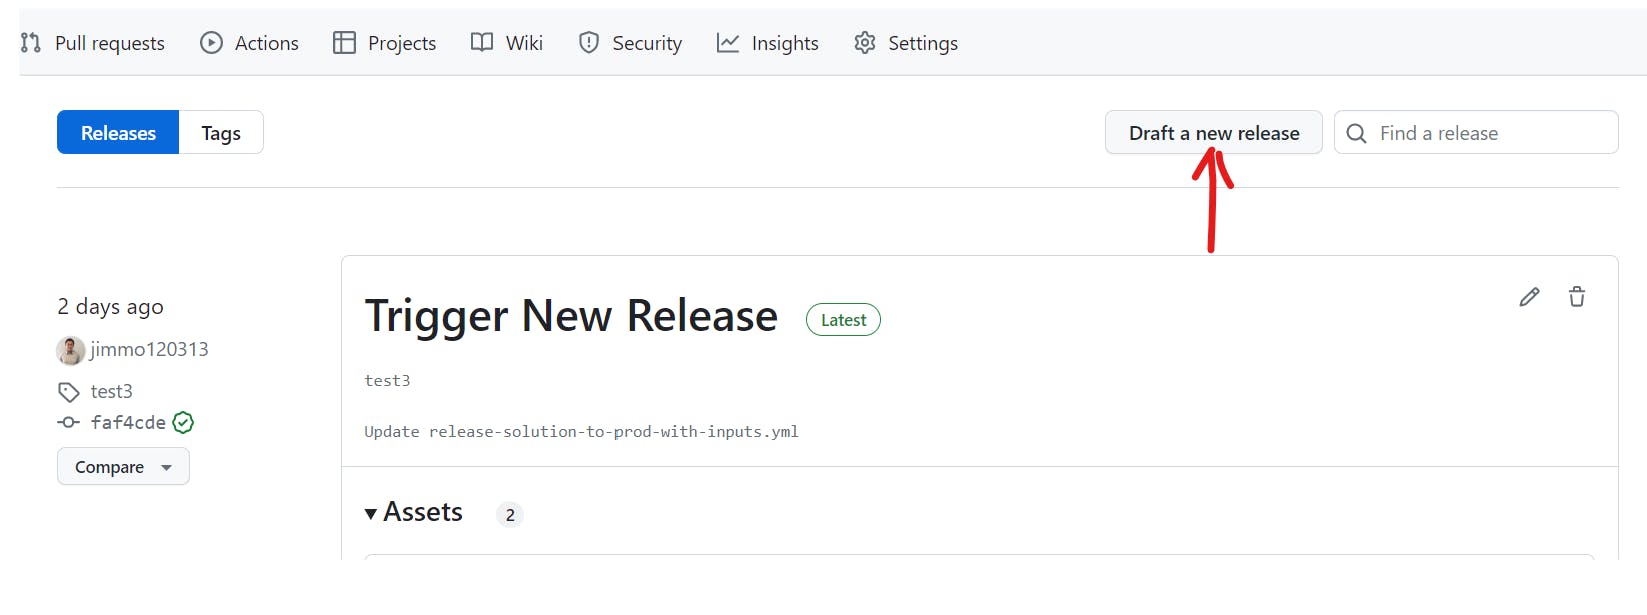
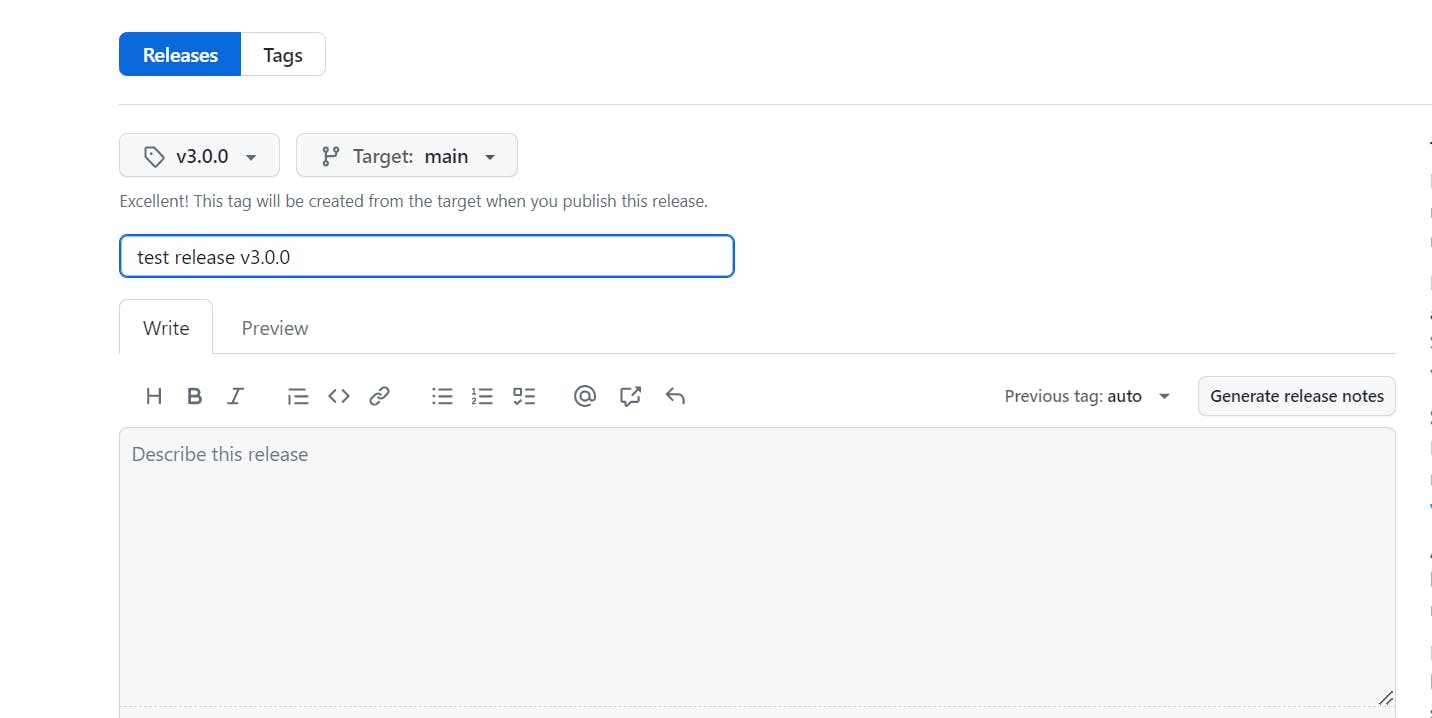
Provide a tag name and release description and click on Publish release
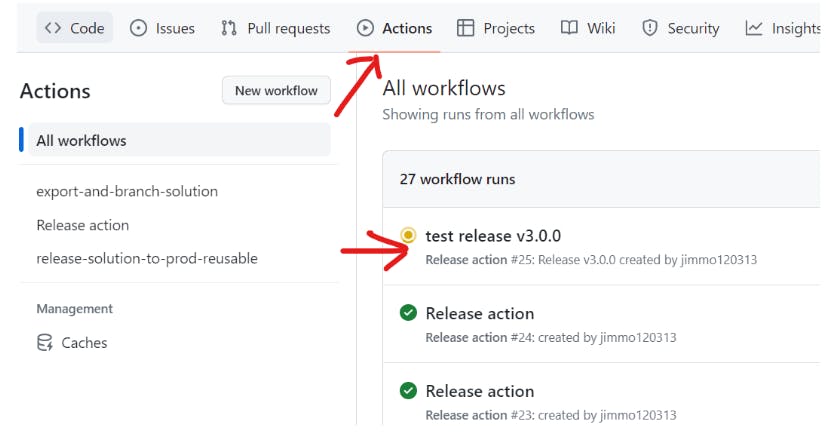
Navigate to Actions:
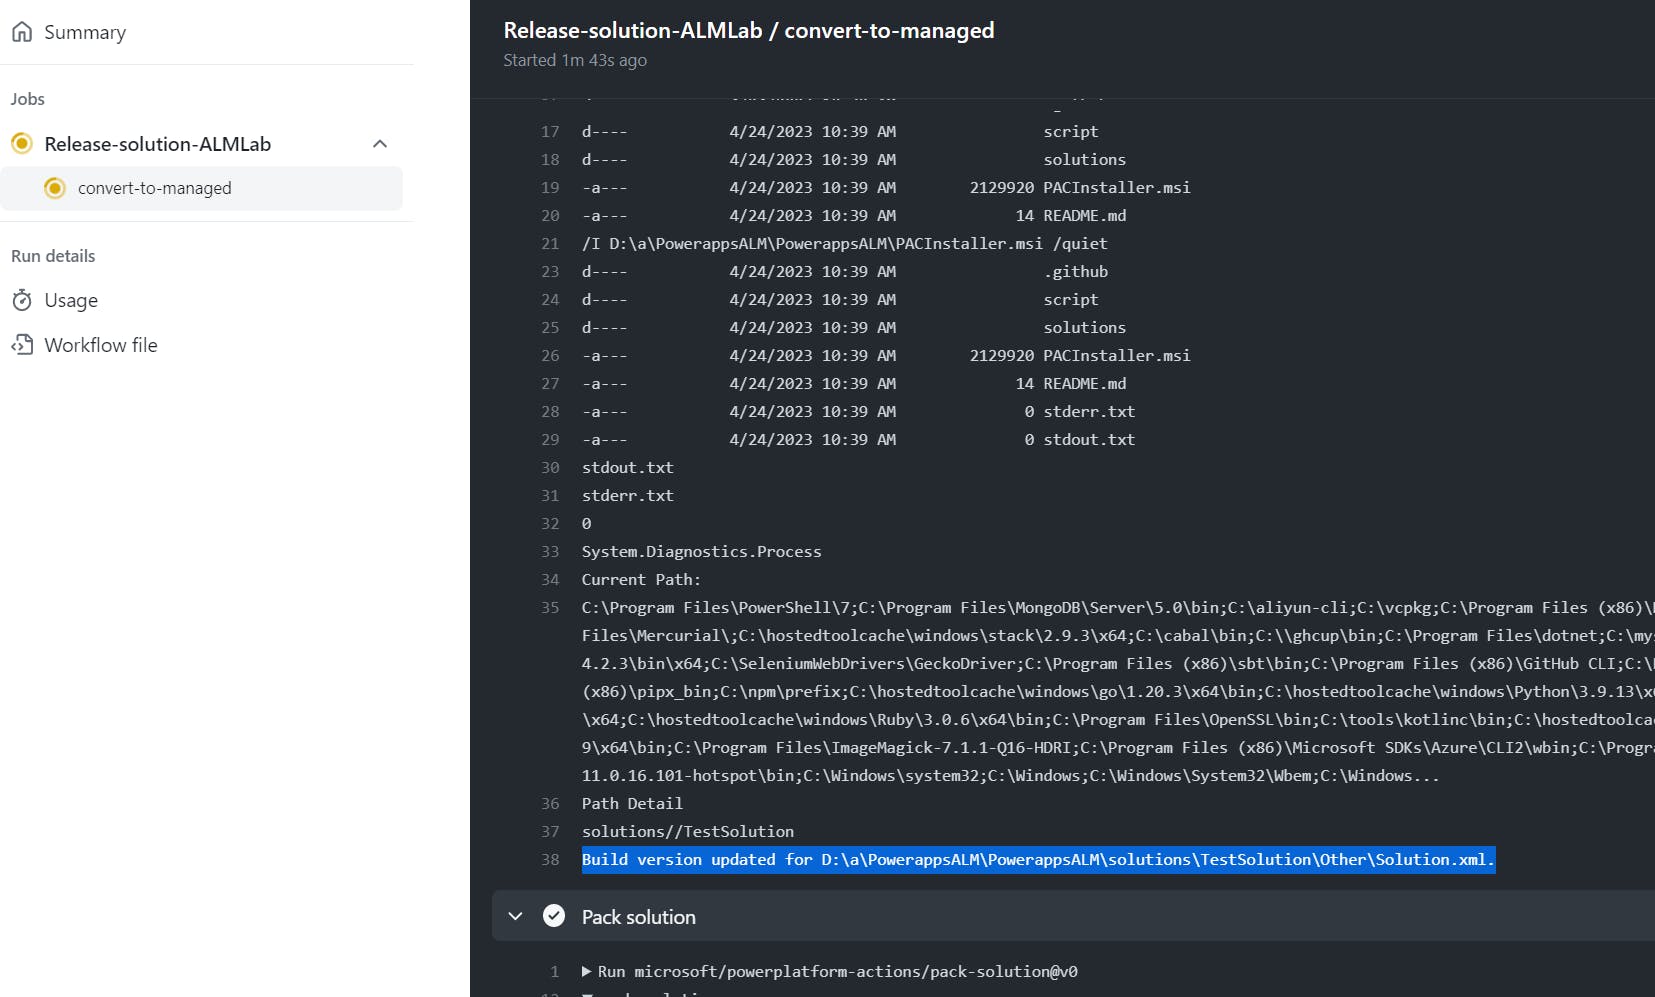
In the job summary page, we can see the new step has been run and the solution version updated successfully:
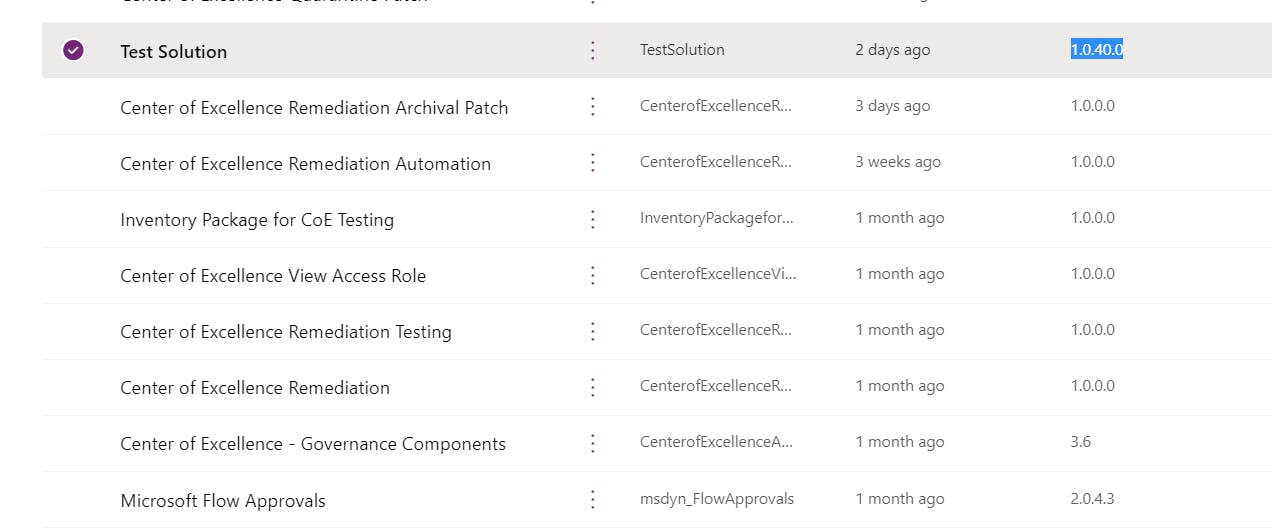
After the release workflow ends, navigate to your Power Platform production environment, you can see the solution has been deployed to the environment with an updated build version:
Summary
In this post, I have demonstrated how to install Power Platform CLI on a GitHub-hosted runner and use it to call Power Platform CLI commands. These same steps can also be implemented on a self-hosted runner to trigger different CLI commands. While the process is relatively straightforward, I highly recommend using the Power Platform GitHub actions whenever possible. Doing so will simplify your workflow and make it easier to maintain in the future. You can find the updated file in my Repo here.
If you encounter any issues while following these steps, please leave a comment below. Happy sharing!🤝🤝🤝🤝🤝