A month back in Microsoft Build 2023, Microsoft introduced a new table type in Datavse called Elastic table. Despite being in the preview stage, I believe this feature holds significant importance as a foundational element for specific types of solutions. Some of my clients have already expressed interest in its functionality and start experimenting with the feature.
In this post, I am going to talk about the data storage technology behind the elastic table and some use cases to help you better understand the feature.
What is Elastic Table?
Different from the standard type of Dataverse tables which are powered by Azure SQL Database, Elastic tables are powered by Azure Cosmos Database which is designed to handle large volumes of data and high levels of throughput with low latency.
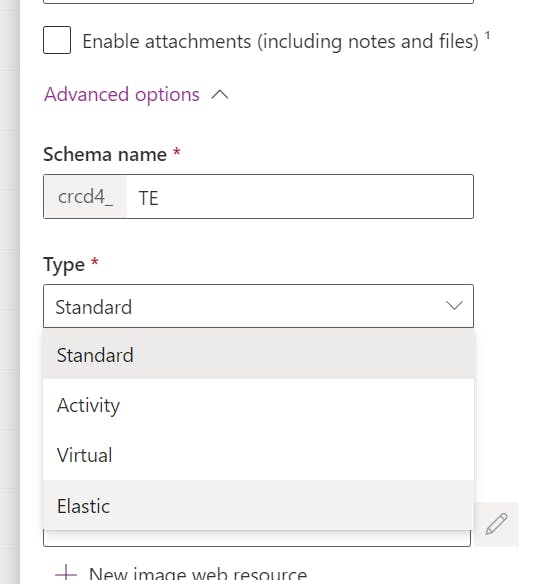
To create an elastic table, we just follow the normal way of creating Dataverse table and expand the Advanced options to select Elastic for the table type option:
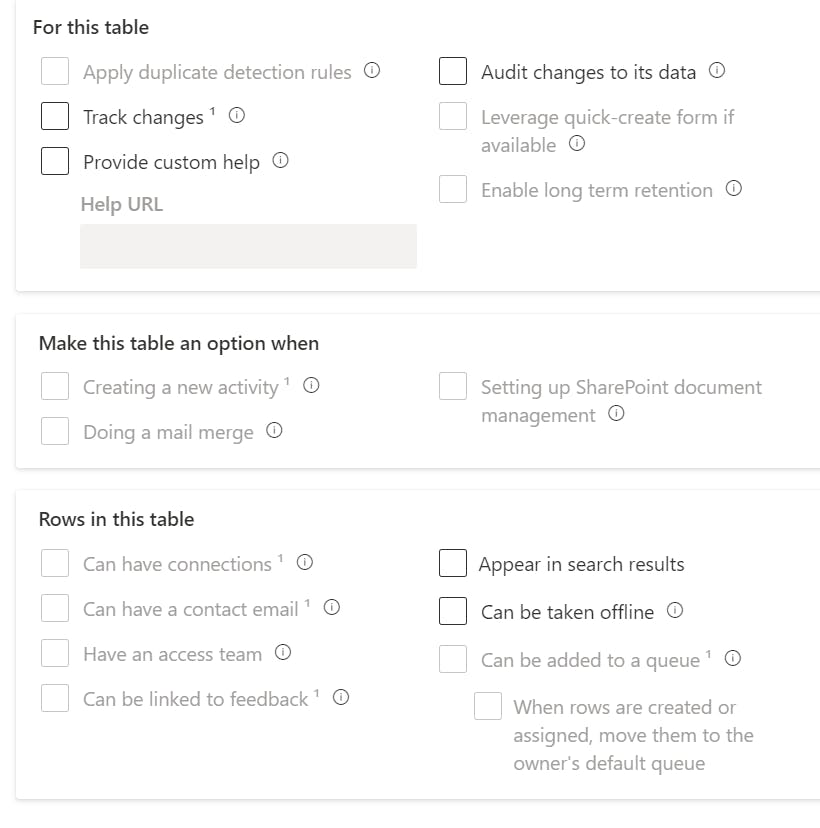
At the moment, some of the standard Dataverse table features are not supported for the elastic tables:
Once created, we can find that there are two extra new columns created automatically for us in the elastic table which are Partition Id and Time to live.

For individuals without background knowledge of Azure Cosmos DB, you might find it challenging to understand how it works. Let's delve into further detail and I will try my best to provide a clear explanation.
Horizontal scaling with Partitioning
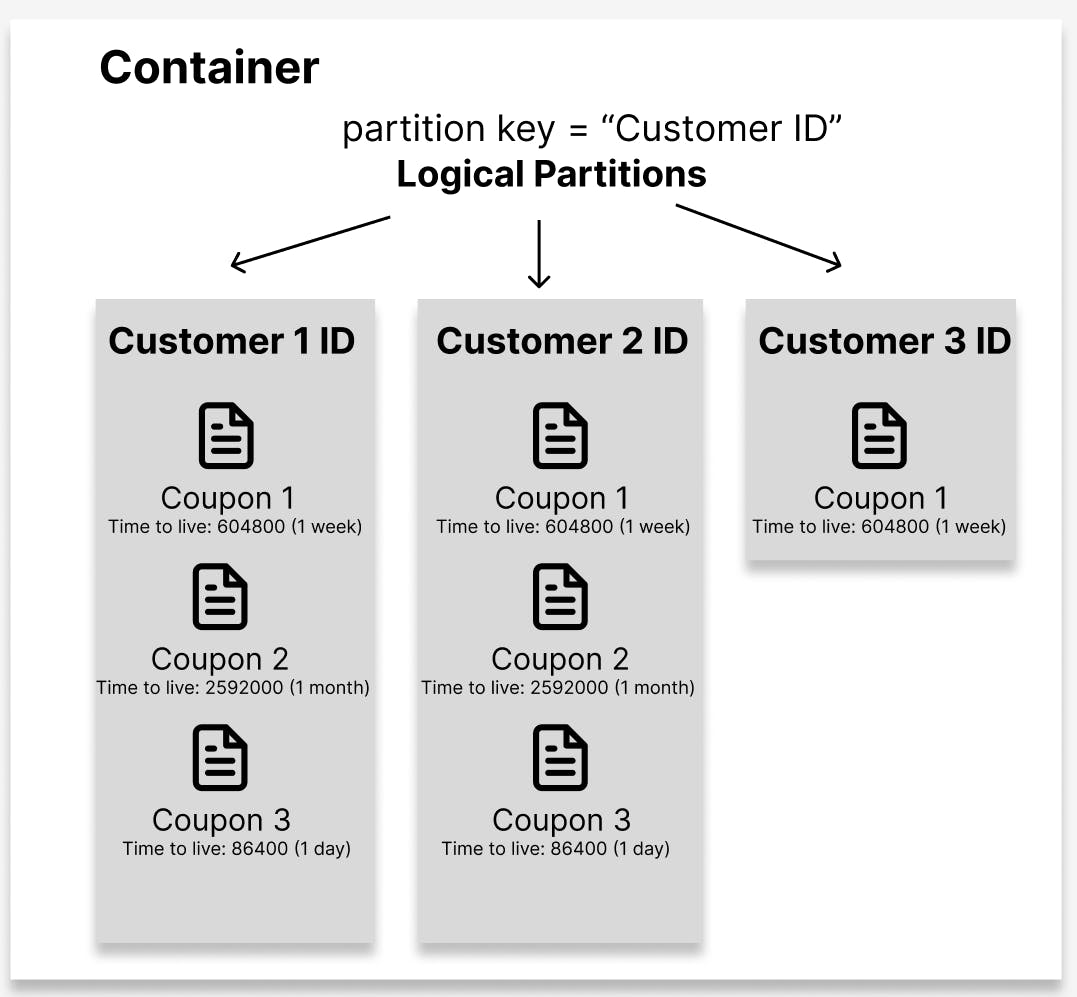
The Azure Cosmos DB stores data in containers. Imagine a container as a collection of items. To organize these items efficiently, the container divides them into smaller groups called logical partitions. Each logical partition contains items that share a common value known as a partition key.
Let's say you have a container storing customer data, and the partition key is the customer's country. The container will group all items belonging to customers from the same country into a logical partition. For example, all customers from Australia would be in one logical partition, while customers from China would be in another logical partition.
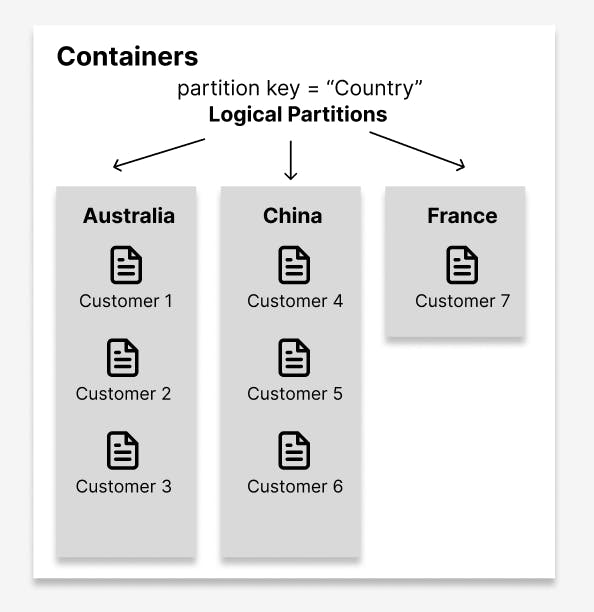
This partitioning approach allows Azure Cosmos DB to distribute the data across multiple physical servers, ensuring that the database can handle a large number of items and provide fast access. By dividing the data into logical partitions based on the partition key, Azure Cosmos DB can scale each partition independently to meet the performance requirements of your application. As this blog post is focusing on Dataverse, I won't go into detail on this topic. Click here for more information on how the backend storage logic works in Azure Cosmos DB.
Now that we understand the basics, Let's come back to Dataverse.
When we create an Elastic table, Dataverse is mapping the table to an Azure Cosmos DB container. The Partition Id value we've defined for each row will be used as the Partition Key values which will be used to group the data stored in the elastic table. Certainly, some optimizations are happening behind the scenes but until now, there is no detailed description of this yet from the official document.
One thing you might notice is that currently, Partition Id has to be set on row creation. We can't update the Partition Id to another value once a row is created. If Partition Id is not specified for a row, Dataverse uses the primary key value as the default Partition Id value.
To get the optimum performance available with elastic tables, choosing the right Partition Id value will be the key. I will cover this topic in another blog post.
Expire data with Time to live
The Time to live column is an integer/whole number type column that defines the time in seconds after which the row will be deleted from the table. If no value is set, the row will not be deleted automatically. You can change Time to live value whenever you want before the row is expired. When you updated the value, the timer will restart.
Let's say you are designing a solution that requires showing all the available coupons for a specific customer. In this scenario, Customer Id will be the best suit to set as Partition Id because coupons will be evenly distributed to each customer and the most frequent query on coupons would be to return all coupons for a specific customer. We can add Time to live column value during coupon creation to implement expiry logic that is handled by the backend automatically.
Using Elastic Table
When using Elastic Table in a Canvas app, we can automatically or manually populate both Partition Id and Time to live to optimize the usage of Elastic table unless you want to use the default primary key as the Partition Id or data in the table will never expire. Partition Id should be read only when the form is in Edit mode to prevent users from updating Partition Id.
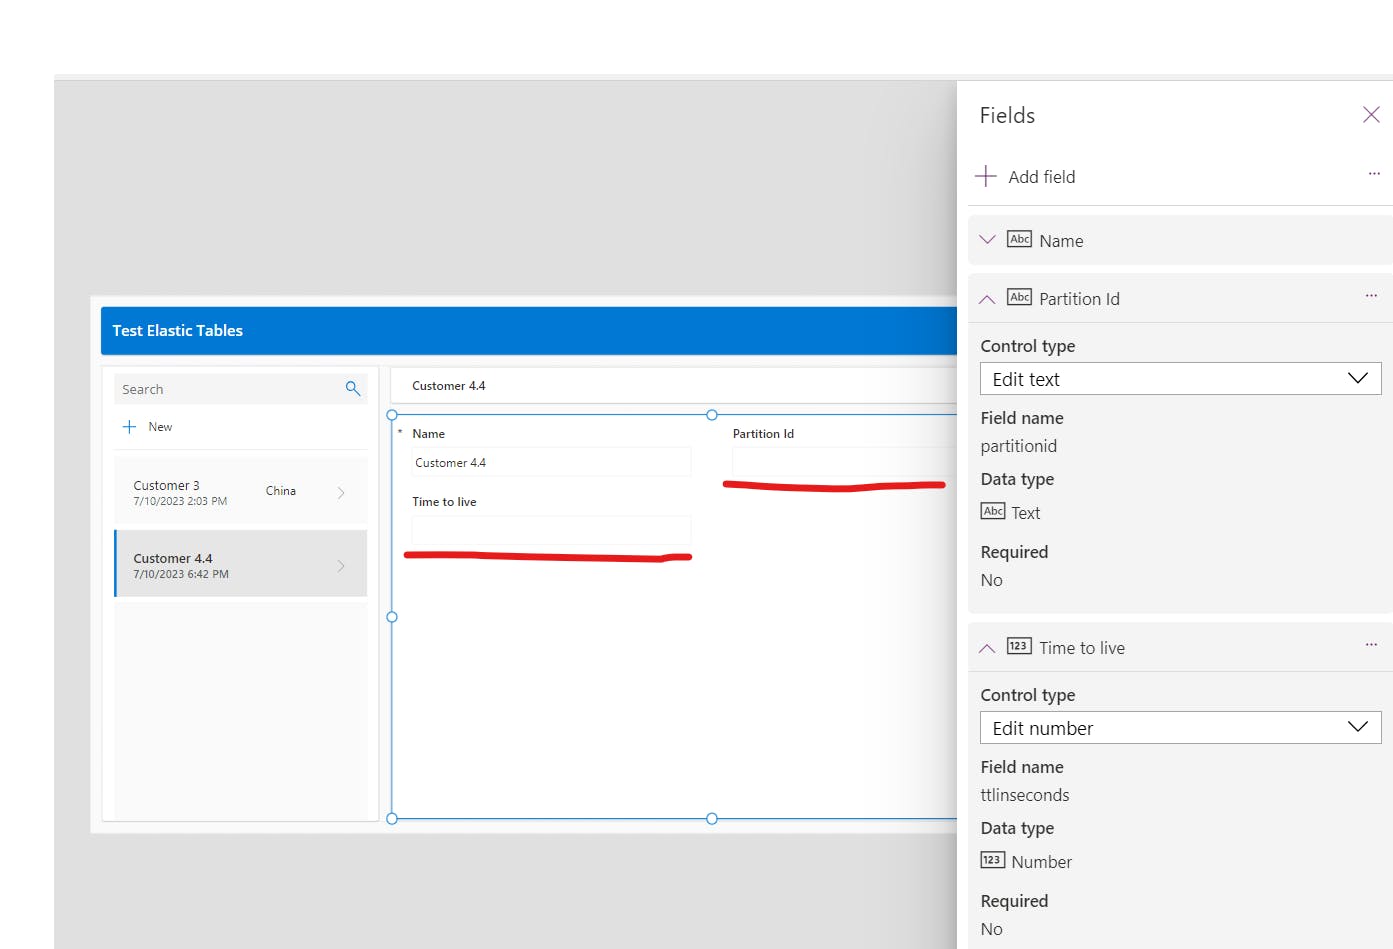
Using Patch function to Create/Update a record in an elastic table will be similar to the Standard table:

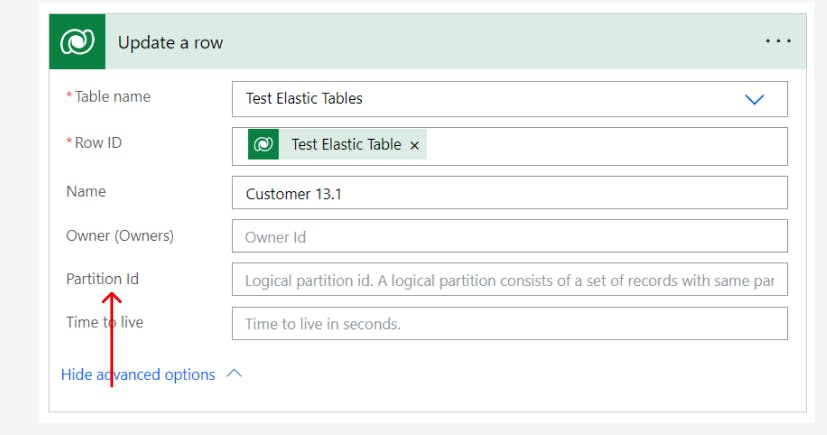
The only catch is that you have to pass the Partition Id when updating an existing item. Otherwise, you will end up creating a new record with empty Partition Id

The same behaviour happens in the Power Automate cloud flow. You have to provide Partition Id value to update a row properly.
Dataverse Capacity Usage?
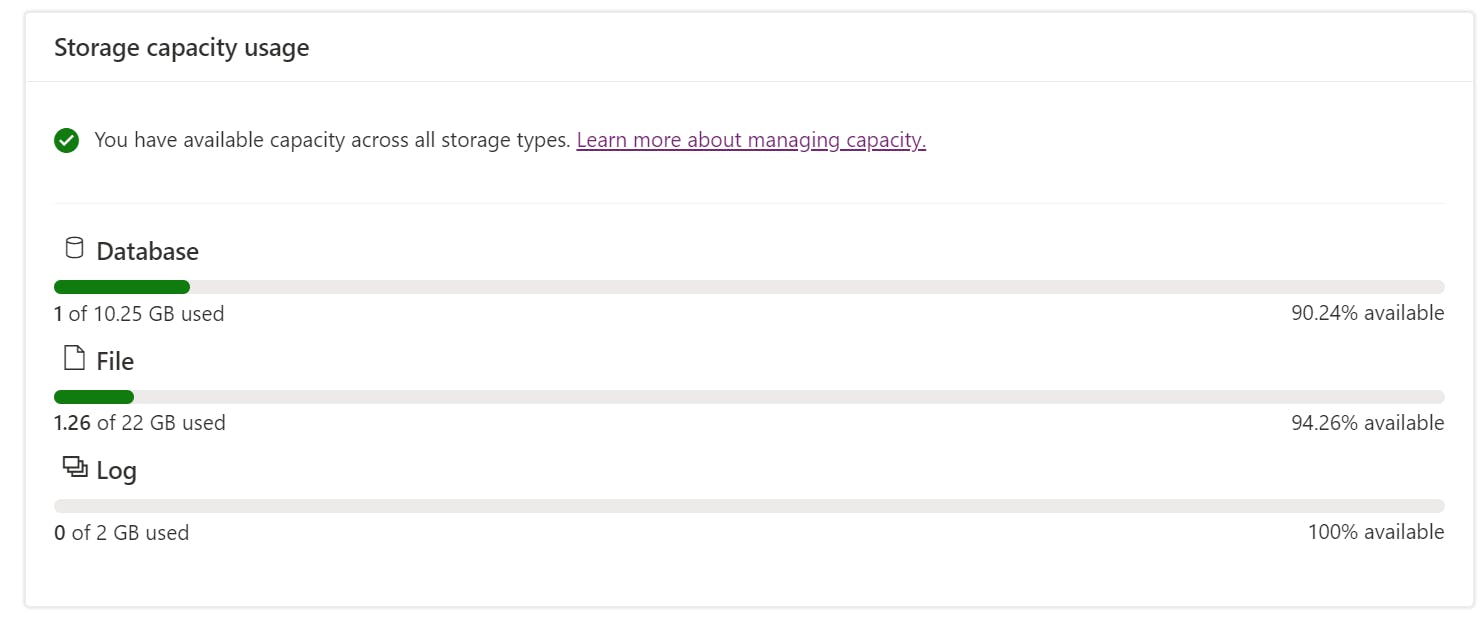
At the moment, elastic tables are included with your Dataverse database capacity use which is the same as the standard tables. Since the elastic table is designed to handle large amounts of data, we would expect that the solution utilizing this type of table might consume a lot of Dataverse capacity. I reckon that It will make more sense if Microsoft can separate the capacity usage between the standard table and elastic table by introducing an extra category of storage capacity or another type of capacity add-on to facilitate the usage(bring down the price😉😉😉) of the elastic table.
Summary
In this blog post, we explore the elastic table feature in Dataverse and delve into its underlying storage technology. Would be interesting to see how the elastic table can improve data model on existing solutions and explore various use cases that align perfectly with its functionality. Once the feature is generally available, I will provide further insights and updates in a subsequent blog post. Please leave a comment below if you have any further questions. As always, happy sharing 🤝🤝🤝🤝
