

I've recently had a great time delving into Real-Time Customer Journey. Real-Time Journey is one of the key features in the Dynamics 365 customer insight (Marketing) module that enables business users to create custom logic to engage with customers. In this blog post, I am going to show you how we can trigger Journey from the Dataverse plugin.
This blog assumes that you possess a foundational knowledge of Dataverse Plug-ins. If you've never created one before, you can find more details here.
Real-Time Customer Journey
Real-Time Customer Journey is a journey orchestration tool that helps businesses automate and optimize customer engagement to enhance customer satisfaction and achieve their business goals.
There are two types of Journey, Trigger-based and Segment-based. The difference is that segment-based journeys will interact with predefined audiences. This is quite useful when the business wants to interact with a group of predefined audiences. Trigger-based Journey will react to user actions. For example, it can be triggered when an opportunity is created or through custom logic implemented in pro-code or low-code services like Power Automate cloud flow.
For code integration purposes, we will be using a trigger-based journey. Click here for more information on Journey.
Create a Trigger
To call a Trigger-based journey, we have to create a Trigger first by navigating to the customer insights and selecting Triggers from the side navigation bar.
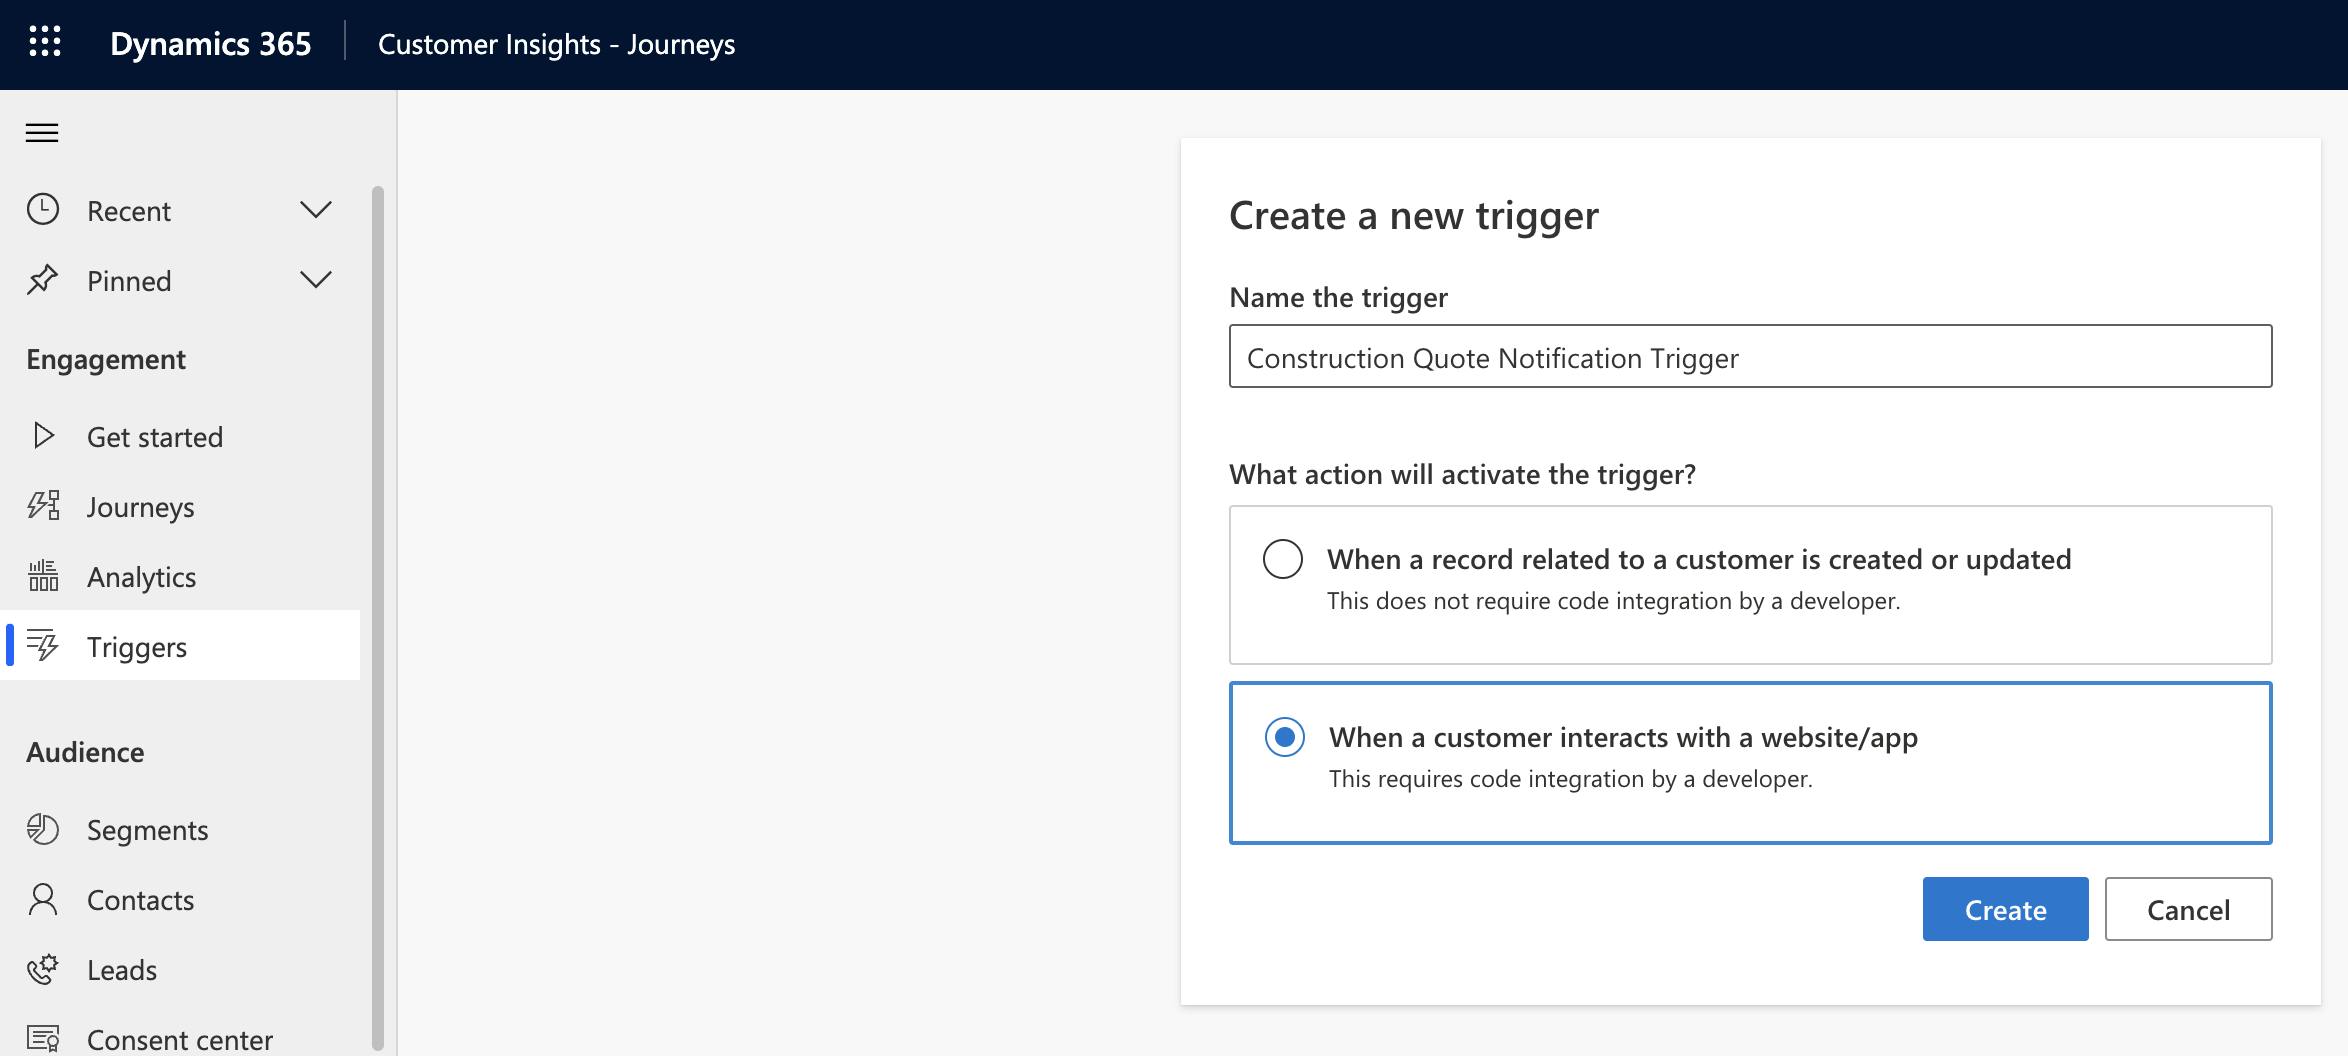
Behind the scenes, a trigger is a Dataverse Custom API (unbound) which can be exposed to components and external systems that are hosted inside or outside the Power Platform.
We can define input attributes for a trigger which can then be exposed to the downstream Journeys (yes, that's right!! A trigger can "trigger" multiple Journeys).
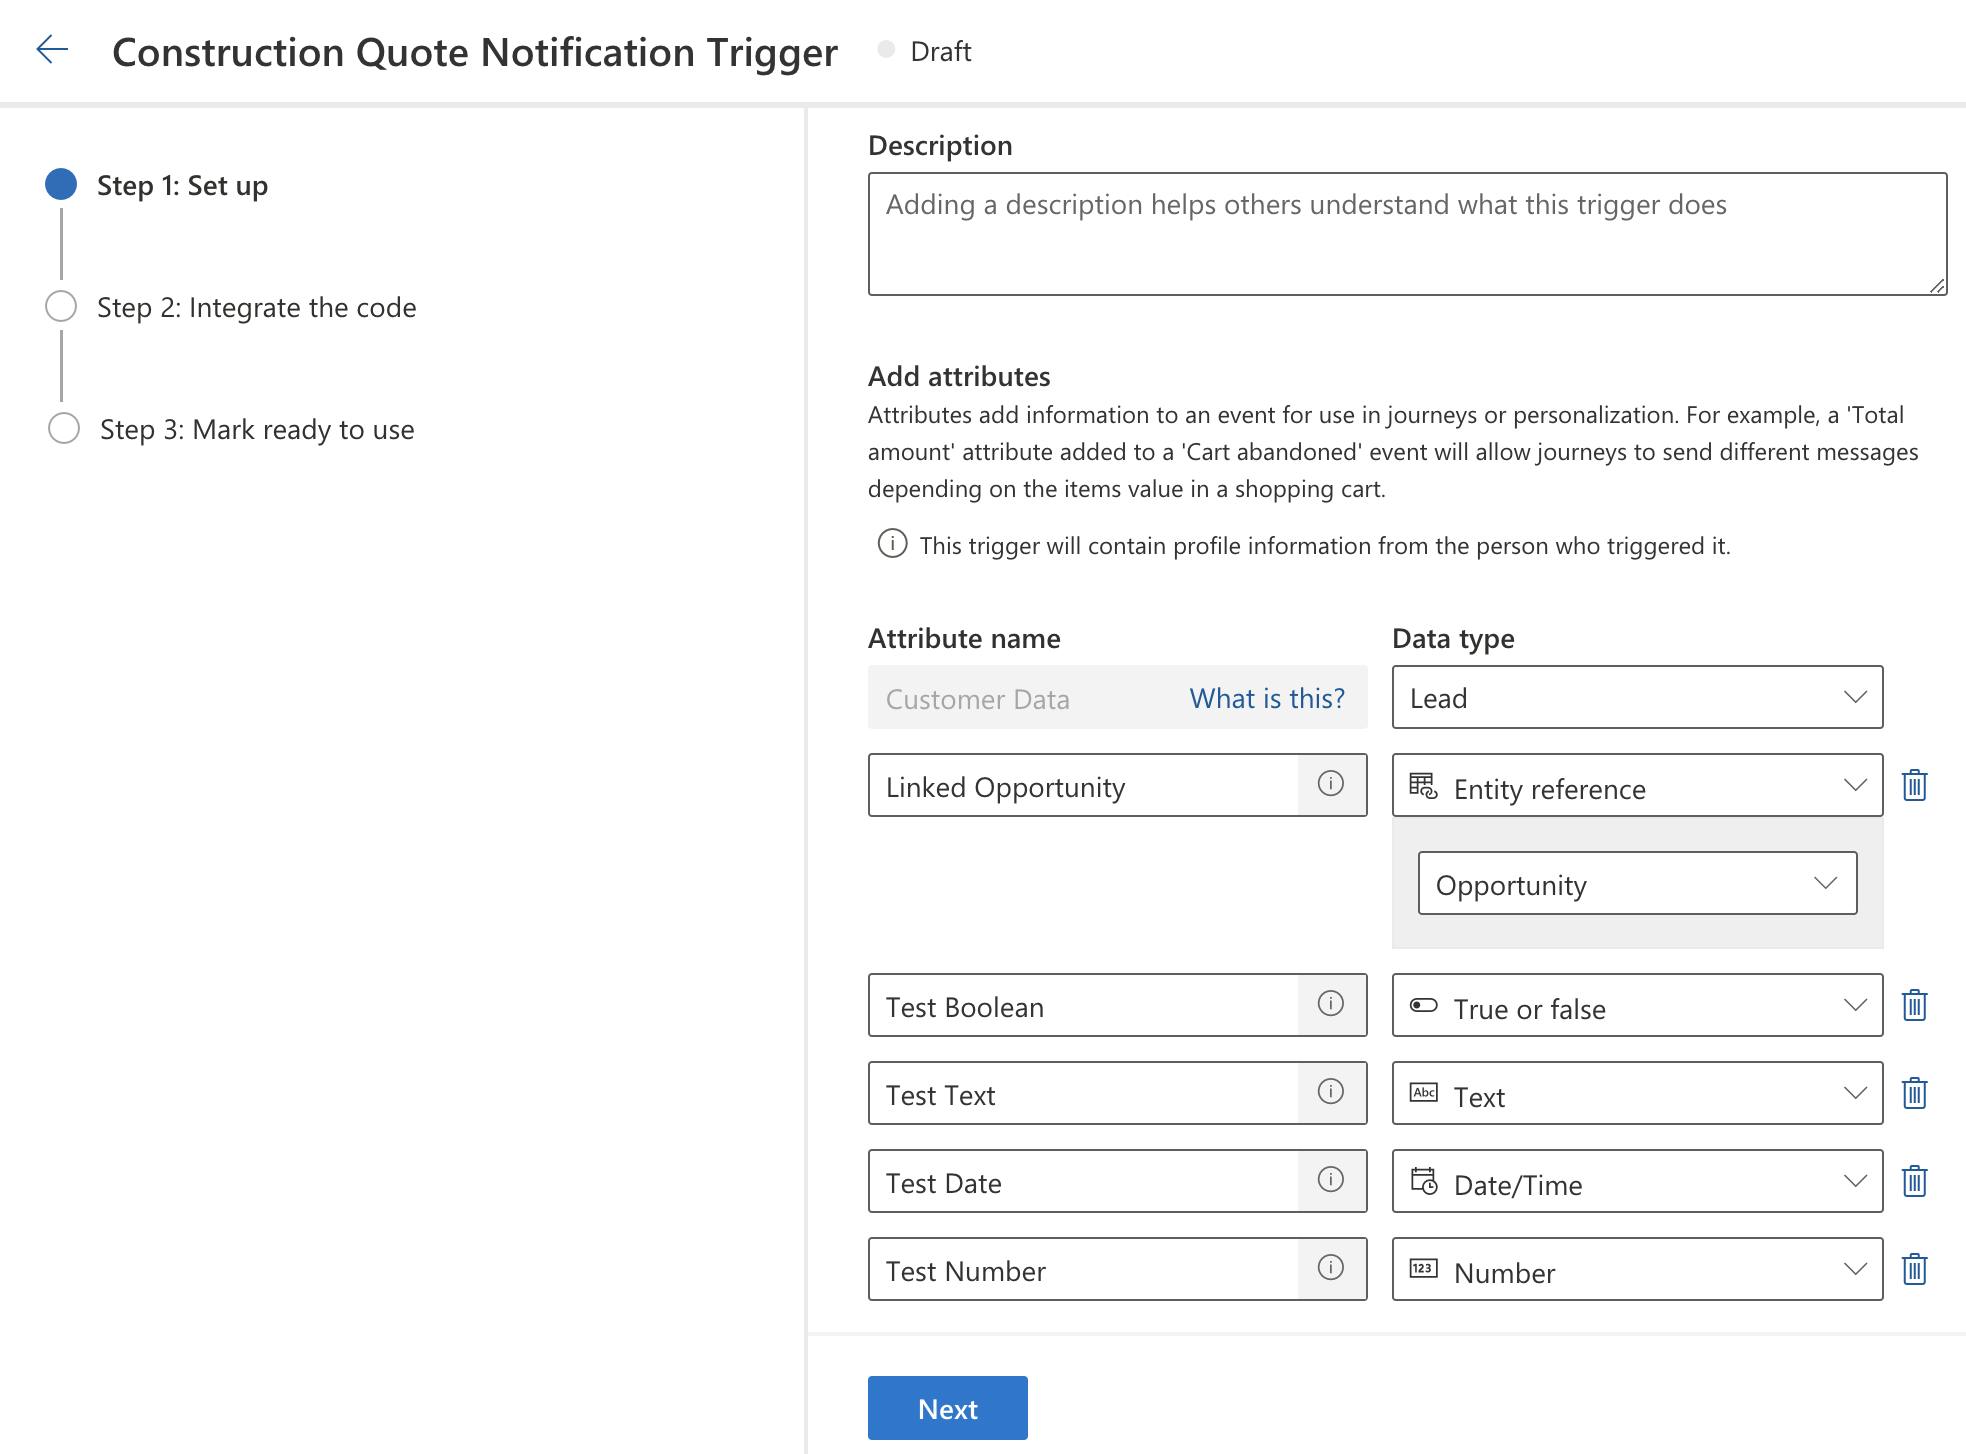
There is a mandatory attribute called Customer Data which can be linked to either Lead or Contact entity. It's an entity reference type attribute that will be used for licensing purposes. As customer insight licenses are sold in packs of unified people, assigning Lead to the Customer Data attribute means, for all the Journeys that are triggered by this trigger, we are going to utilize Lead entity records to uniquely identify a customer when occupying available contact quota. Click here for the detail description of customer insight quota consumption.
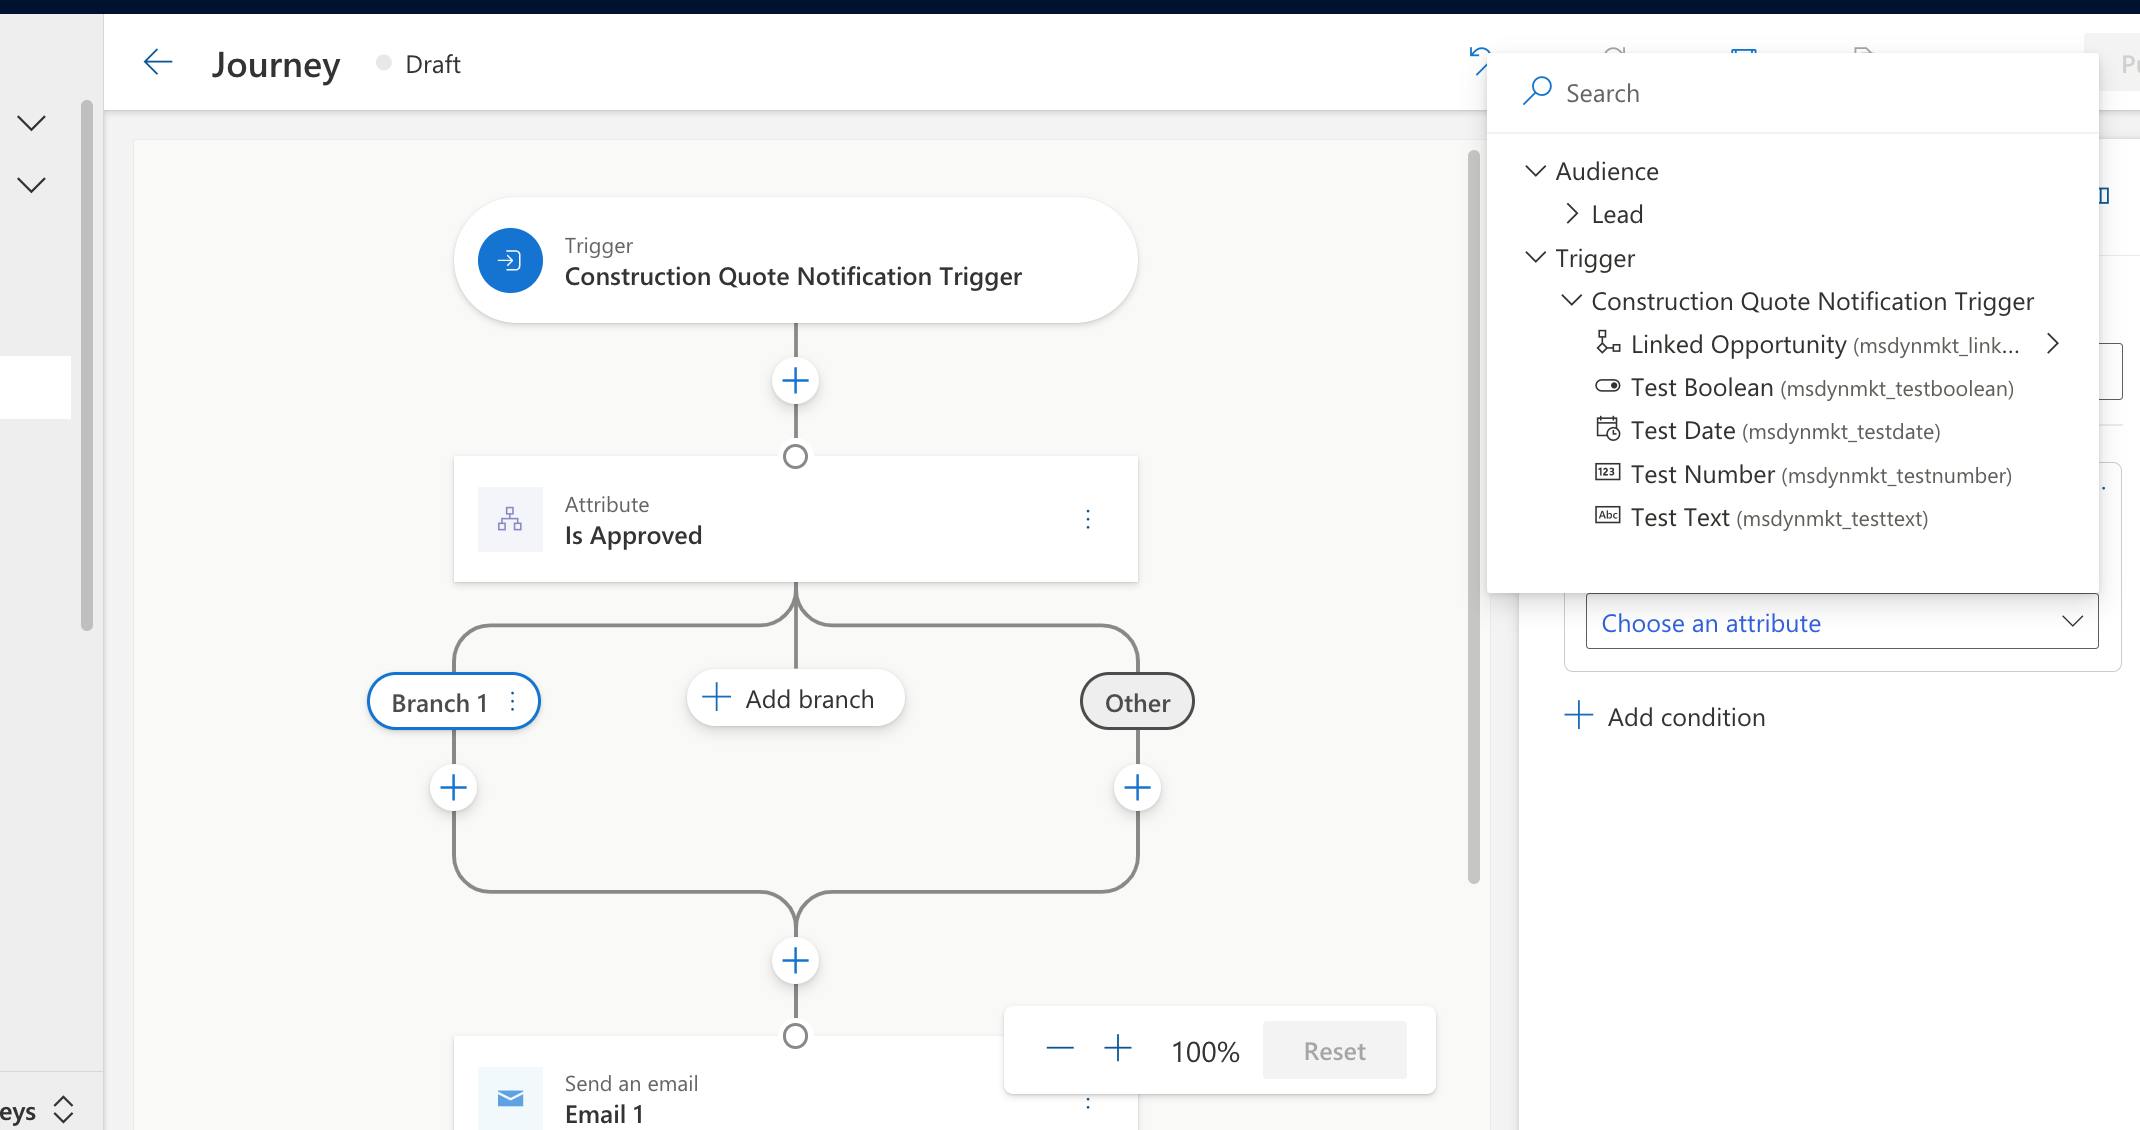
Apart from Boolean, Text, Date and Number type attributes, we can add additional entity reference attributes to expose related entity data in the same Journey.
In the next step, the wizard will create code snippets based on the attributes we have provided from the first step.
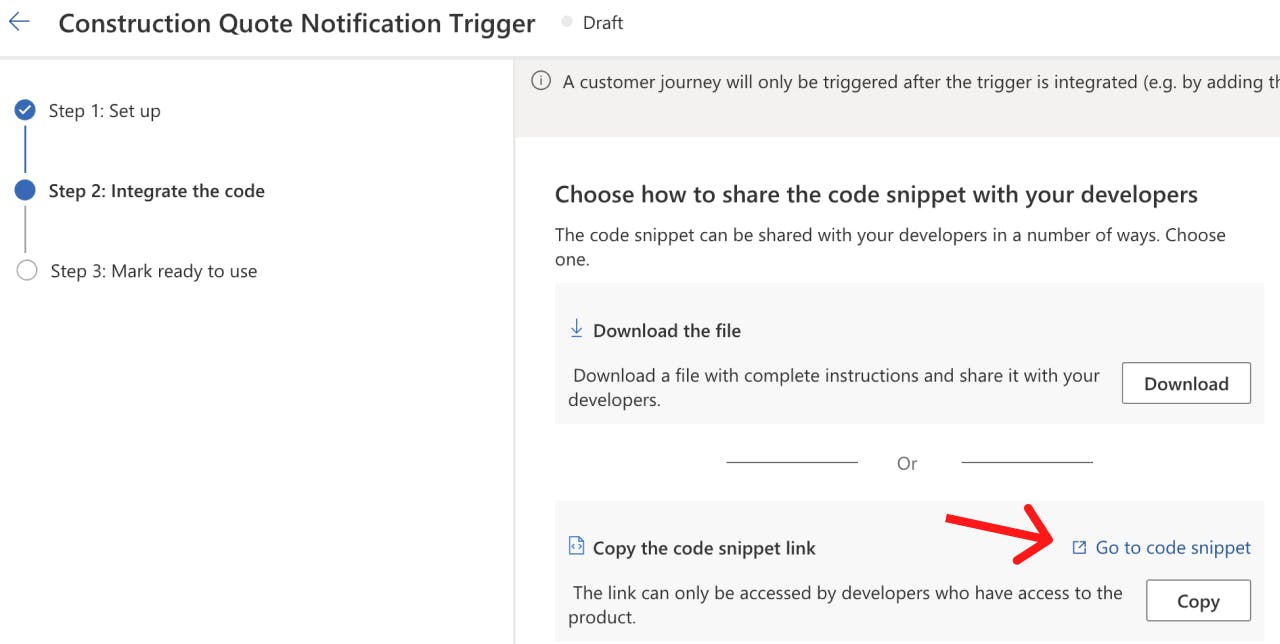
Navigate to the next page by clicking on Go to code snippet link where you can find sample codes for different languages. Next, let's call the trigger using the code snippet. Firstly, select C# on the snippet page since we will trigger it from a plug-in. Then download the SDK using the link below and copy all the code snippets. Pay special attention to the analytics GUID and the trigger internal name.
The analytics GUID is unique for each Power Platform environment which means all triggers from one environment will share the same analytics GUID.
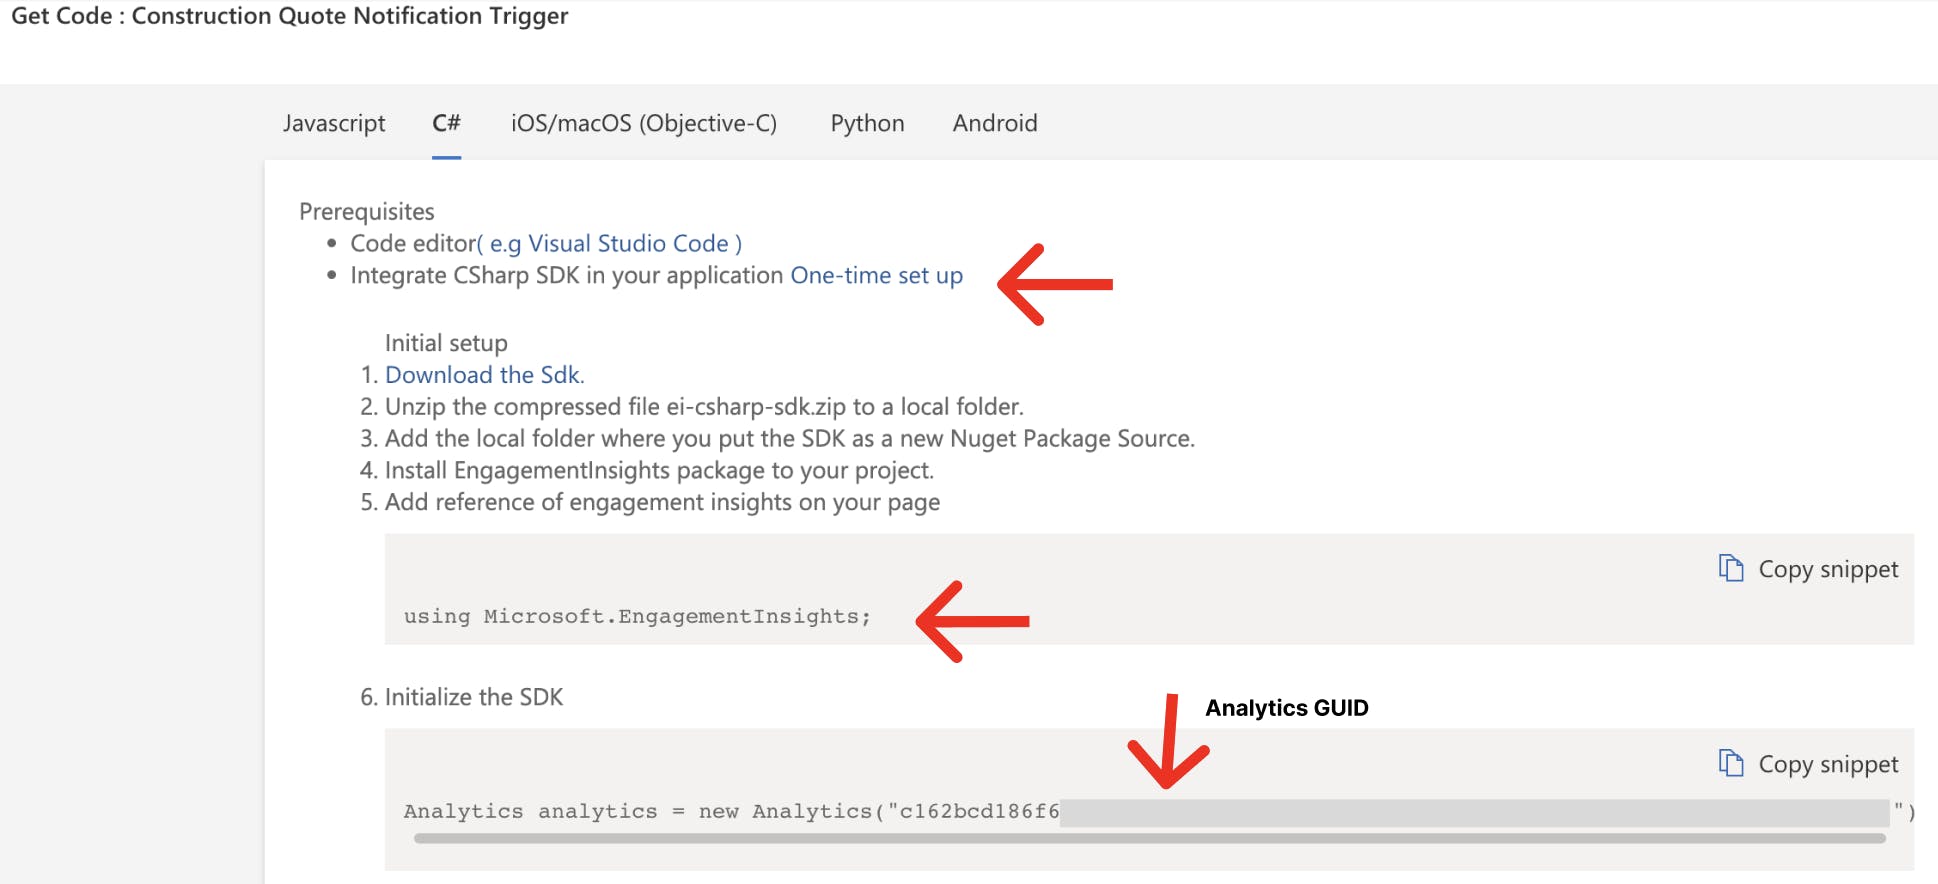
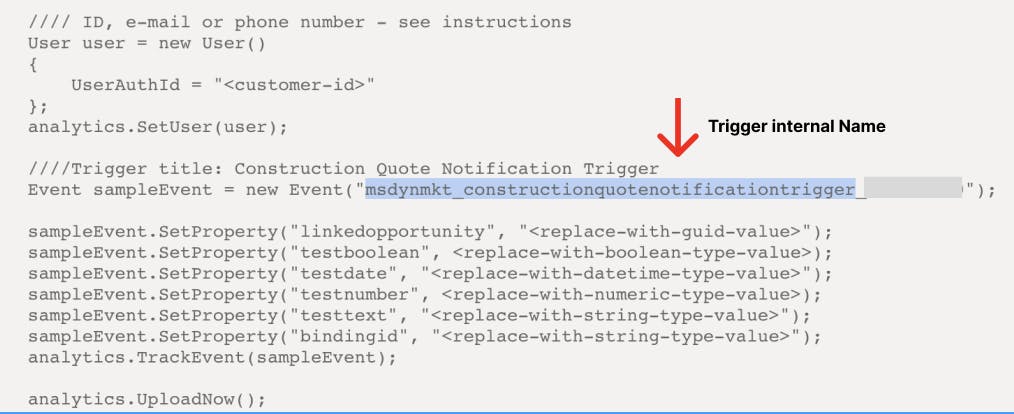
The trigger internal name is autogenerated based on the trigger display name with a 9-digit suffix. For ALM purposes, we might want to save them in an environment variable that can be referenced in the plugin code.
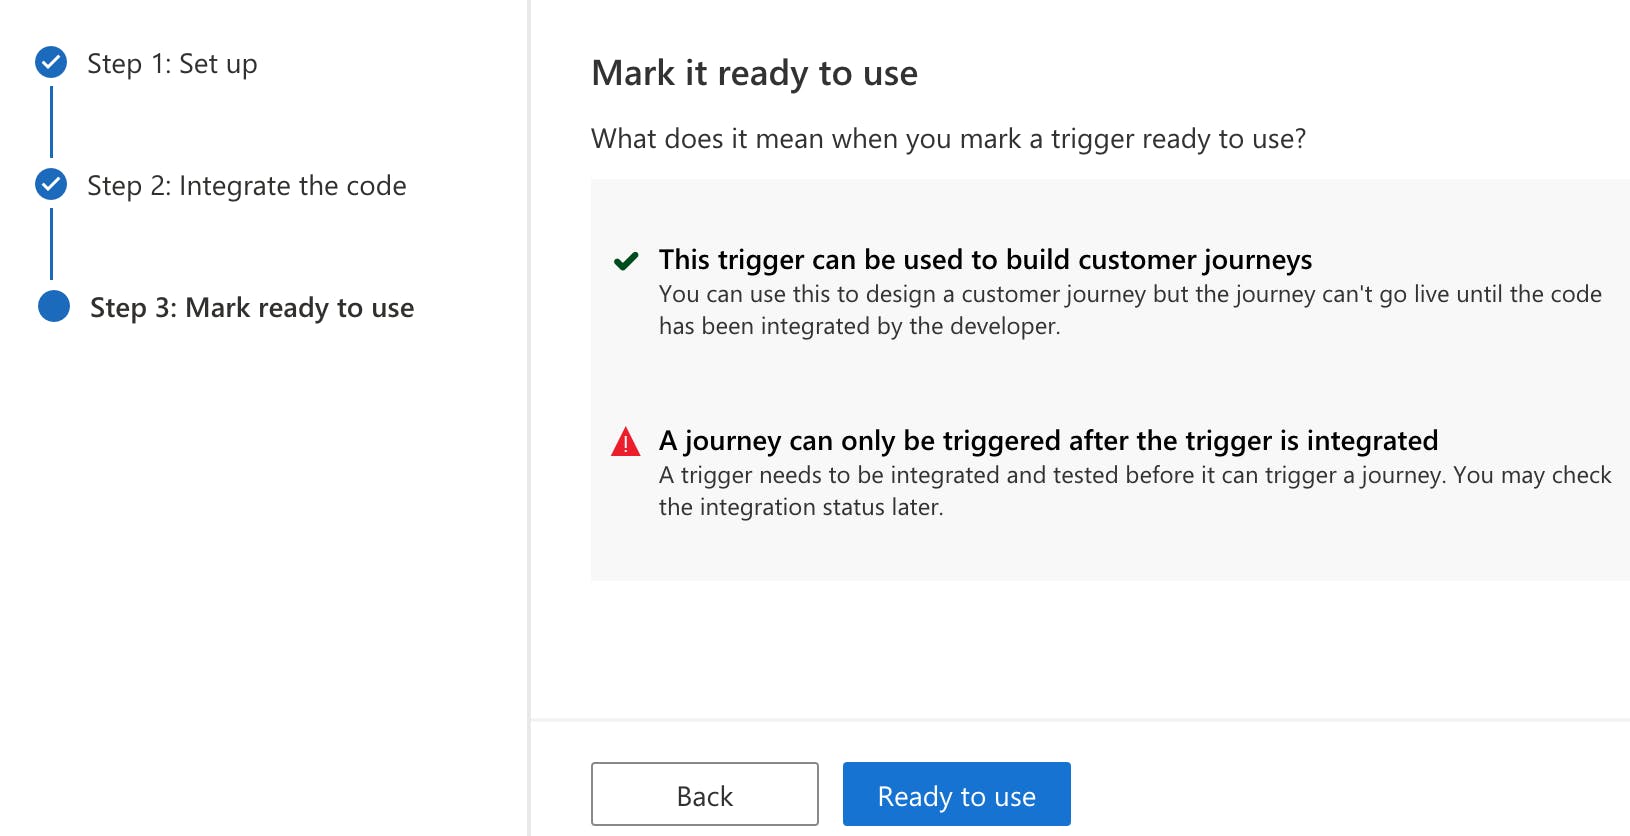
Once done, Click on Ready to use to publish the trigger:
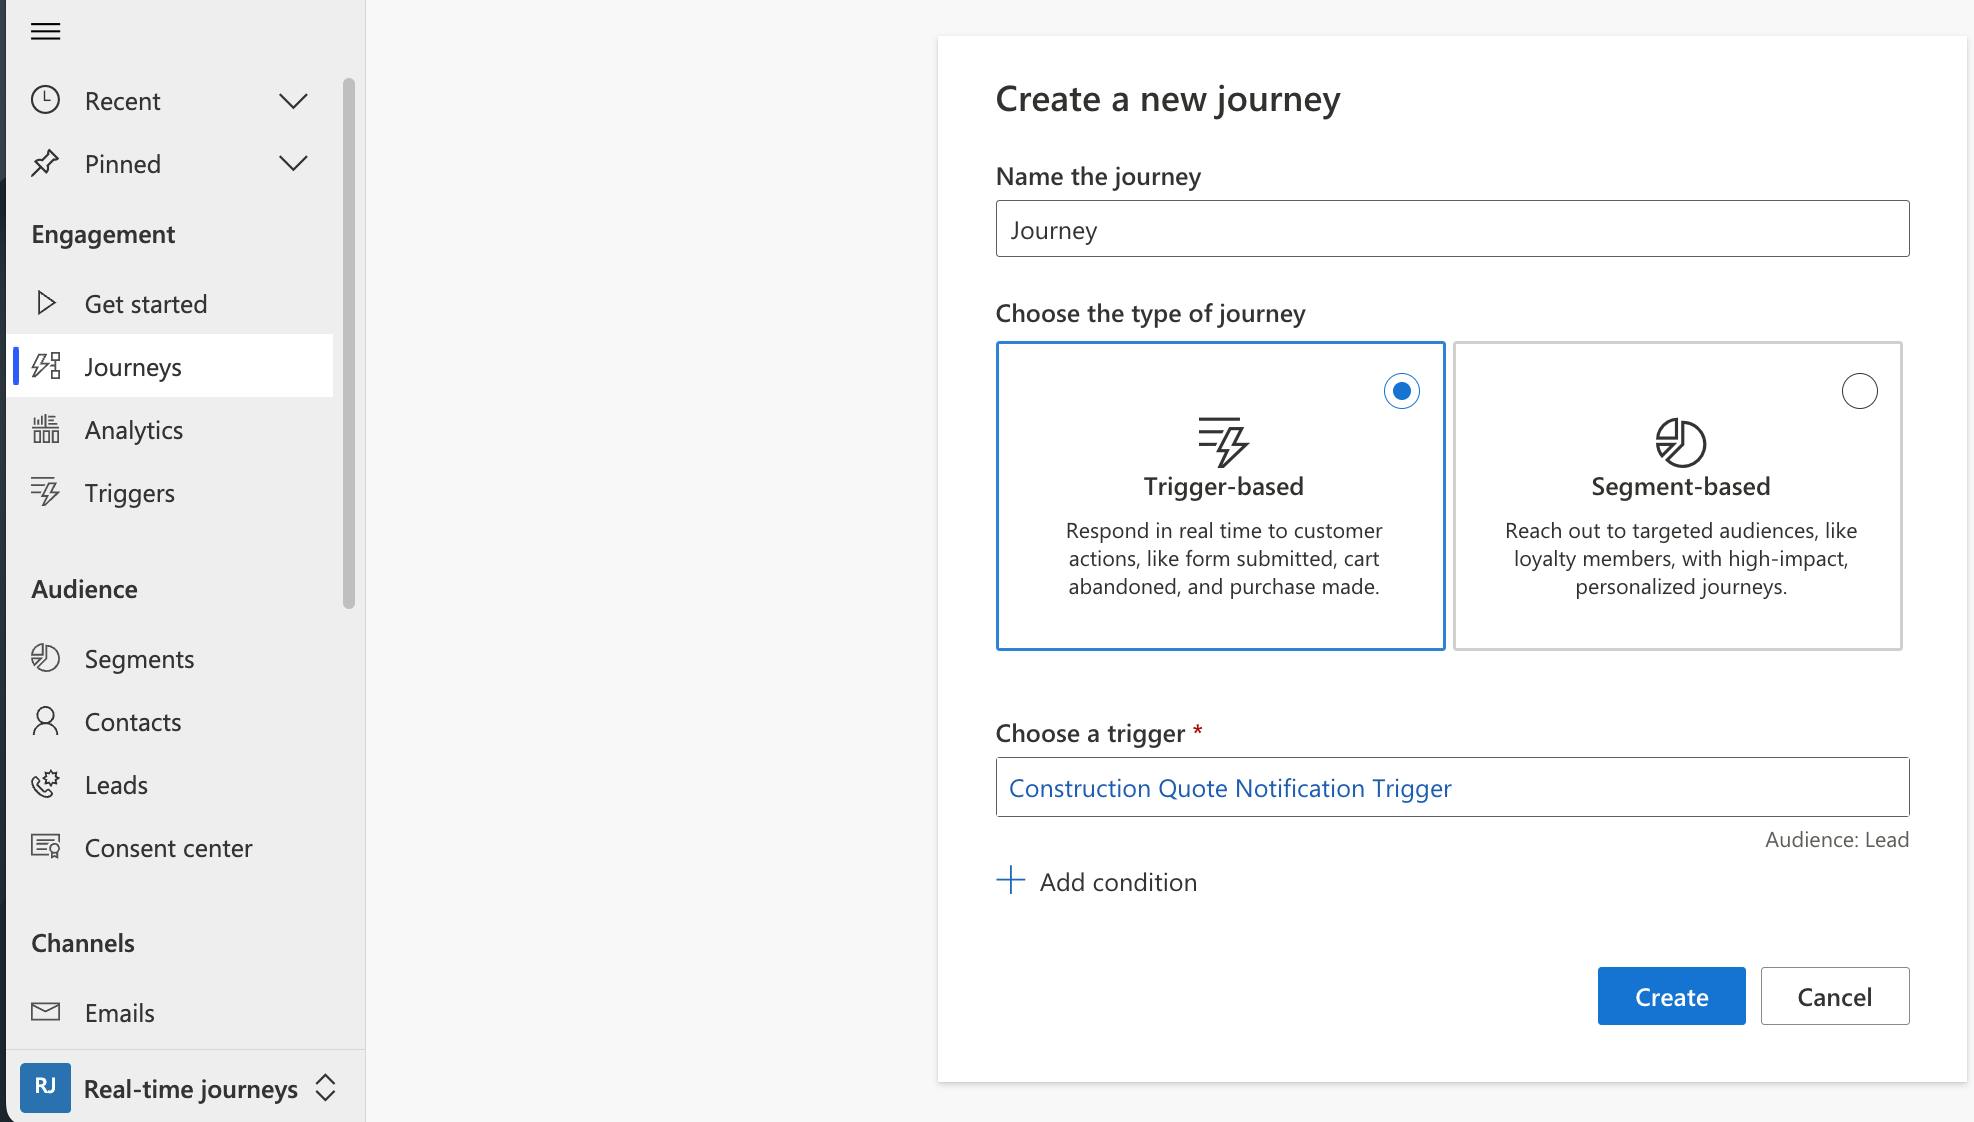
Create a Customer journey if you don't have one. Select Trigger-based and choose the trigger we've just created then click on Create button:
Customize the Journey based on your requirements. You can get reference data from all the property values that are passed from the Trigger. Remember to publish the journey once done.
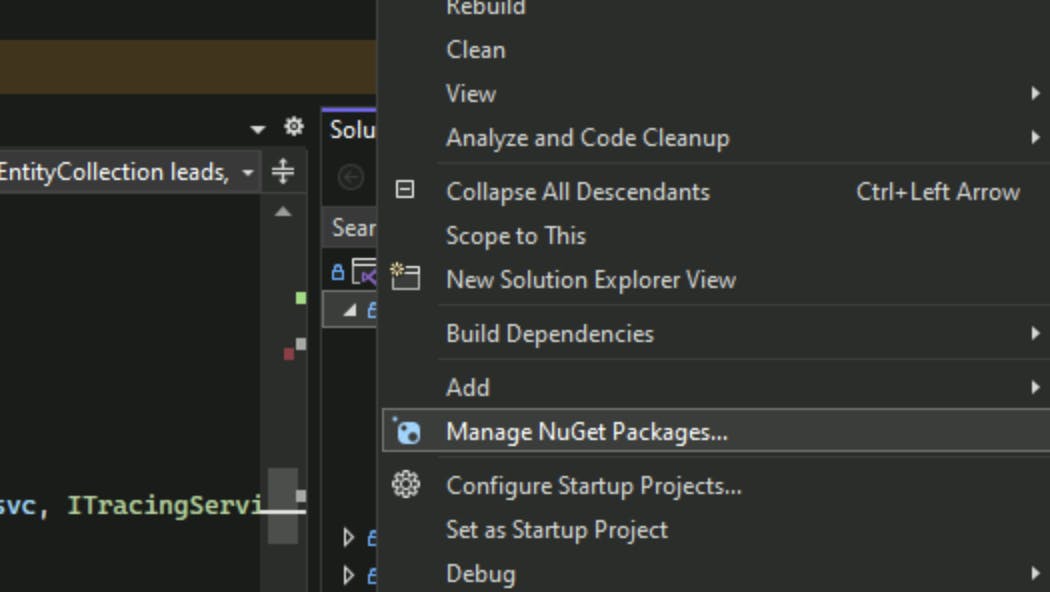
Now let's switch to our Dataverse plug-in project. I've created a plug-in for the opportunity object. To call the trigger, we need to add the SDK we've downloaded above. Right-click on the plugin project and select Manage NuGet Packages.
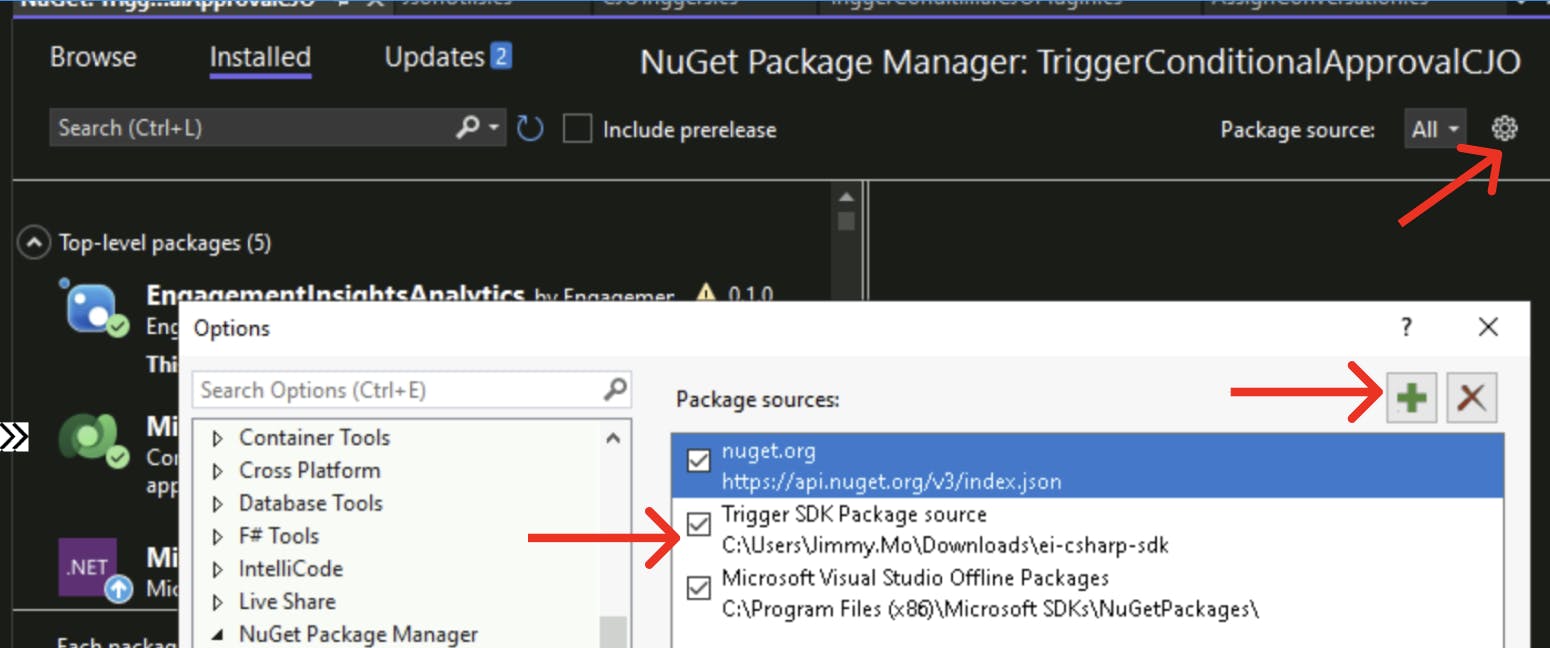
Add the location containing the downloaded SDK to the package source:
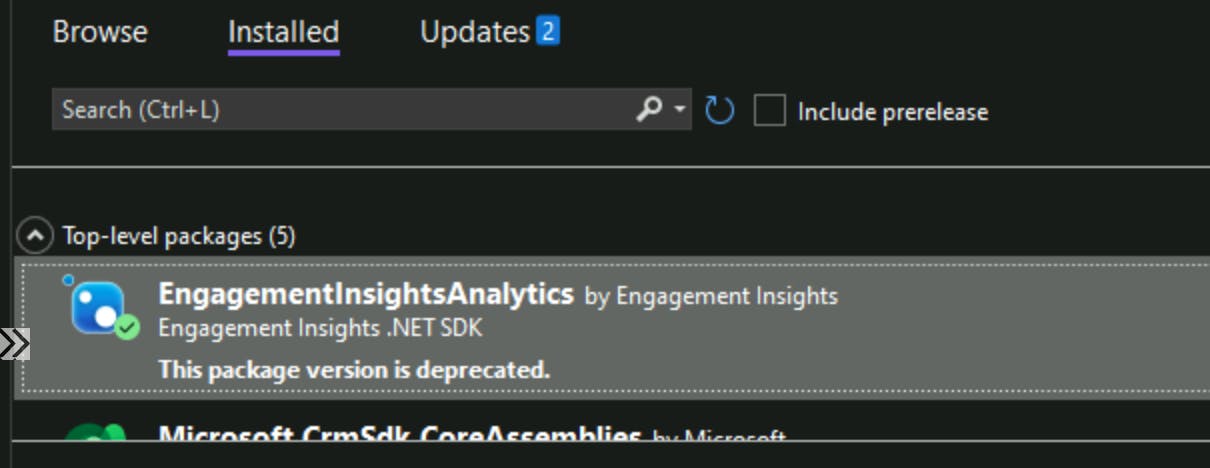
Once added the package source, you should be able to find the new package called EngagementInsightsAnalytics. Select to Install the package for your project.
Below is the code snippet I've used to call the trigger:
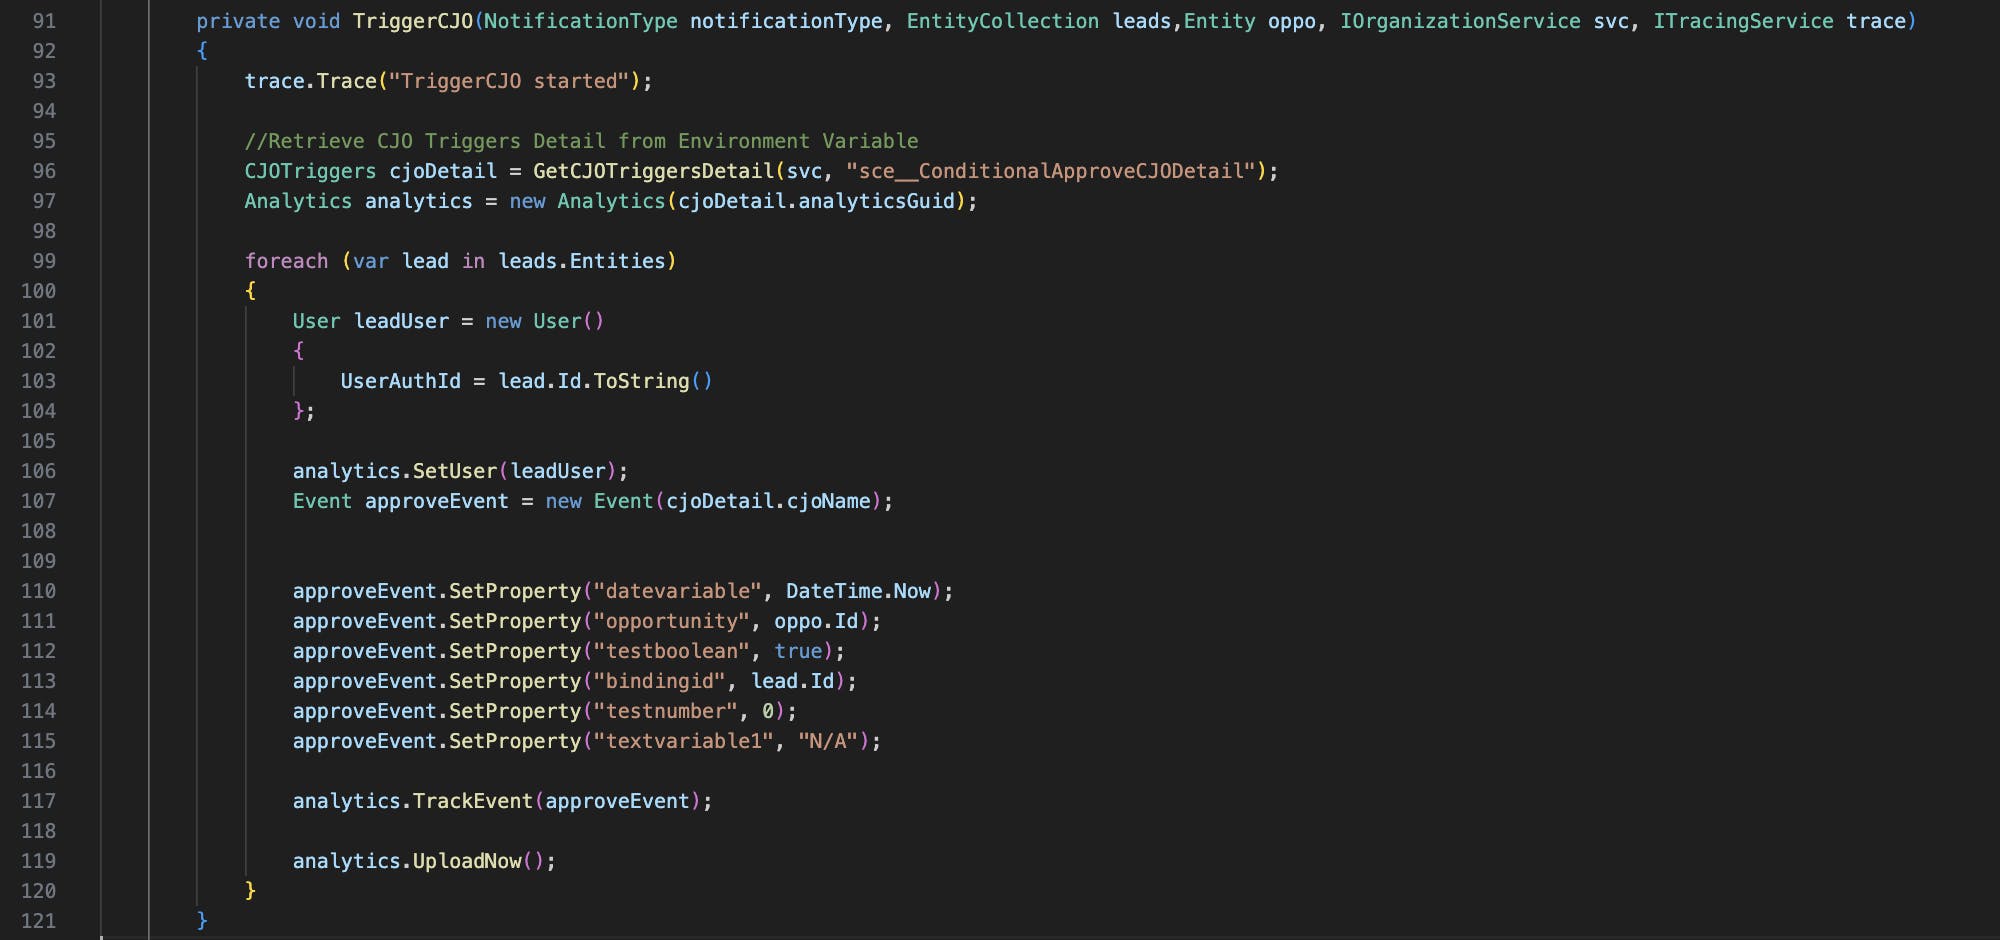
Key points:
Line 96: Retrieving both analytics GUID and trigger internal name from the environment variable.
Line 97: Analytics GUID is used to initiate the SDK.
Line 103: Using the lead record ID to initiate a User object. As I've mentioned above Customer Insights Journey accepts Lead and Contact entity records to count toward the contact quota. The UserAuthId value accepts not only the record GUID, but it's also smart enough to find the Contact record if we pass in an email or phone number. However, if the logic finds multiple records, it will prevent us from triggering the Journey. We should always use the unique identifier to initiate the user object for accuracy.
Line 107: Initiate Event object using Journey internal name.
Line 110-115: To set input value for each property. Each property must be assigned a value that matches its type. For example, if you assign a time string value to a date time type variable, the Journey will fail to trigger.
note: as you can see, the package is deprecated a the time I am writing this blog (3/Oct/2023). Even though it is still working at the moment, I assume a new package will be released very soon. I will also show you how to call the trigger in a more "elegant" way. Keep reading...
Call Trigger - The "Better" Way
As I've mentioned above, by creating a Trigger in Customer Insights, Dataverse automatically generates a Custom API for us. In theory, we should be able to execute a custom API through Xrm.WebAPI or in our case, call it directly like how we call an unbound action in a Plugin. With that in mind, let me show you how I call the trigger using the OrganizationService:
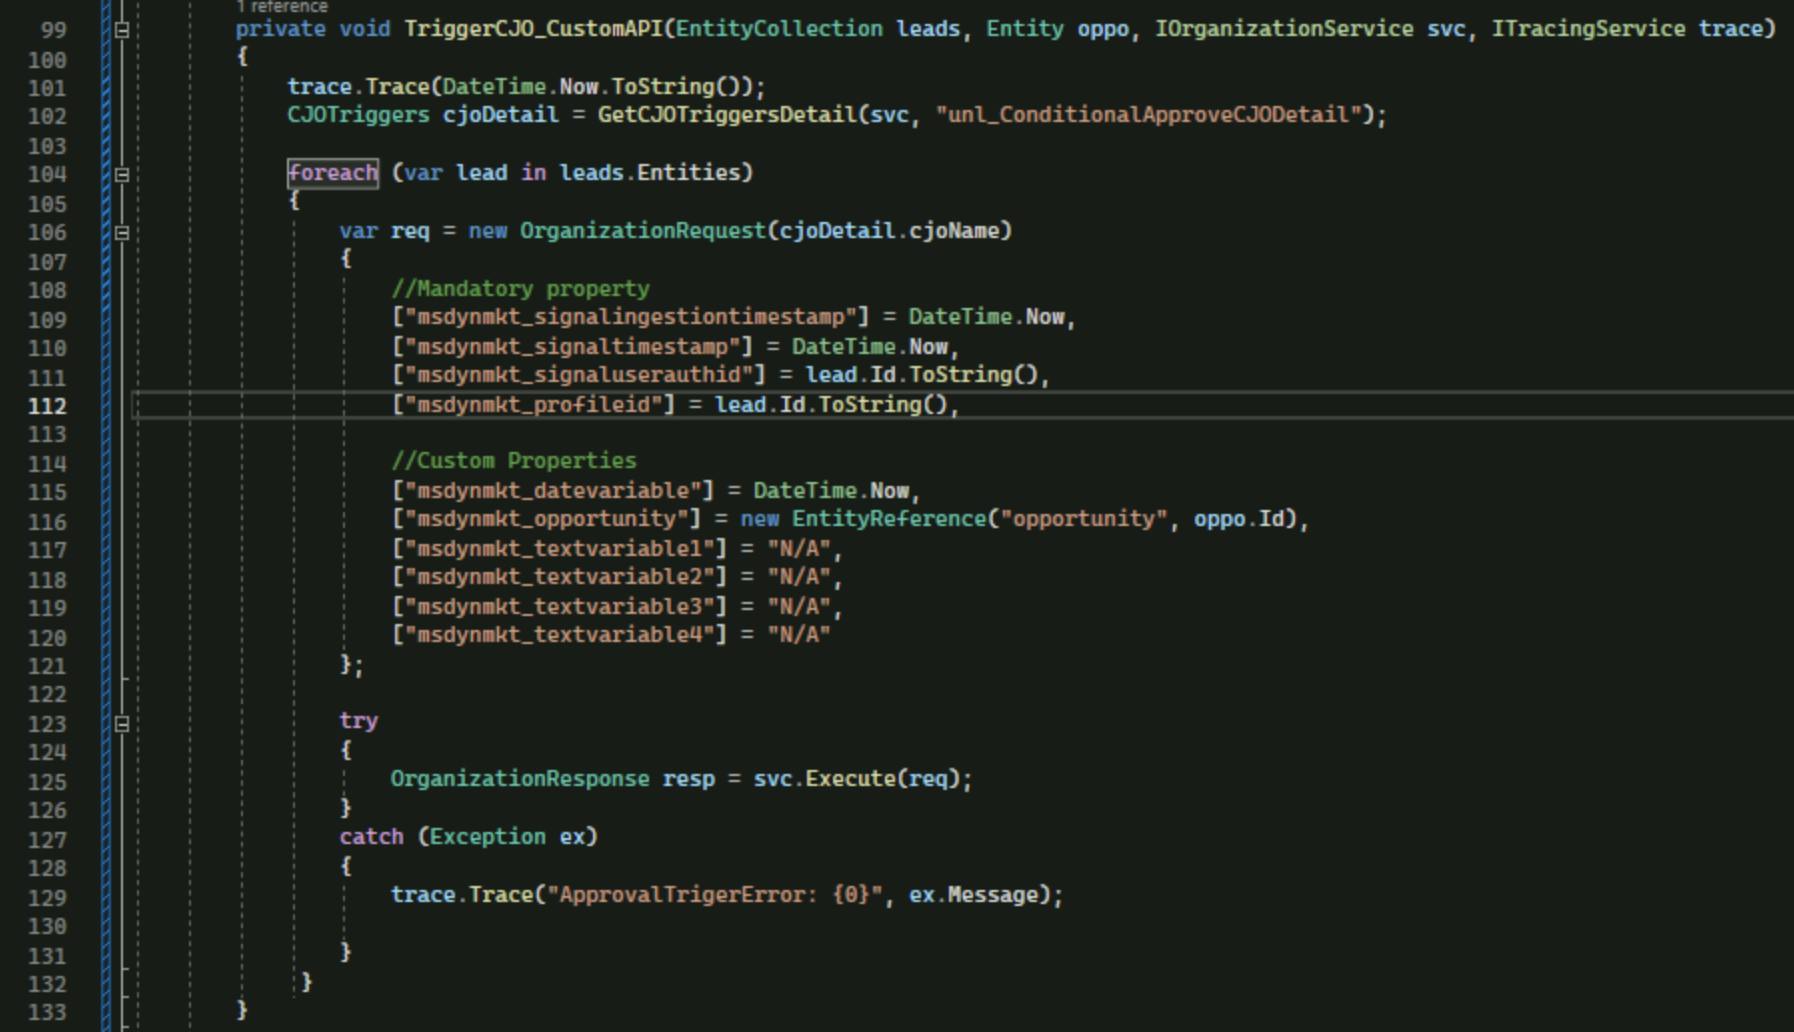
Key points:
Line 109-112: These are generic attributes that will be the same for all Triggers. If not populated, the code will fail at line 125.
Line 115-120: These are custom attributes. Same rules, we have to assign a value that matches the attribute type. Otherwise, the code will fail at line 125.
As you can see, calling triggers as Custom API will avoid using the deprecated SDK. It also means we don't have to register the whole package (including the deprecated SDK) to create a step for the plugin assembly. (Click here for more information on how to register a plugin with dependent Assembly) As a result, this is my preferred option for now.
For the simplified plug-in code, please visit the Github Repo.
Summary
Customer Insight has provided us with various ways to trigger a Journey. With the help of custom code, the business can now implement complex logic before interacting with the customer. Comment below if you want to learn more about how Journey works. I will share more content on how Journey can help simplify and automate customer engagement in my future post.
As always, happy sharing 🤝🤝🤝🤝