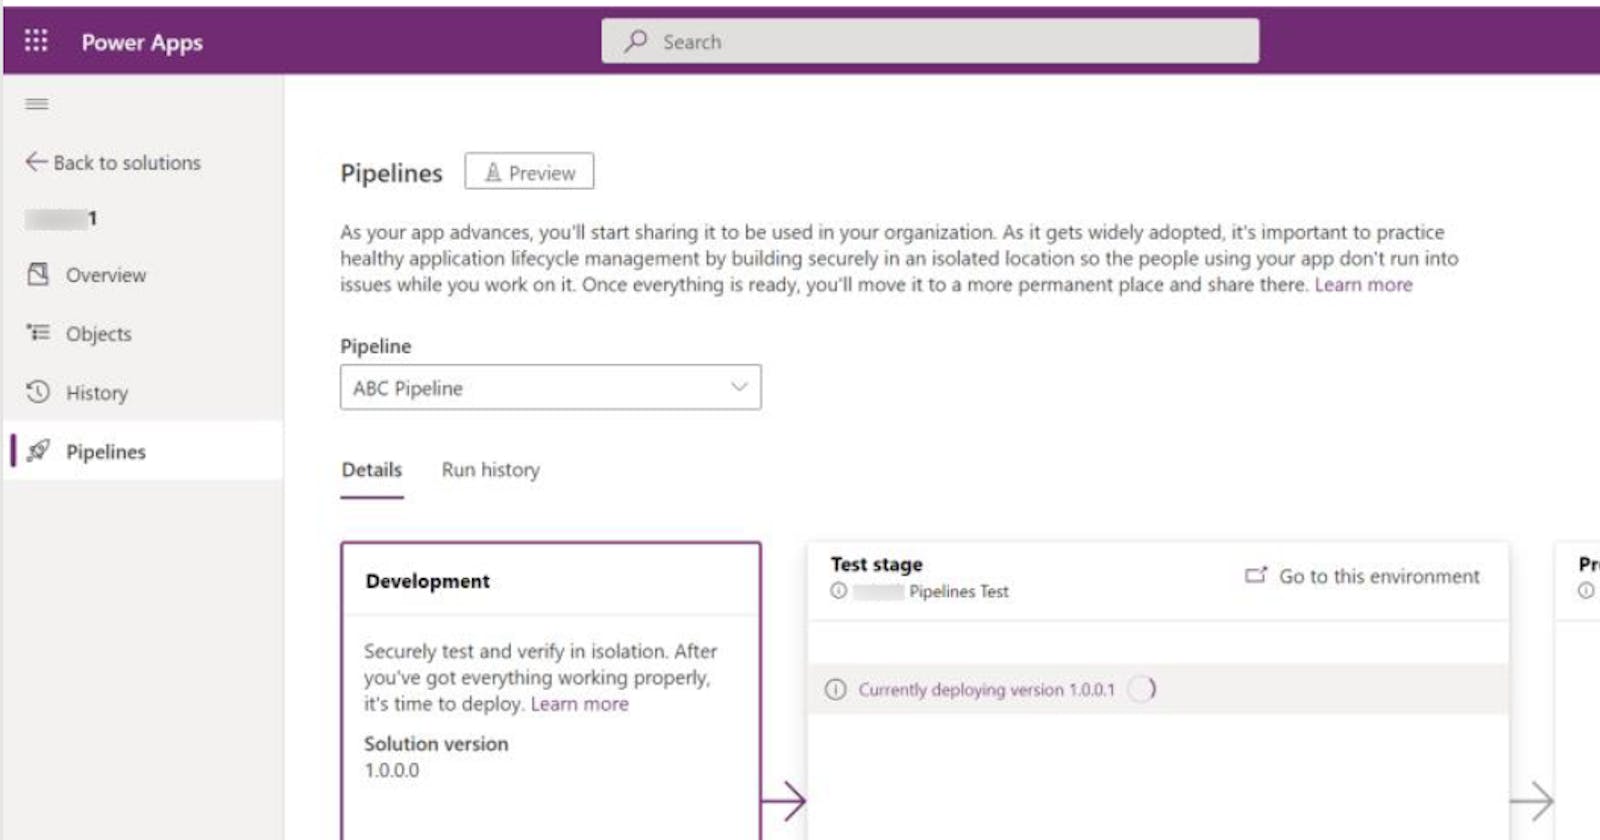
It was last year (2022) around December when Pipelines is first released as a preview feature for Power Platform Managed Environment. Since then, the Microsoft team has added some more features to it and finally, after 4 months (26/04/2023), they've made this feature generally available. What are Pipelines? If you've read my previous post about implementing CI/CD for Power Platform solutions through Github actions, you may find that Pipelines are similar in concept. However, Pipelines target administrators or makers who lack the skillset to code the deployment process or don't have access to the source control repository.
In this post, I will walk you through some of the features of Pipelines in the original version and demonstrate how to set up a solution release process from scratch.
Environment Setup
As suggested by Microsoft, the best way to test out the Pipelines features is to implement a three steps release process which requires four environments to be created.
The Pipeline has defined three environment types:
Host environment - This special-purpose environment acts as the storage and management plane for all pipeline configuration, security, and run history. Within the host environment, we can define multiple pipelines which may define multiple collections of environments that will be used in the solution release.
Development environment - This is where you’ll develop solutions. A pipeline can be run from within any development environment linked to it.
Target environment - The destination environment(s) a pipeline deploys to. For example, integration testing, UAT, production, etc.
In this example, I am going to create four environments as shown below:

Note:
The host environment, in best practice, should be a dedicated environment for hosting Pipelines app.
All environments used in pipelines must have a Microsoft Dataverse database.
All development and target environments used in a pipeline must be enabled as Managed Environments. (Currently, this hasn't been enforced)
All environments should be created in the same region. (Region is defined when you create the environment.)
If an environment has been defined as a Development environment, it can't be defined as a Target environment.
Installation
Before proceeding, make sure you are using an account with at least a Power Platform administrator or Dataverse system administrator role in all the environments.
Behind the scenes, Pipelines is a Dynamics app that can be installed from the Power Platform admin centre:
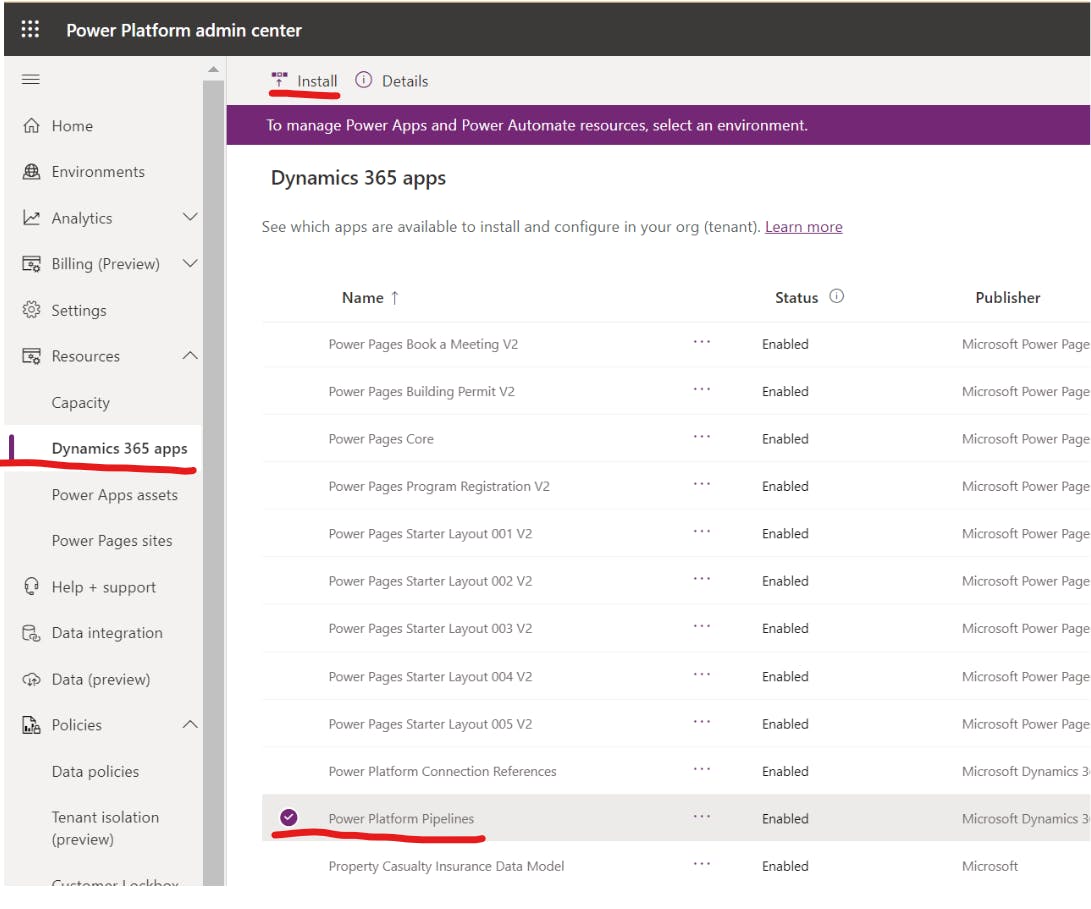
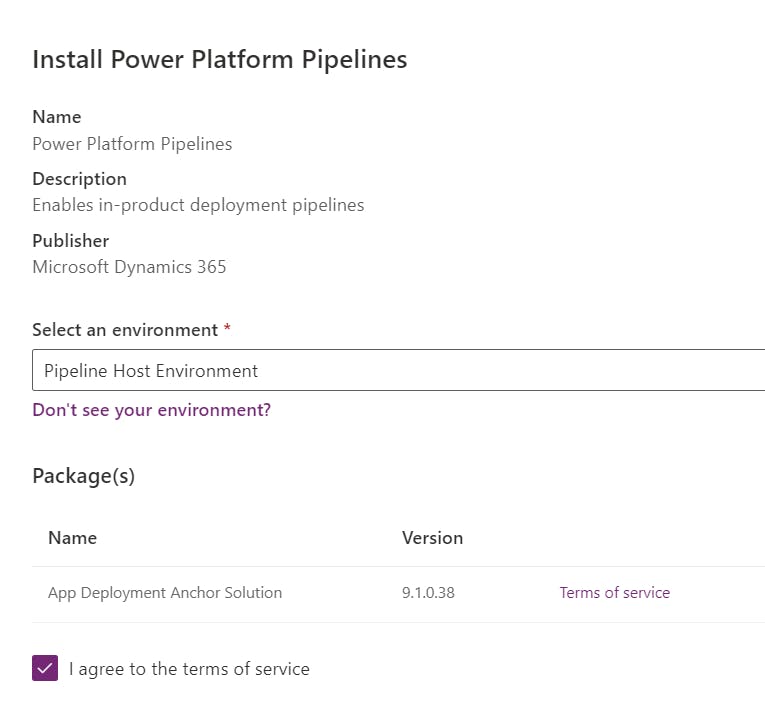
Click on Install button then select host environment to install the App
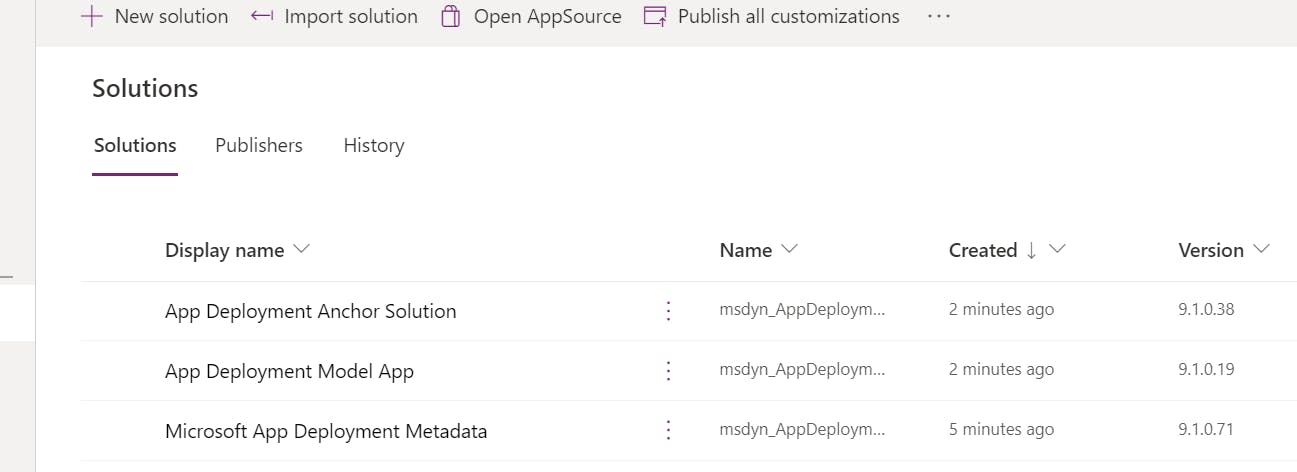
Once done, navigate to the host environment. You should now find three new solutions installed:
Configuration
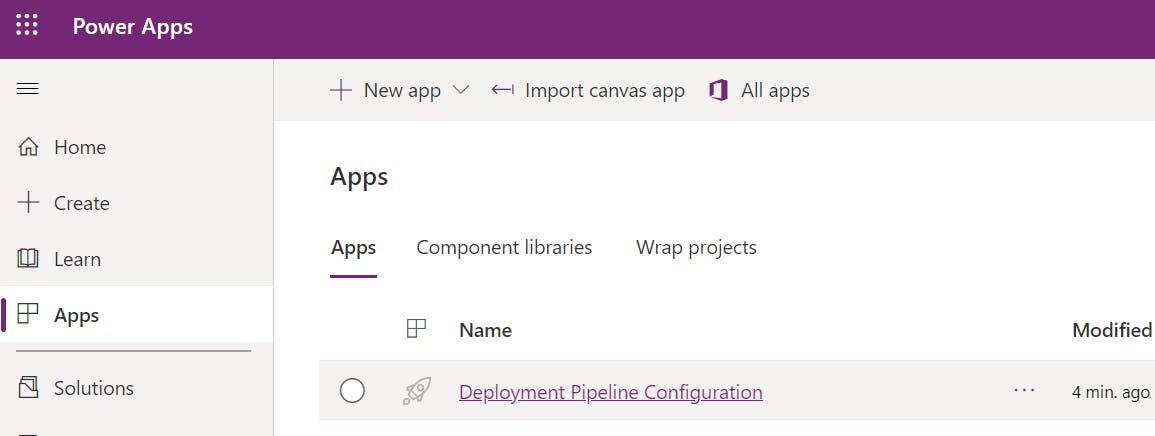
- Click on Apps and you will see a new model-driven app called Deployment Pipeline Configuration. We will use this app to configure the release pipeline. Click the name to run the app.
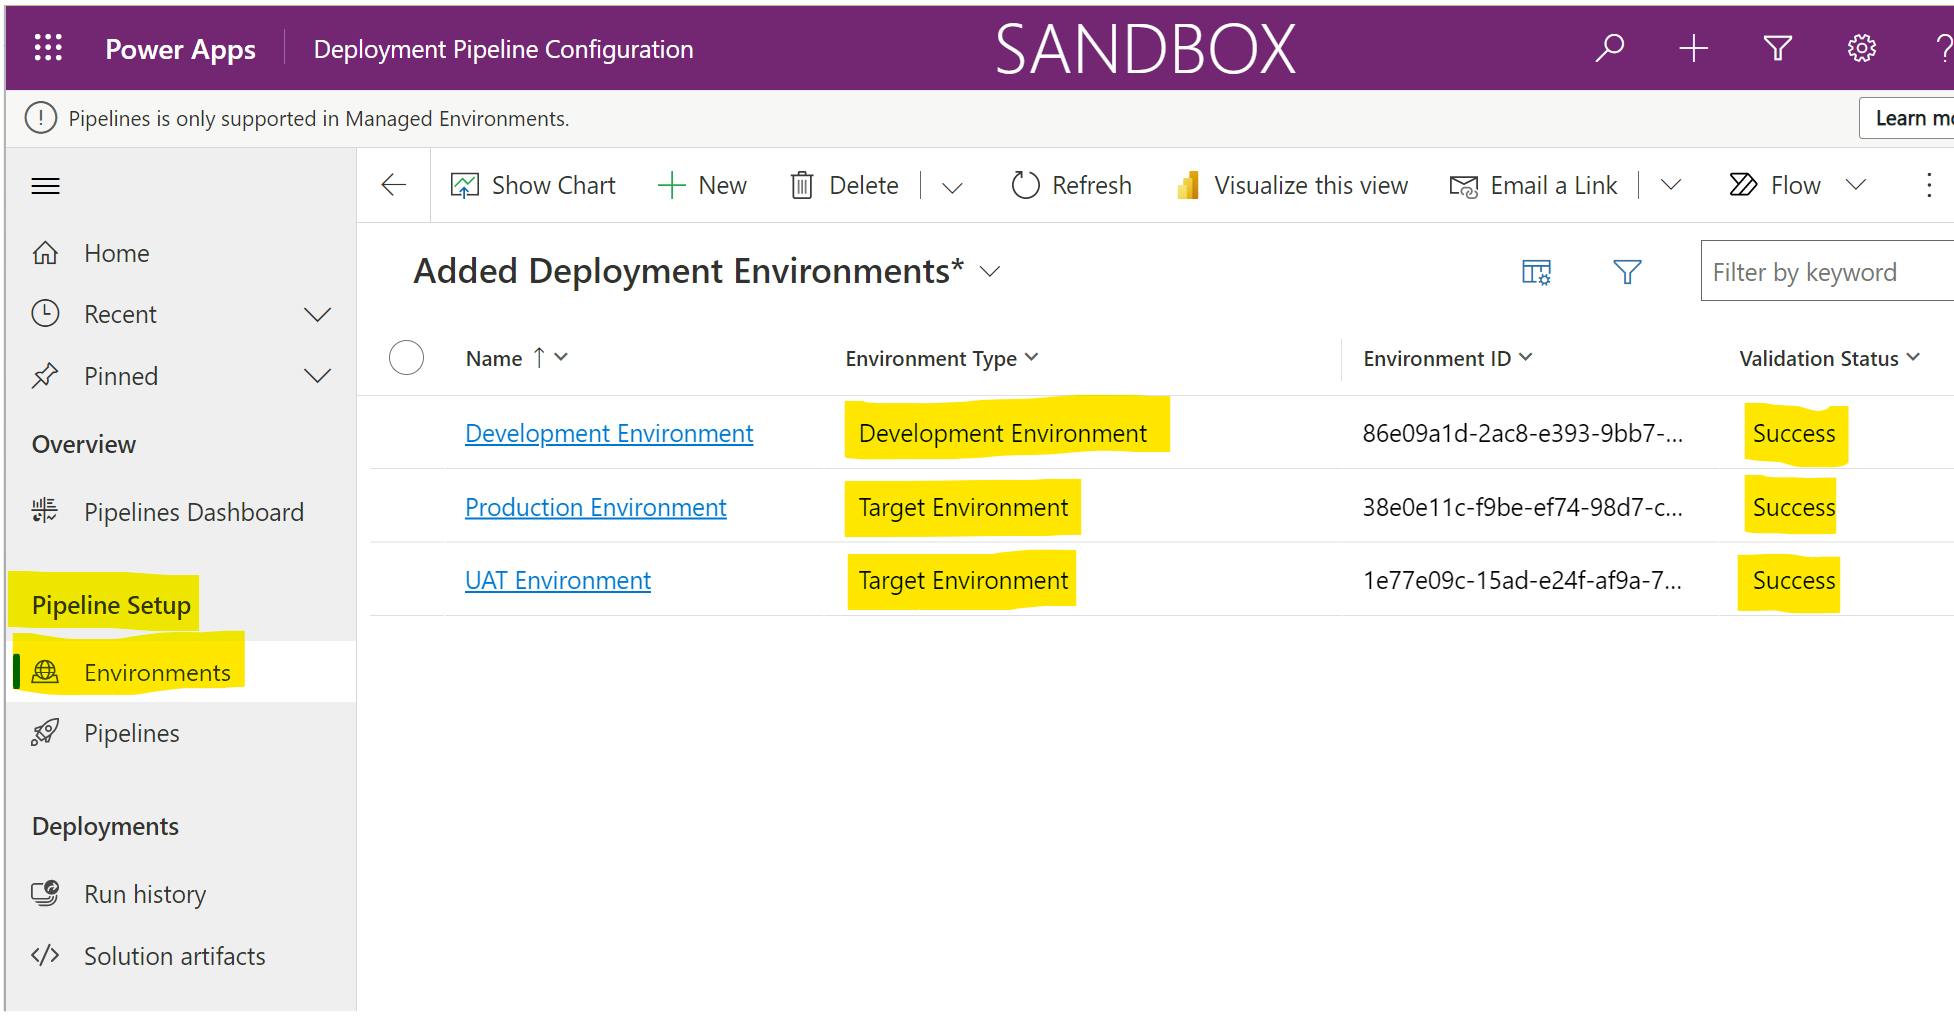
- In the Environments tab under the Pipeline Setup section, create three environments record which will be referenced when configuring the pipeline:
Note:
- Environment id can be found from the URL once you selected environment from the Power Apps studio

- Make sure Validation Status \= Success for all the environments.
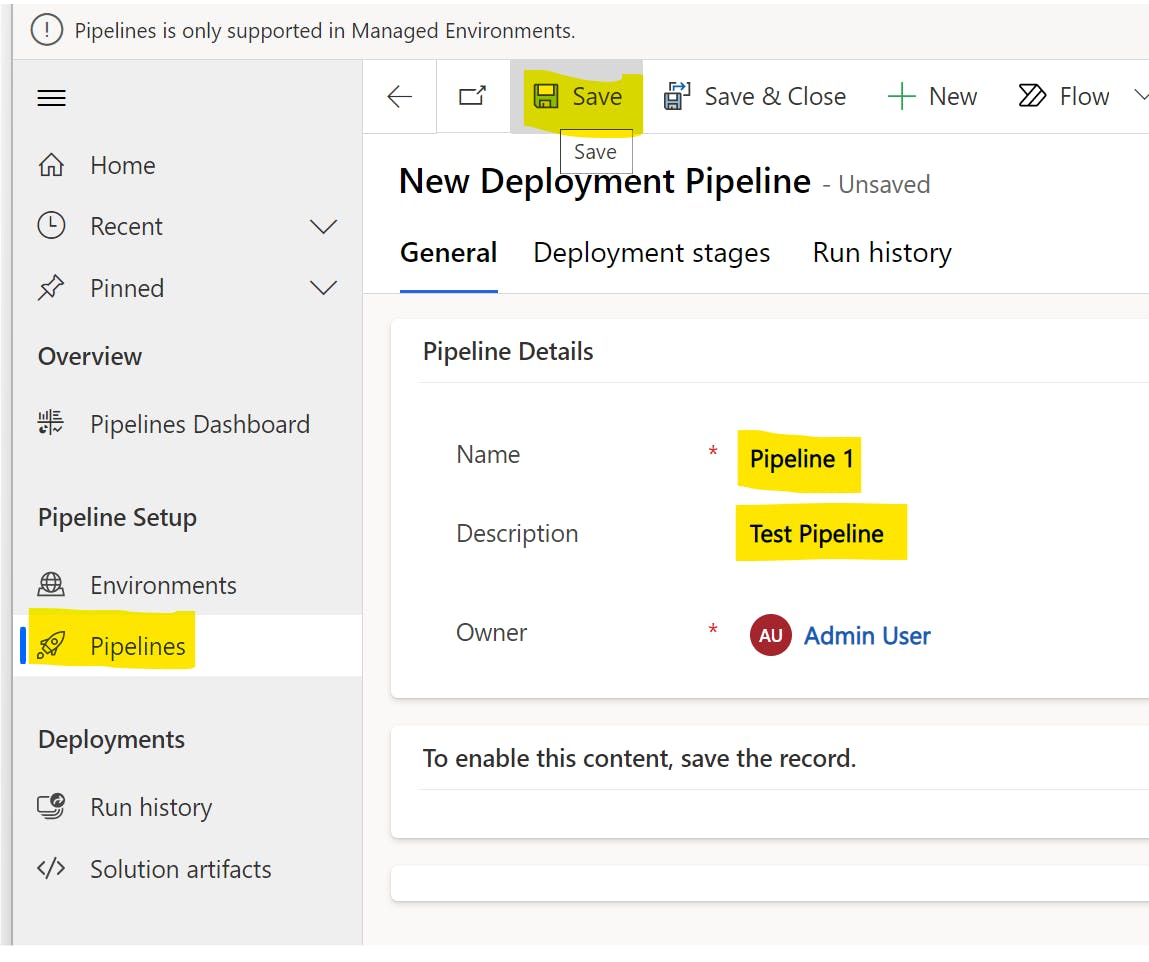
Create a new Pipeline in the Pipelines section. Click on the Save button after populating the Name and Description field:
At the linked Development Environments grid, select Add existing Deployment Environment

Select the Development Environment we just created and click on Add button:

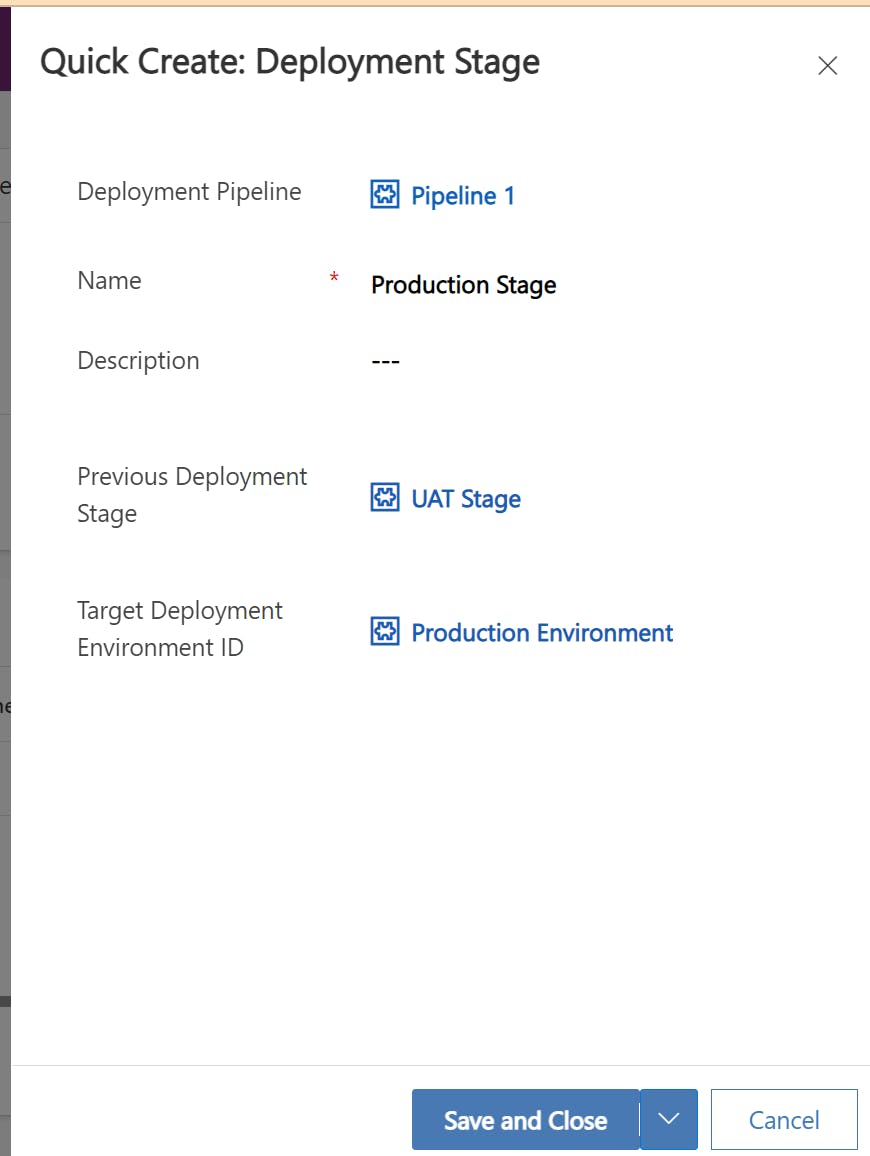
In the Deployment stages grid click on + New Deployment Stage. Provide the following detail in the side pop-up:
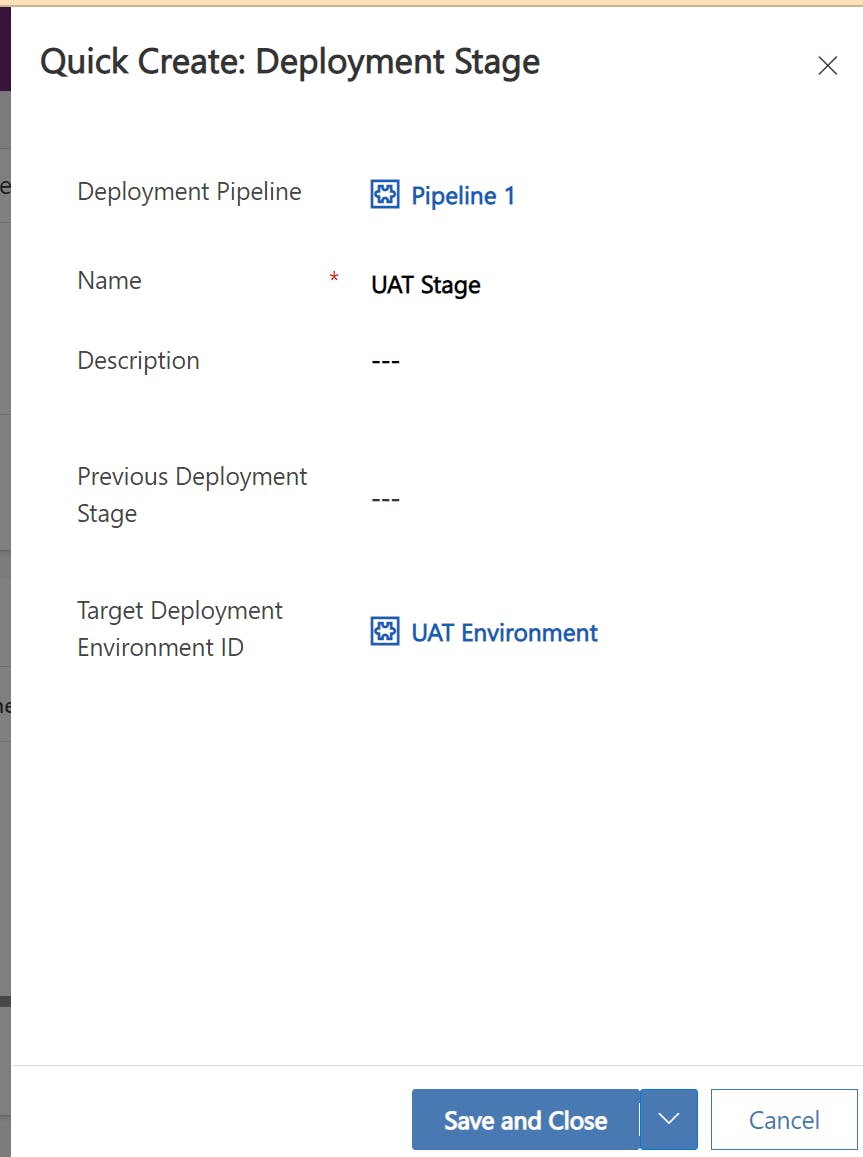
note: leave the Previous Deployment Stage empty as this is the first target environment/stage we've set-up
Create another stage for Production deployment as follow:
Test the Pipeline
Congratulations, you've done all the setup and configuration. let's test the pipeline now.
Create a new solution with a canvas app and a connection reference in your developer environment.
In solution, you can now see a new button on the left:
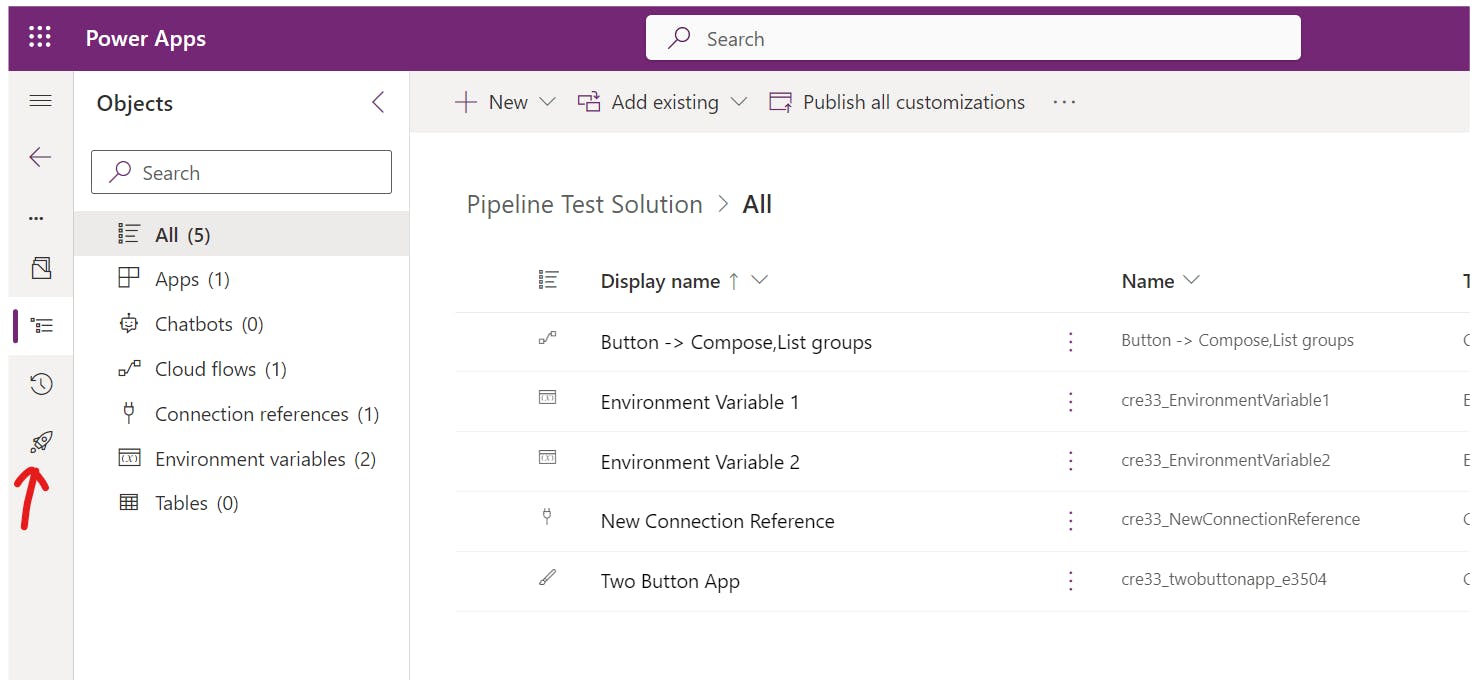
Click on the new button and we will be navigated to the Pipelines page. Select the Pipeline we just created, you can see the release process we have created:
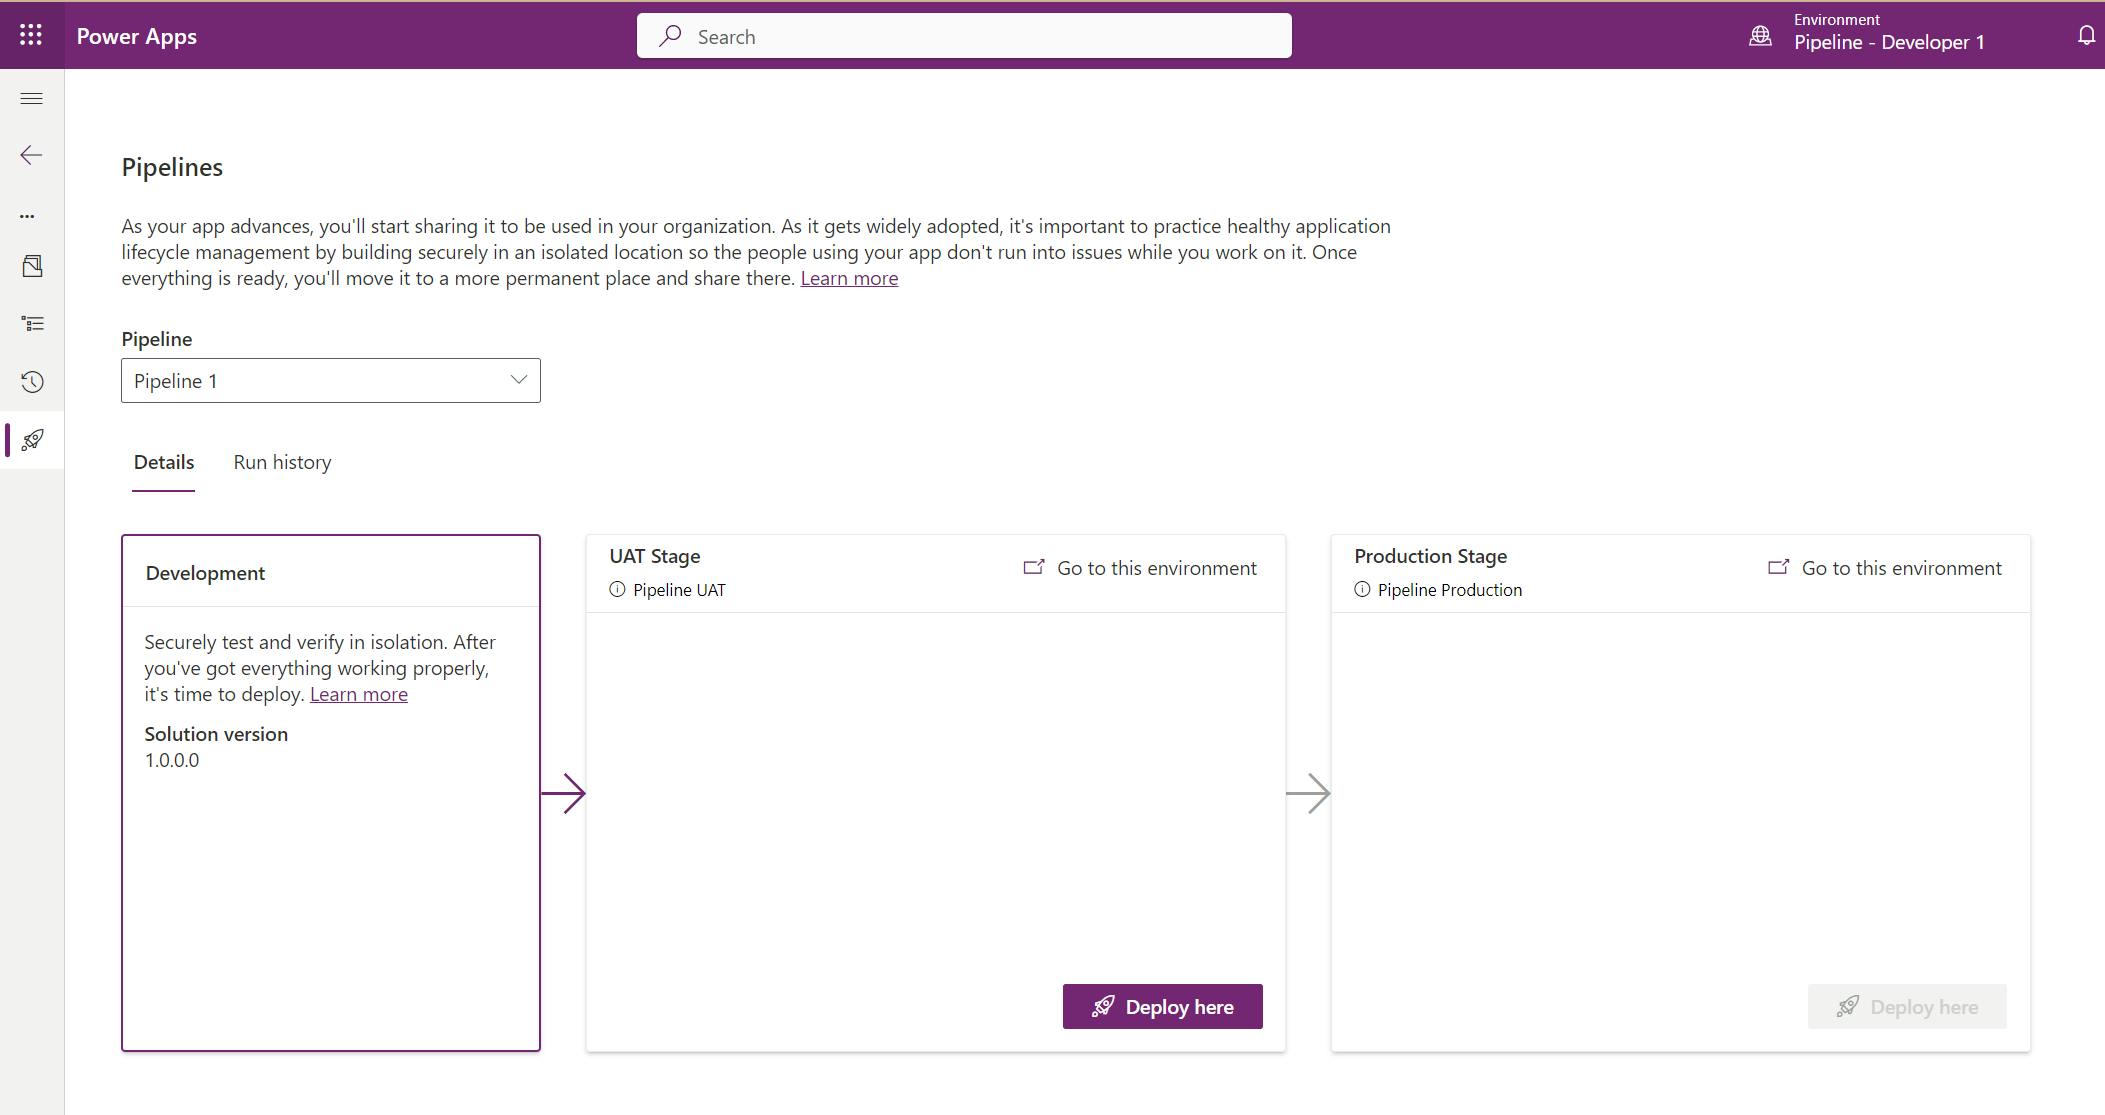
Under UAT Stage, click Deploy here button to trigger a deployment to move the solution from the Developer environment to the UAT environment.
Note:
- Clicking on the Deploy here button won't publish the latest change you've done in your solution. Always remember to publish all the changes before you trigger the pipeline.
- You won't be able to update the App version from Pipeline.
- You can't update environment variables for now.
If you have added a connection reference in your solution, the deploy wizard will ask you to provide the connection before deploying the solution:
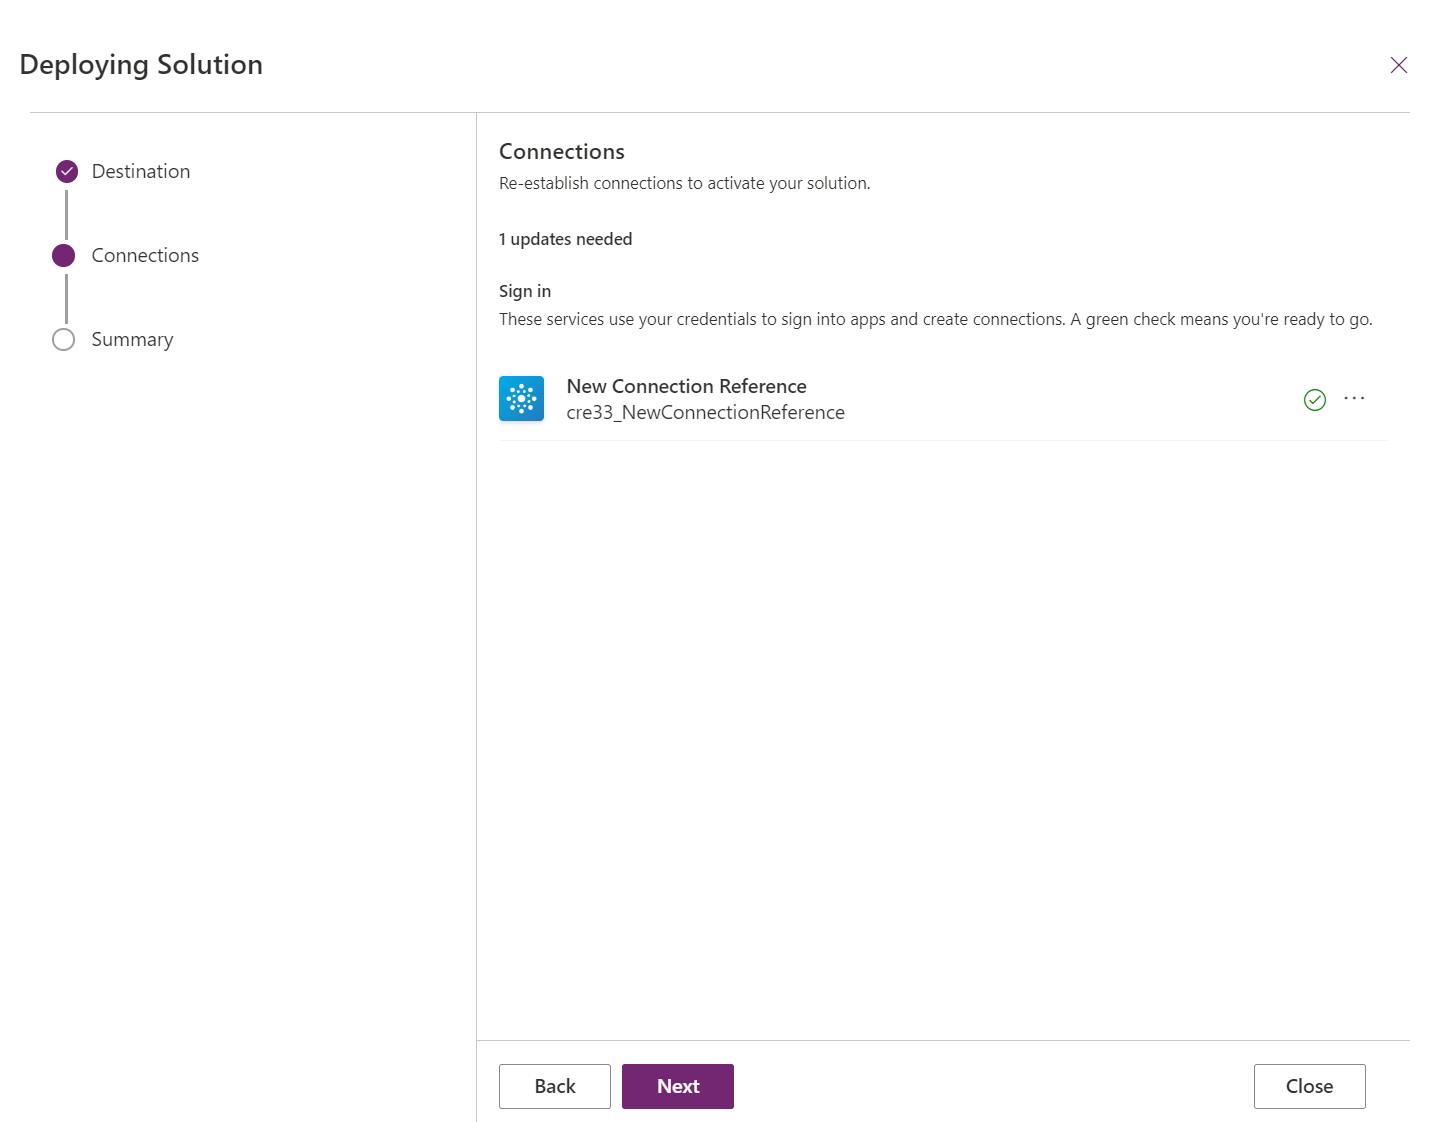
Once done, the UAT Stage status will be updated:

- click on Deploy here under Production Stage to deploy your solution to the production environment.
Note: you won't be able to deploy the solution to Production if you haven't deployed it to UAT. This is because you've set up UAT stage as the Previous Deployment Stage

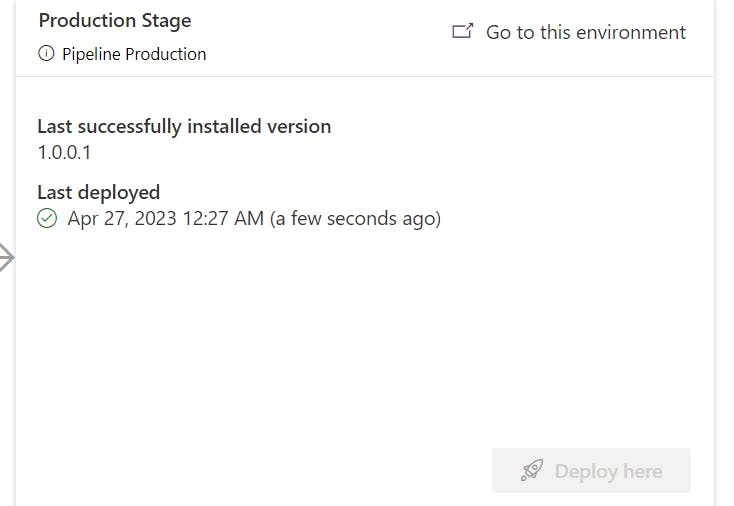
Once done, the production stage deploy button will be disabled until the solution version number at UAT stage is changed.
Summary
Power Platform Pipelines provide an easy and efficient way for admin users and makers to implement CI/CD capability without needing to set up a release pipeline in a source control system like GitHub. While there may be some limitations at this stage, the flexibility to configure the release process is a significant advantage. In my next post, I will discuss some of the new features of the latest release. Happy sharing.🤝🤝🤝
