Power Query Dataflow - How to import Excel data into Dataverse from Power apps

Have you ever been tasked with developing a canvas app that enables users to upload an Excel file and import its data into Dataverse?
Even though it is a broad requirement but deal to some functional or licensing restriction in Power platform components, developers might consider a different way to implement this functionality.
For example, if the Excel sheet has a small size of data set (like several hundred rows with around 20 - 30 columns) and it does not require complex data cleansing and transformation, then we should be able to utilize the out-of-box connector from Cloud Flow to achieve the goal by looping through each row.

The key limitation of the above approach is that all data in Excel needs to be contained in a table otherwise data can't be captured. Also, since cloud flow is not an ETL tool, you might hit some functional restrictions if advanced data transformation is a must. Plus, when the dataset is growing, developers need to consider the cloud flow limitation depending on the license and add-on available in the tenant.
So is there a better way to handle complex cases? The answer is Power Query Dataflow. In this blog, I am going to demonstrate how to create an end-to-end solution to import Excel data using Dataflow.
Prepare Tables and Test Data
Let's start with creating the Dataverse tables of the solution.
Create a new solution and add two tables:
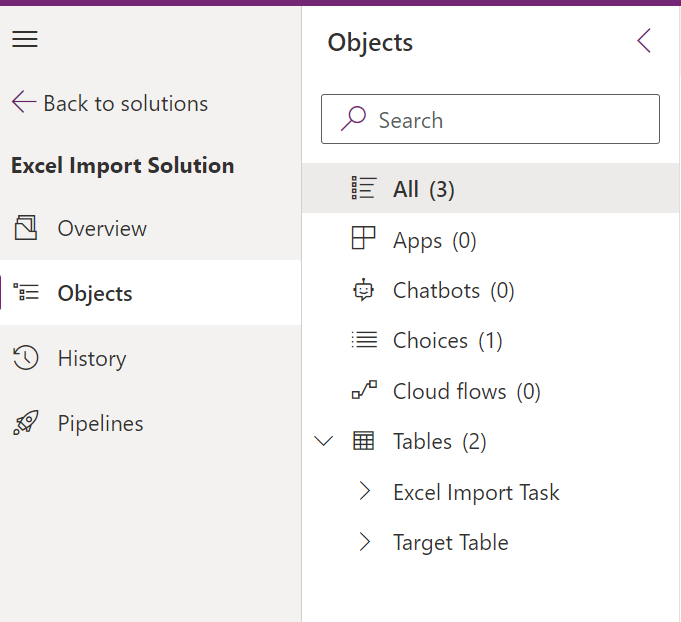
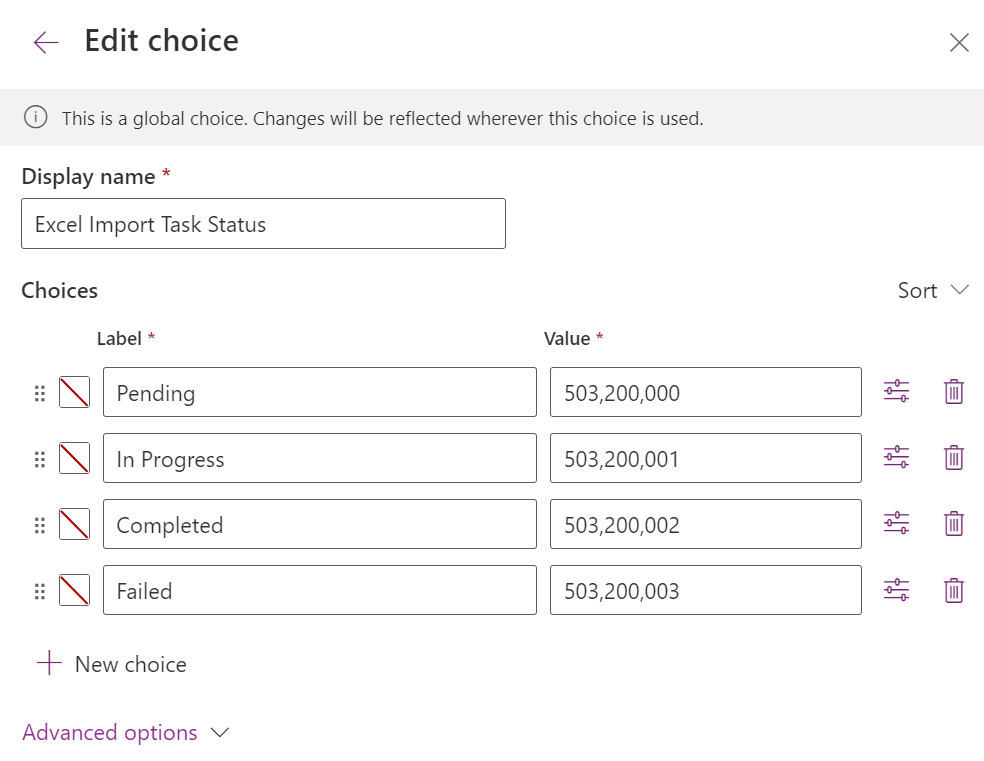
In the Excel Import Task table add a Text type Column to store the File Id from One Drive (This is not a Guid so make sure we give it at least 200 characters). A new custom choice column called Import Task Status with the following choices (Note down the value for Completed status before saving. In my case, it's 503200002):
Add a new record to the table, use the Excel file name for the Name column and set the status to In Progress:

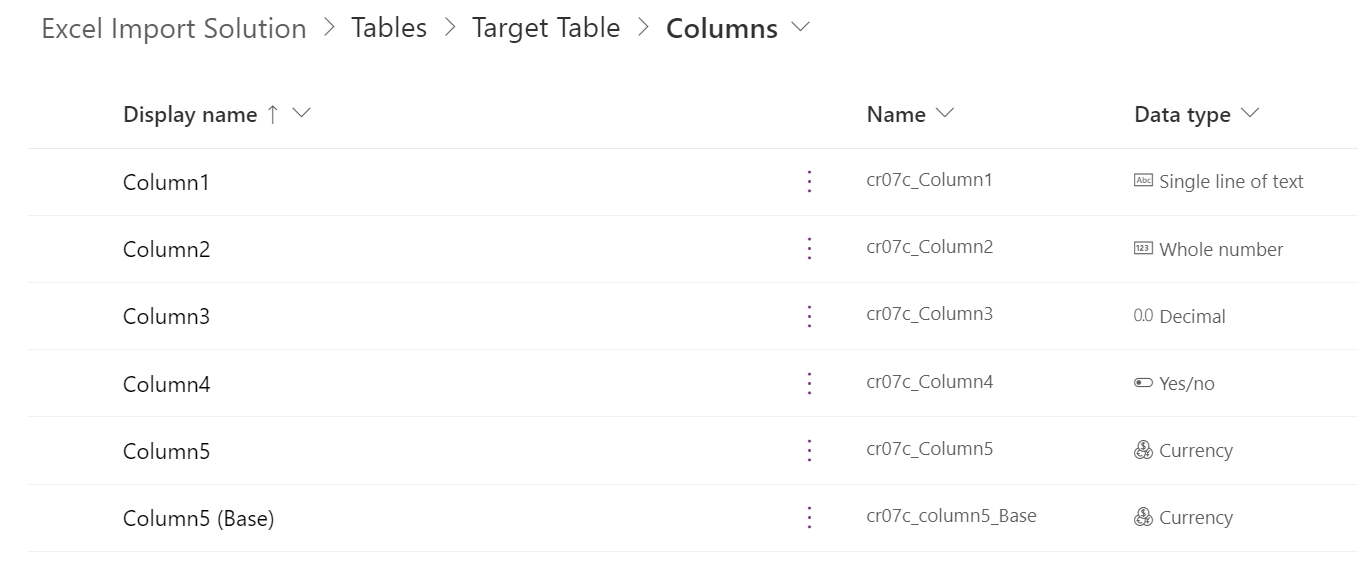
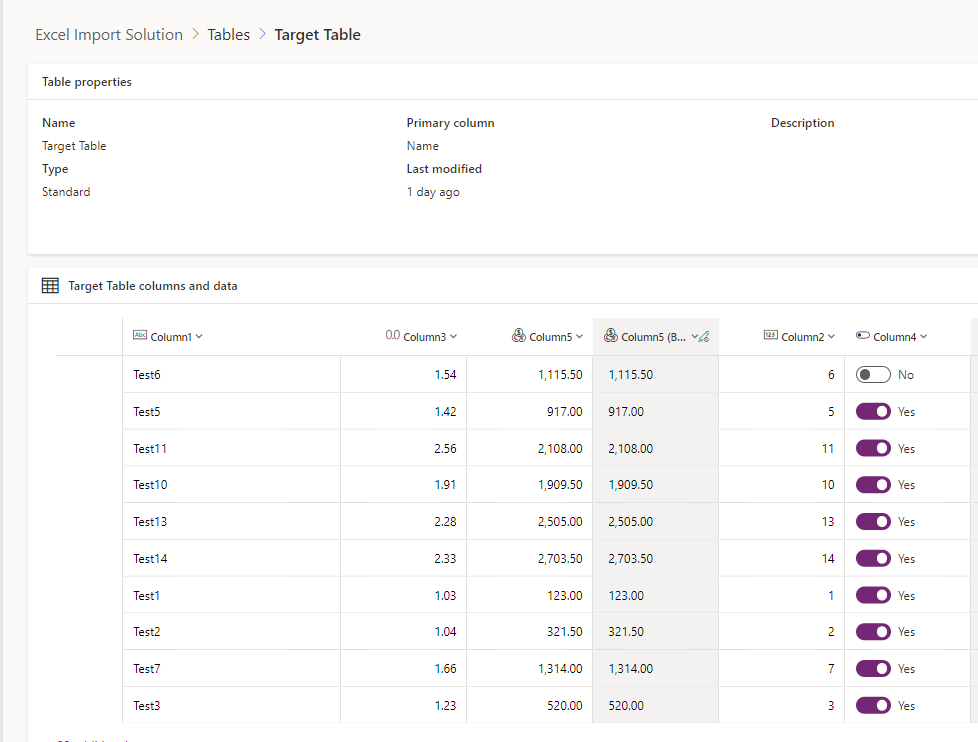
Next, add the following columns to the Target Table:
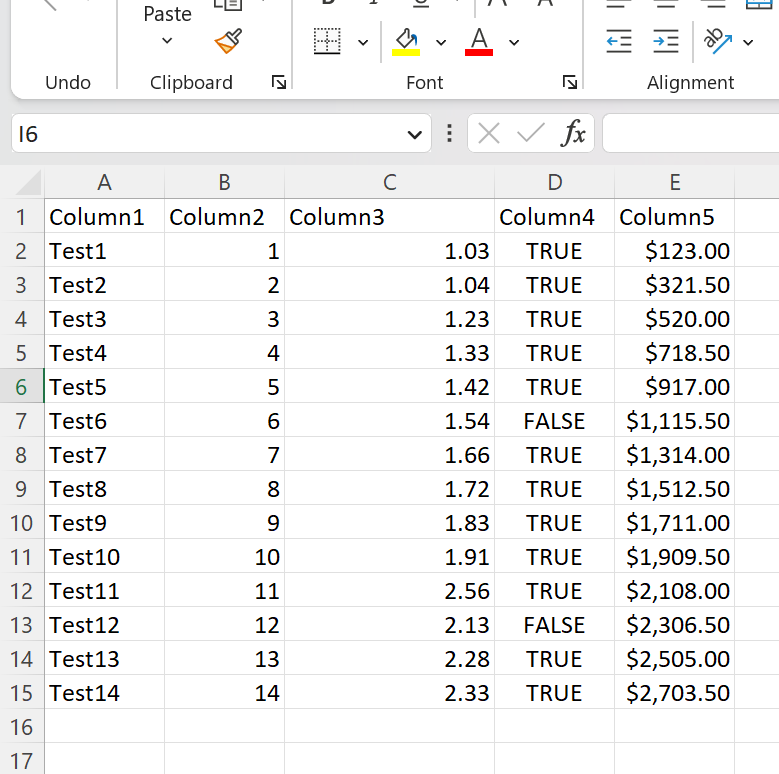
Prepare an Excel file with some sample data:
Prepare Dataflow
Now that we've finished setting up the backend let's create a Dataflow to read data from the Excel sheet and import it into Dataverse. Let's assume that the Excel sheet will be uploaded to Onedrive before we get data from it.
Important:
Uploading files to Onedrive is my personal preference for simplicity. Feel free to use SharePoint, Blob storage other other locations instead.
Since this is not a Power Query tutorial, I am going to assume that you have some basic knowledge of Power Query. In the following steps, I have provided a copy of my query from the Advanced editor*. You need to replace tables and column schema with your actual value. Alternatively, you can replicate the steps based on my description using the user interface which will help you to auto-populate the schema.*
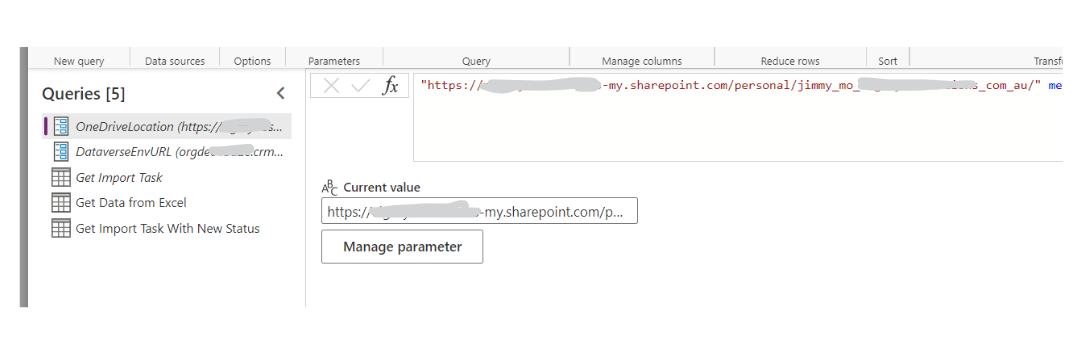
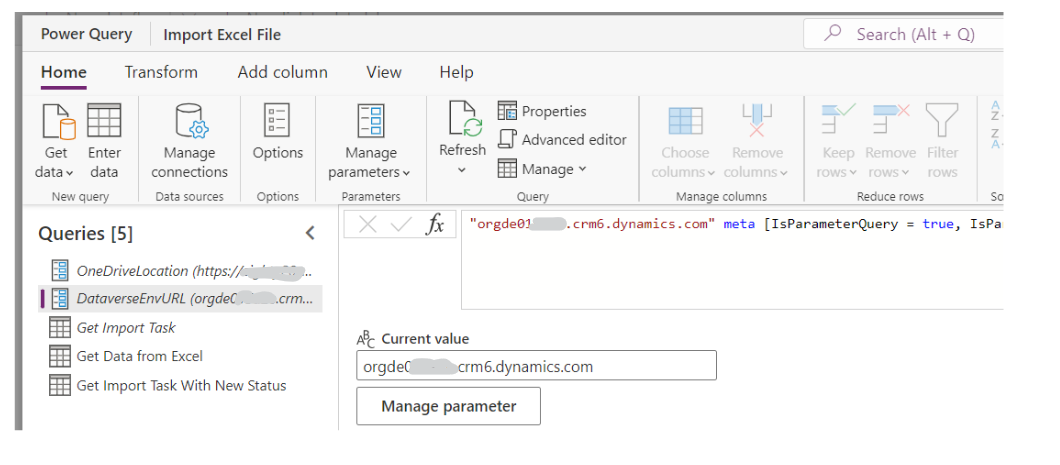
In your new Dataflow, create two parameters to host the Onedrive URL and your Dataverse Environment URL.

Create a query to get data from the Excel Import Task table.
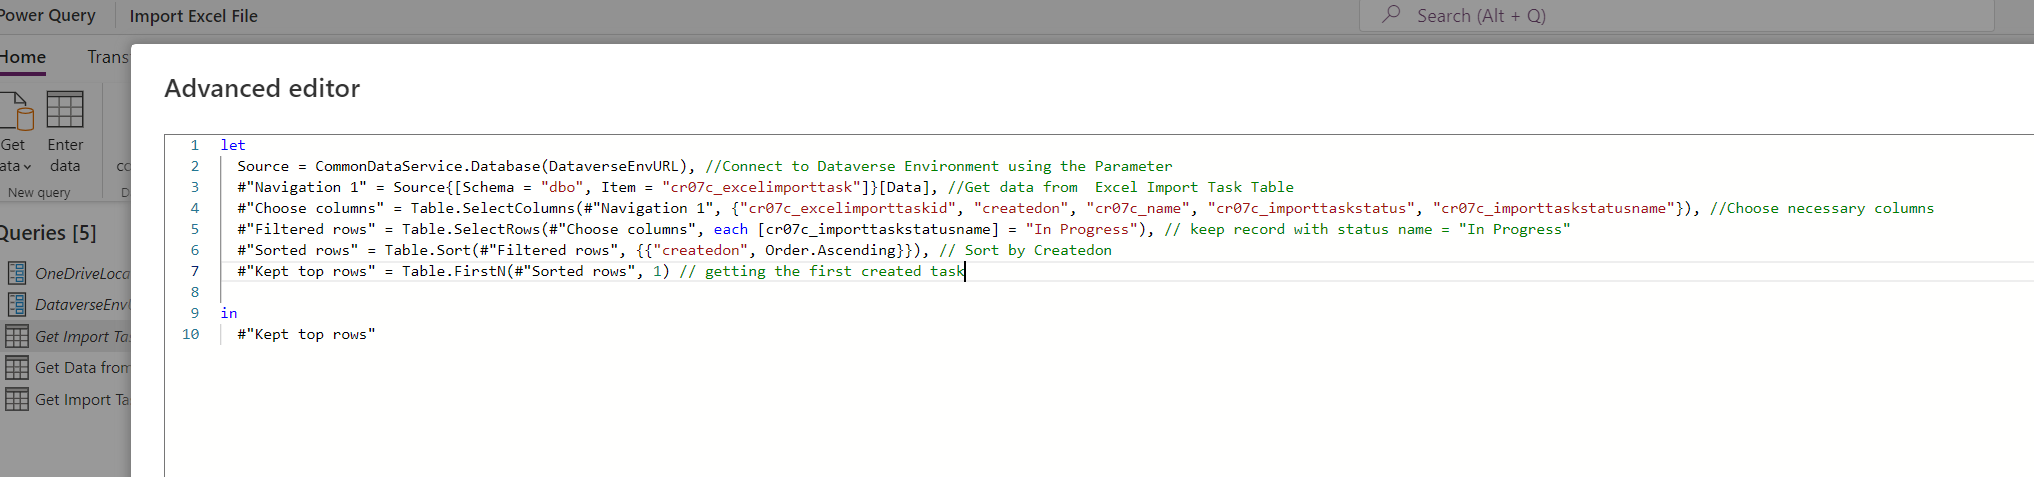
let
  Source = CommonDataService.Database(DataverseEnvURL), //Connect to Dataverse Environment using the Parameter
  #"Navigation 1" = Source{[Schema = "dbo", Item = "cr07c_excelimporttask"]}[Data], //Get data from  Excel Import Task Table
  #"Choose columns" = Table.SelectColumns(#"Navigation 1", {"cr07c_excelimporttaskid", "createdon", "cr07c_name", "cr07c_importtaskstatus", "cr07c_importtaskstatusname"}), //Choose necessary columns
  #"Filtered rows" = Table.SelectRows(#"Choose columns", each [cr07c_importtaskstatusname] = "In Progress"), // keep record with status name = "In Progress"
  #"Sorted rows" = Table.Sort(#"Filtered rows", {{"createdon", Order.Ascending}}), // Sort by Createdon
  #"Kept top rows" = Table.FirstN(#"Sorted rows", 1) // getting the first created task

in
  #"Kept top rows"
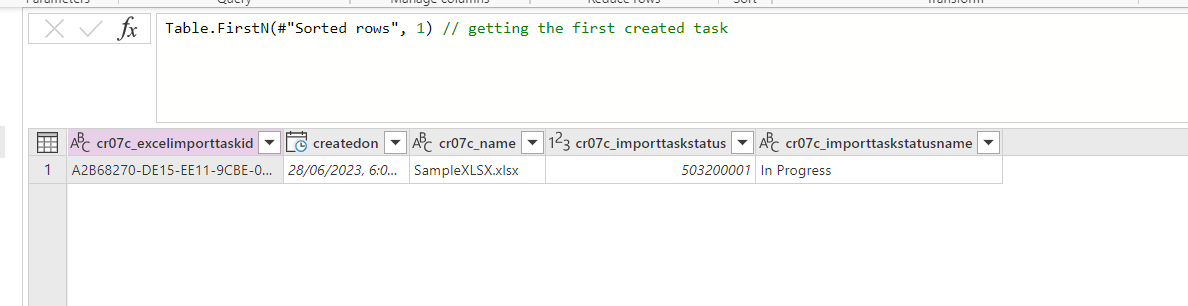
The result of the query should be a single record with file Name, task record id and status = In Progress:
Next, create a query to get data from Excel:
let
Source = SharePoint.Files(OneDriveLocation, [ApiVersion = 15]),
//Get Next Task related Excel Path
#"Get File Full Path" = Text.Combine({OneDriveLocation, #"Get Import Task"{0}[cr07c_name]}),// Get File name From Get Import Task Query
FileContent = Excel.Workbook(Web.Contents(#"Get File Full Path"), null, false), // Get Excel file content
SheetData = Table.First(FileContent)[Data],//Get Data from First Sheet
#"Filter null and whitespace" = each List.Select(_, each _ <> null and (not (_ is text) or Text.Trim(_) <> "")), //Define a function to filter out Null and whitespaces
#"Removed other columns" = Table.SelectColumns(SheetData, List.Select(Table.ColumnNames(SheetData), each try not List.IsEmpty(#"Filter null and whitespace"(Table.Column(SheetData, _))) otherwise true)),//Remove all empty column
#"Promoted headers" = Table.PromoteHeaders(#"Removed other columns", [PromoteAllScalars = true]),//Use first line has header
TrimHeader = Table.TransformColumnNames( #"Promoted headers", Text.Trim),//Trim Header Name
#"Added index" = Table.AddIndexColumn(TrimHeader, "Index", 0, 1, Int64.Type), // Add index column
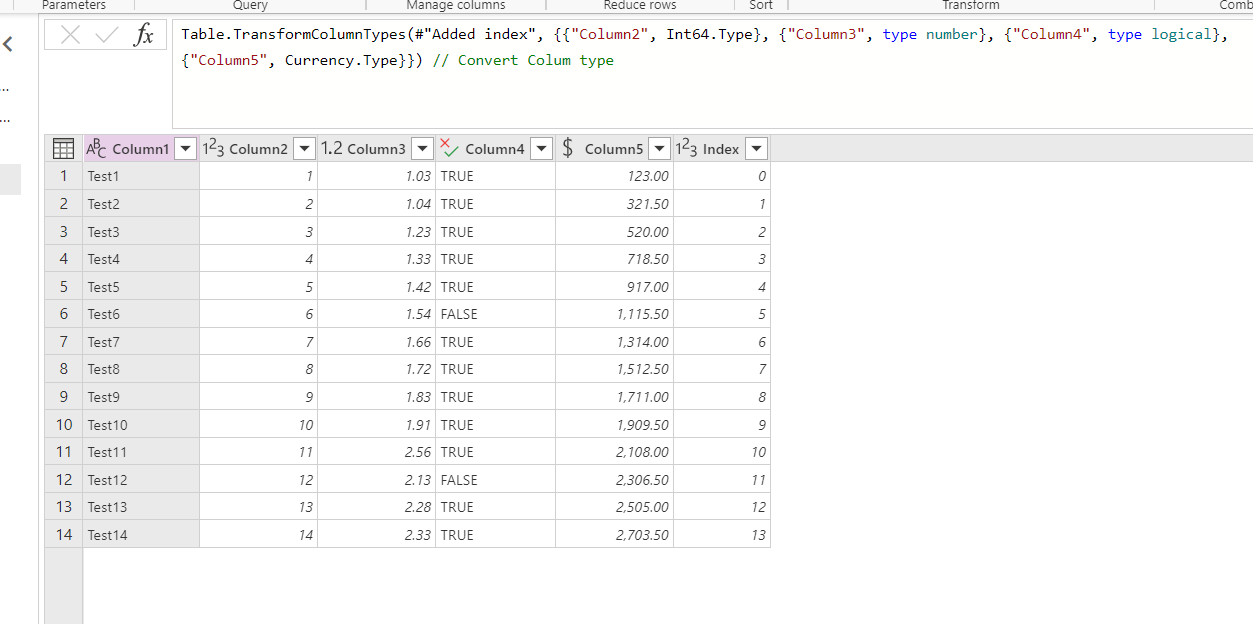
#"Changed column type" = Table.TransformColumnTypes(#"Added index", {{"Column2", Int64.Type}, {"Column3", type number}, {"Column4", type logical}, {"Column5", Currency.Type}}) // Convert Colum type
in
#"Changed column type"
The query should return all data from the Excel sheet.
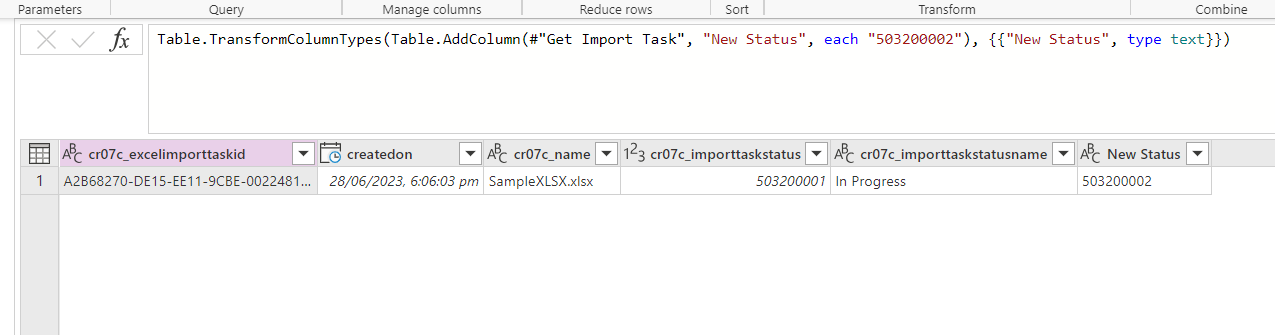
Lastly, we need to create a query for updating the task status:
let

  #"Added custom" = Table.TransformColumnTypes(Table.AddColumn(#"Get Import Task", "New Status", each "503200002"), {{"New Status", type text}})// 503200002 is the choice value for Completed Status

in
  #"Added custom"
This query will add an extra column based on the Get Import Task query. (Instead of creating from scratch, referencing the existing query will improve the performance).
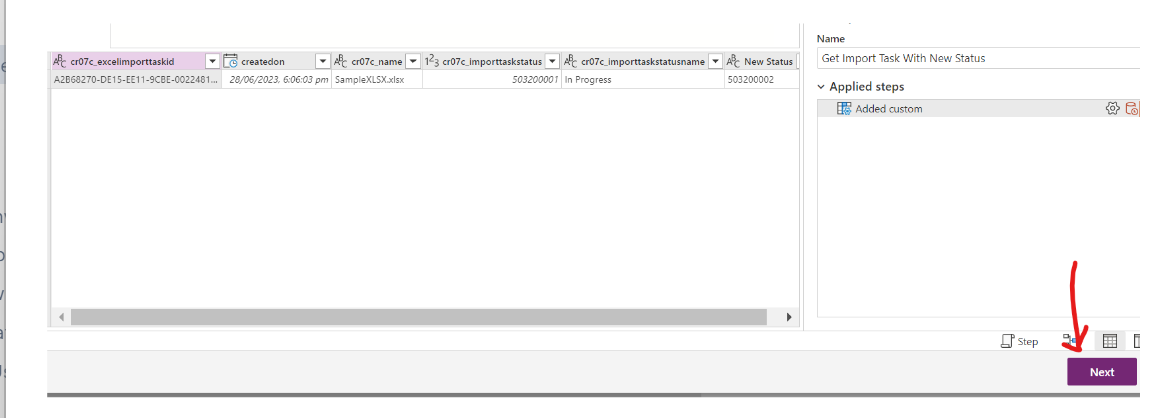
Now it's time to configure data mapping by clicking on the Next button
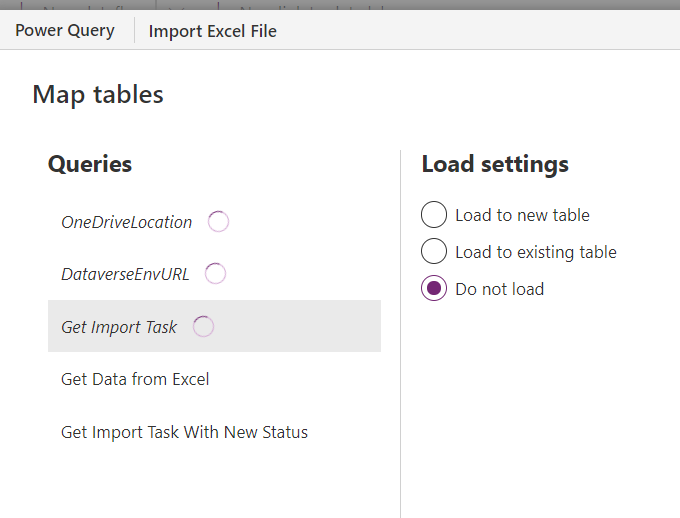
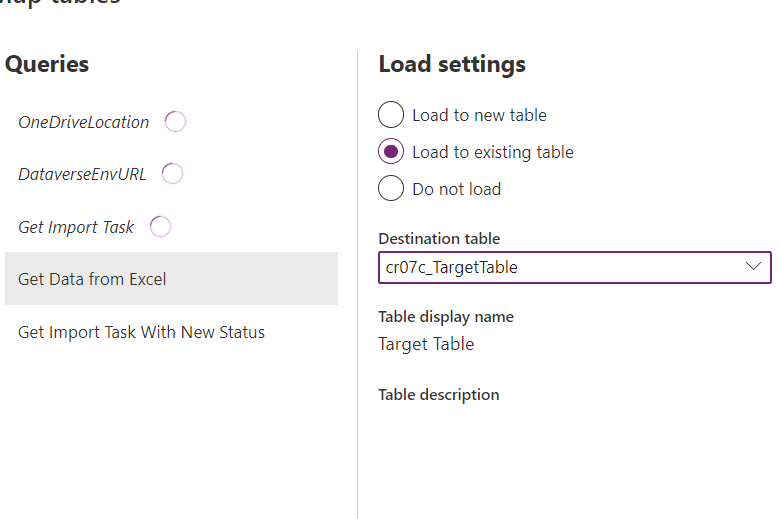
Select Do not Load for the first three queries:
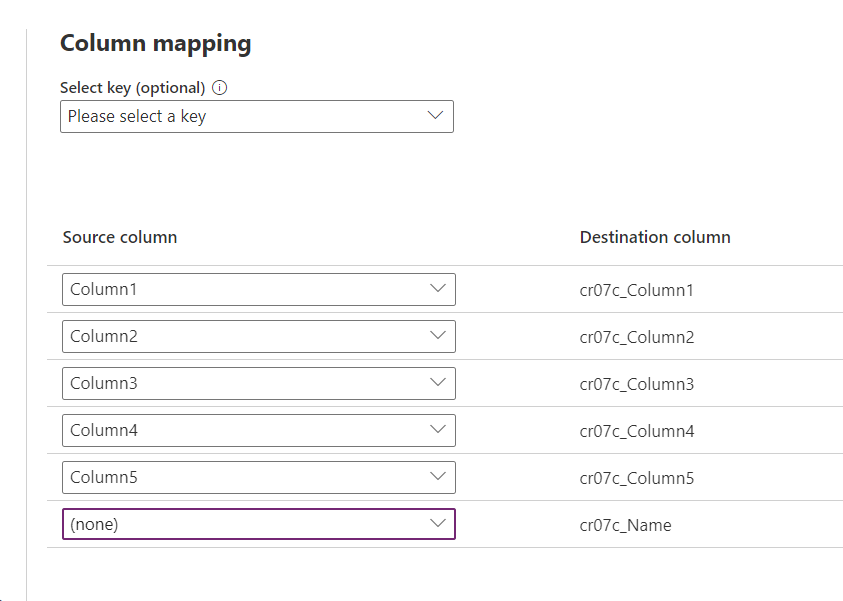
For Get Data from Excel query, select Load to existing table and find the target table from the Destination table dropdown
Then do the column mapping as follow:
Select the next query and do the mapping as follow:
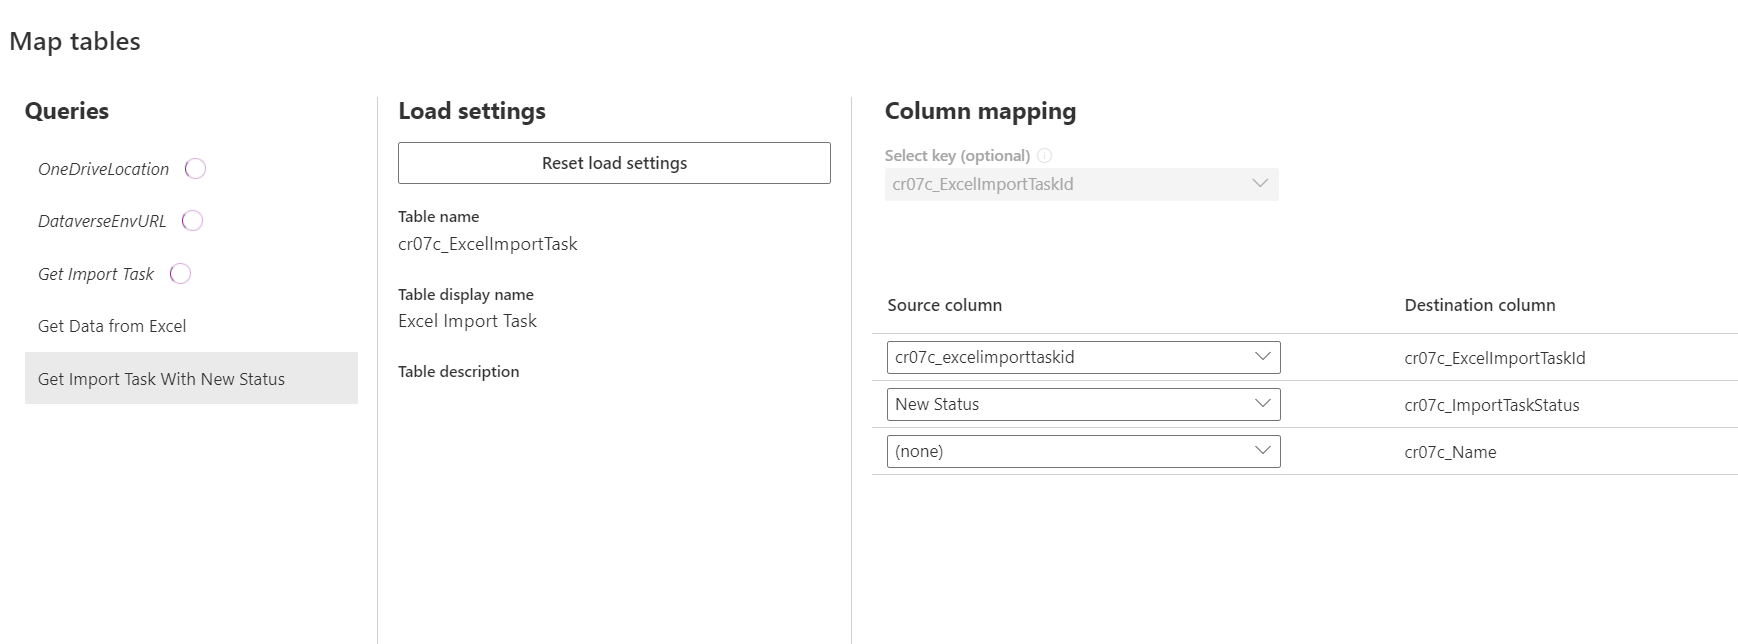
Since we are updating an existing record, we need to provide value to the Select Key dropdown and map ExcelImportTaskId(Primary Key).
Click on Publish once finish to test the dataflow and wait for Publish and Refresh status to turn to green

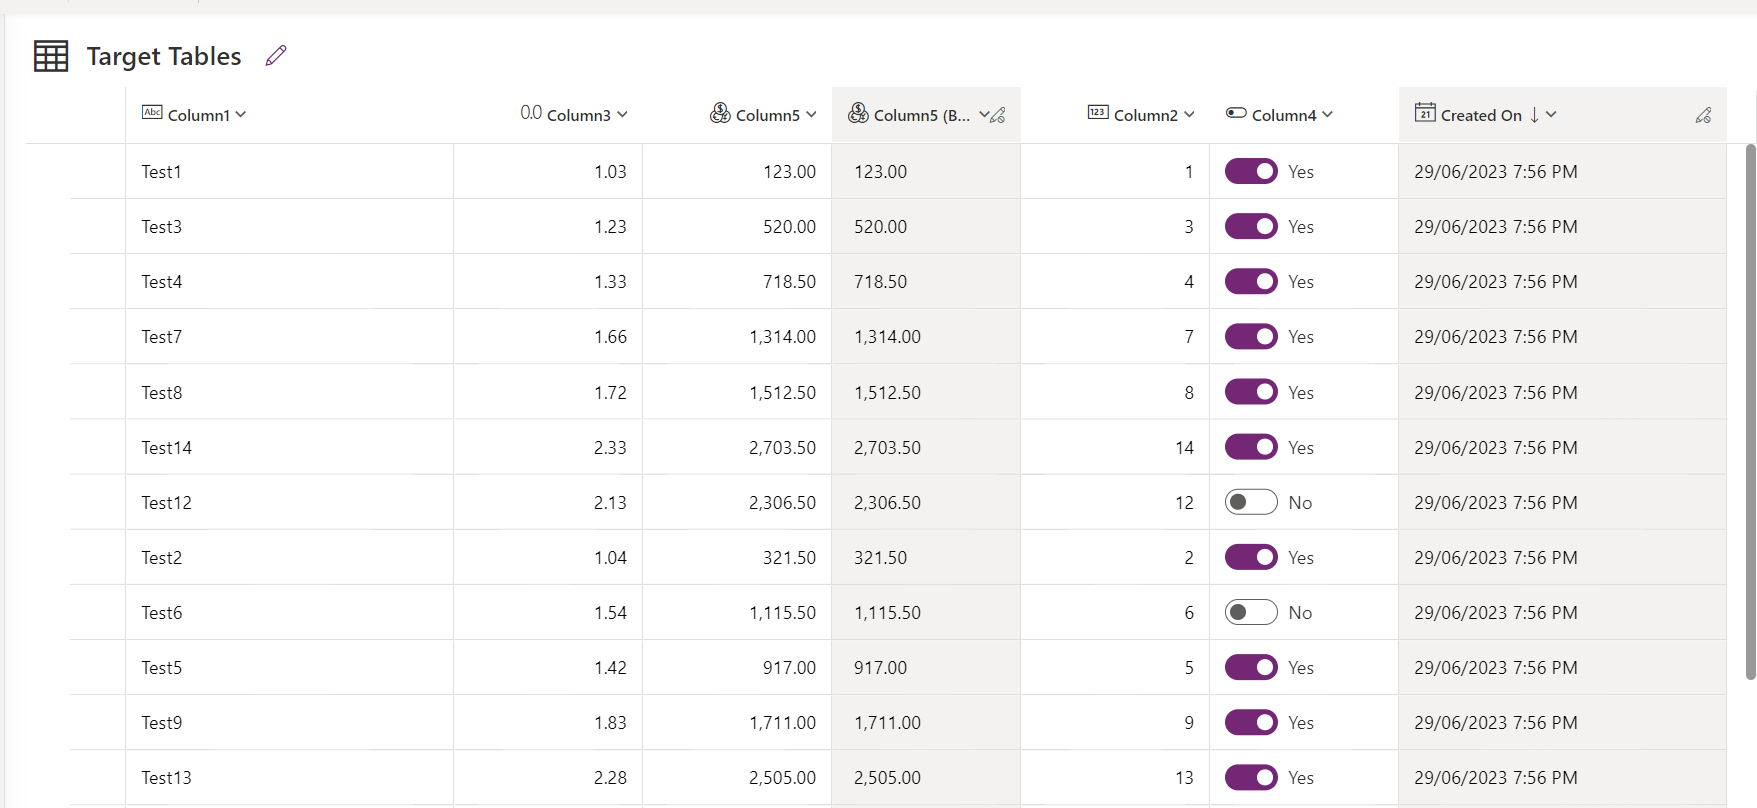
Now we should find all the data imported into Target Table successfully:
Prepare Cloud Flow
To focus on the topic and be lazy, I skipped the error-handling steps.😉😉😉
Create a Cloud flow to Upload Excel Files to Onedrive and create a File import Task:
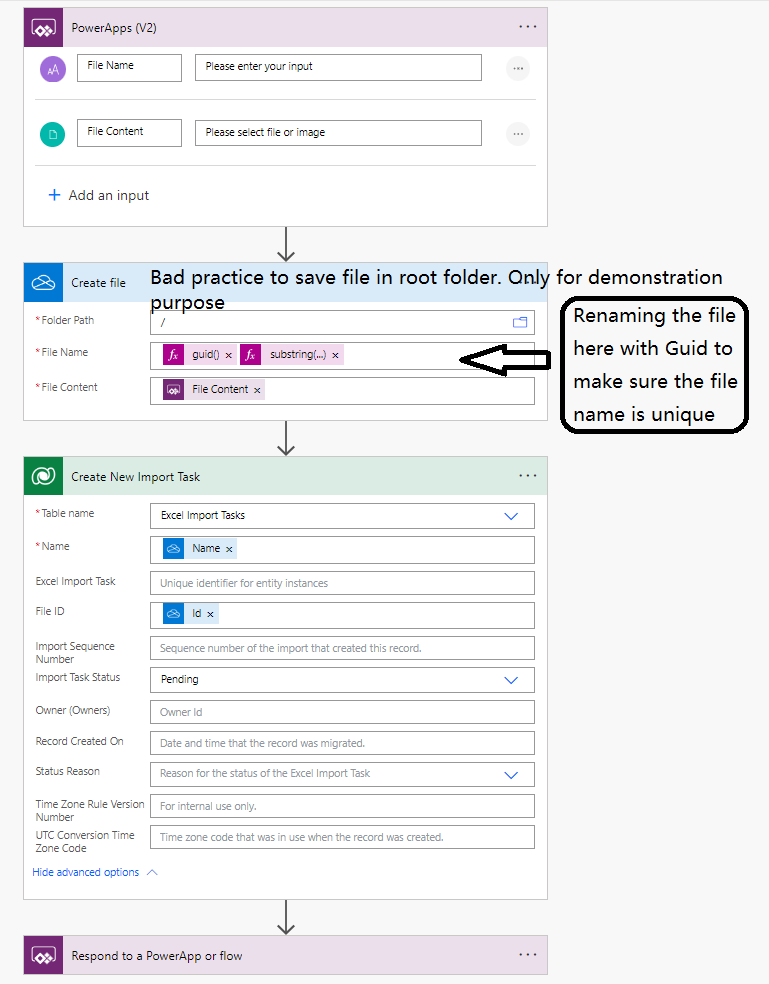
Below is the script for File Name for Create file Action
@{guid()}@{substring(triggerBody()['text'],indexOf(triggerBody()['text'],'.'))}
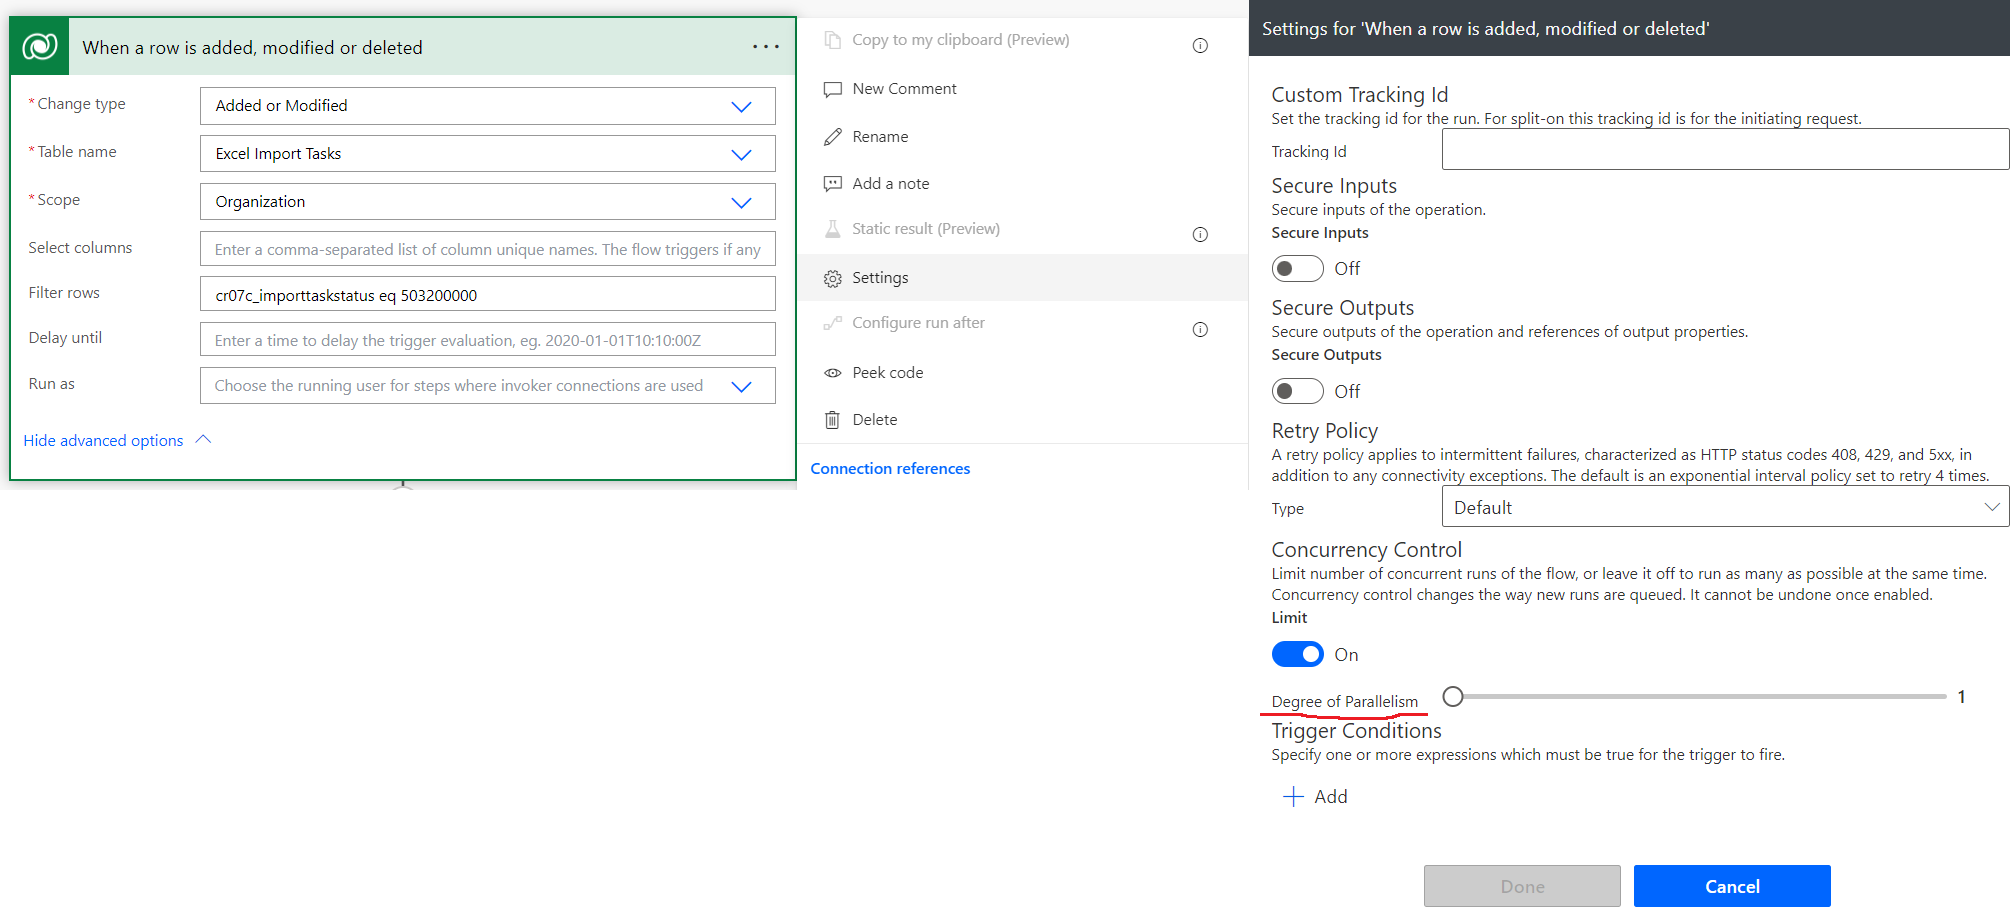
Next, Create a workflow to trigger dataflow and update task status:
The cloud flow should be triggered when a new record is created with status = pending. Also, we need to set up the workflow concurrency control as below so that the Dataflow won't be trigger concurrently:
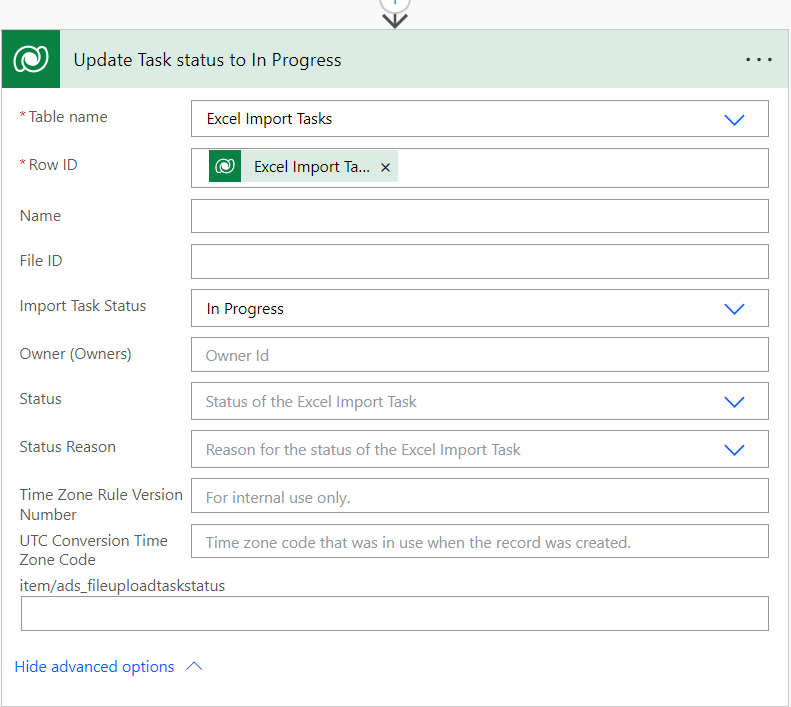
next, we update the import task status to In Progress so that it will be picked up by the Dataflow:
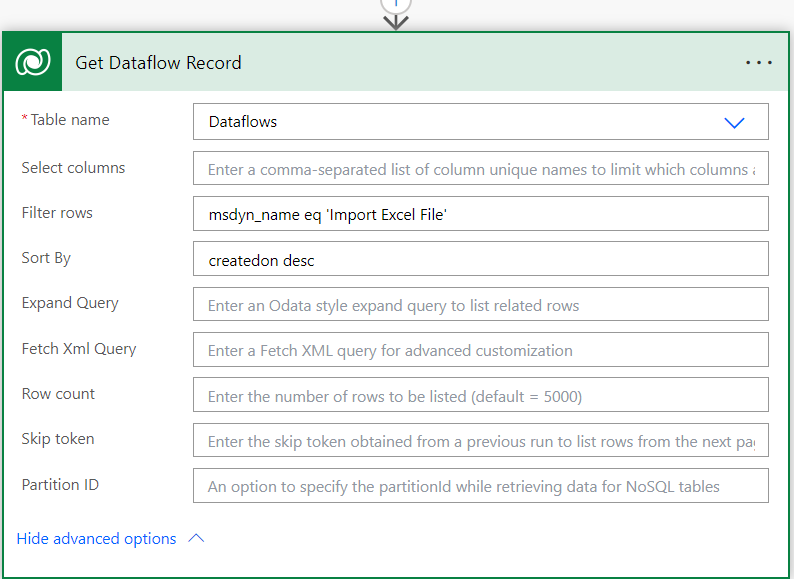
Next, we need to get the dataflow ID by accessing a system table call Dataflows using Dataflow‘s name:
Then we need to add the following action/trigger:
1. Trigger the dataflow to import data.
2. Wait until the dataflow completes and return the refresh status.
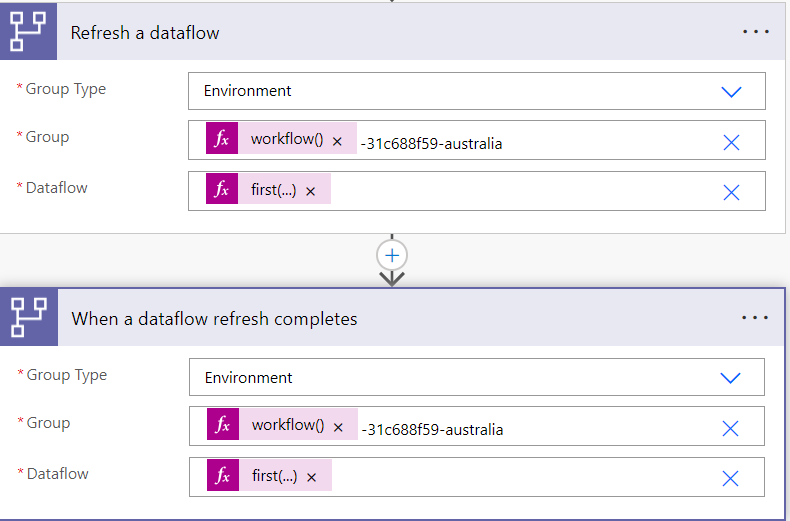
Note:
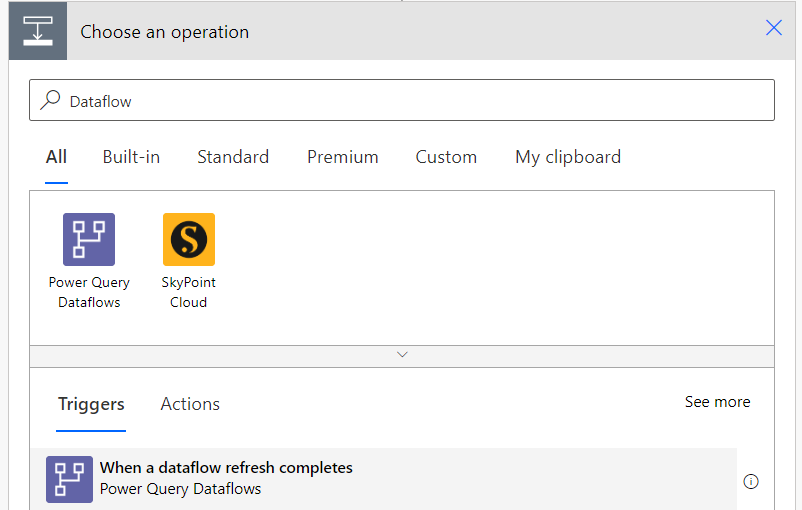
You have to switch to Triggers tab to get the When a dataflow refresh completes Trigger:
Group Value: @{workflow()['tags']['environmentName']}-31c688f59-australia.
we are using workflow()['tags']['environmentName'] to get envrionment guid from system variable. Please switch to custom value before pasting the above script

31c688f59-australia is the Dataflow Group suffix for Dataflow hosted in Australian region
Dataflow: @first(outputs('Get_Dataflow_Record')?['body/value'])?['msdyn_originaldataflowid']
@first(outputs('Get_Dataflow_Record')?['body/value']) indicate the first value getting from Get Dataflow Record action. We can use this to bypass Apply to each action.
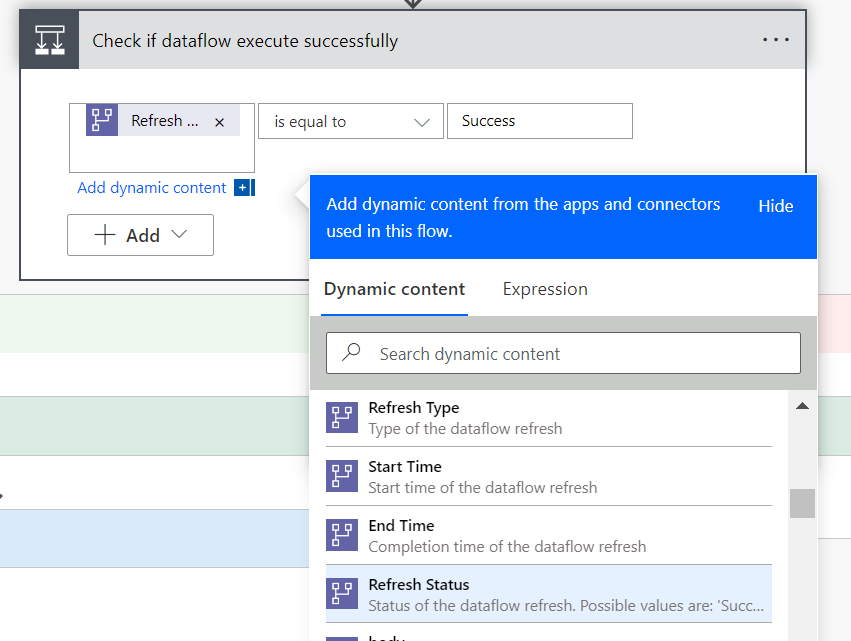
Next, we check whether the dataflow refresh successfully by using the Refresh Status value
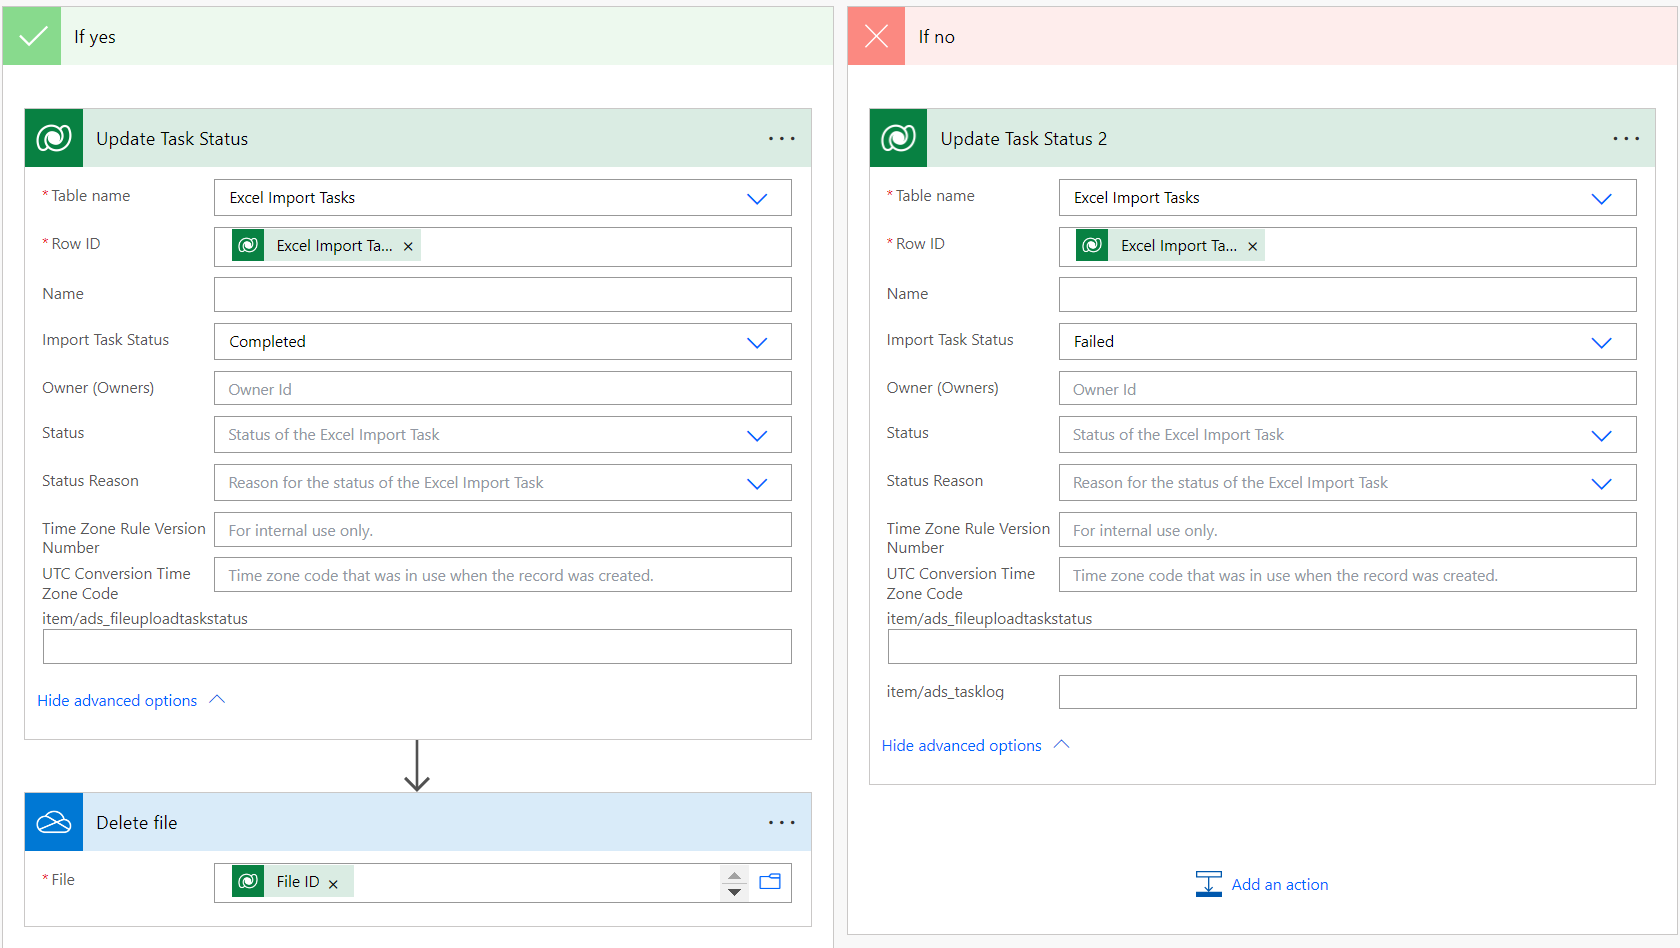
If Success, we update the task status to Completed and you can remove the file from Onedrive using the File ID. Otherwise, update the task status to Failed
Save the workflow once done. We will then create a Canvas app to test the cloud flow.
Prepare Canvas app
In this step, we will create a Canvas App to upload files to Onedrive and trigger the dataflow to import data from Excel.
For demonstration purposes, we are going to create a canvas app with an attachment control and an Import Button:
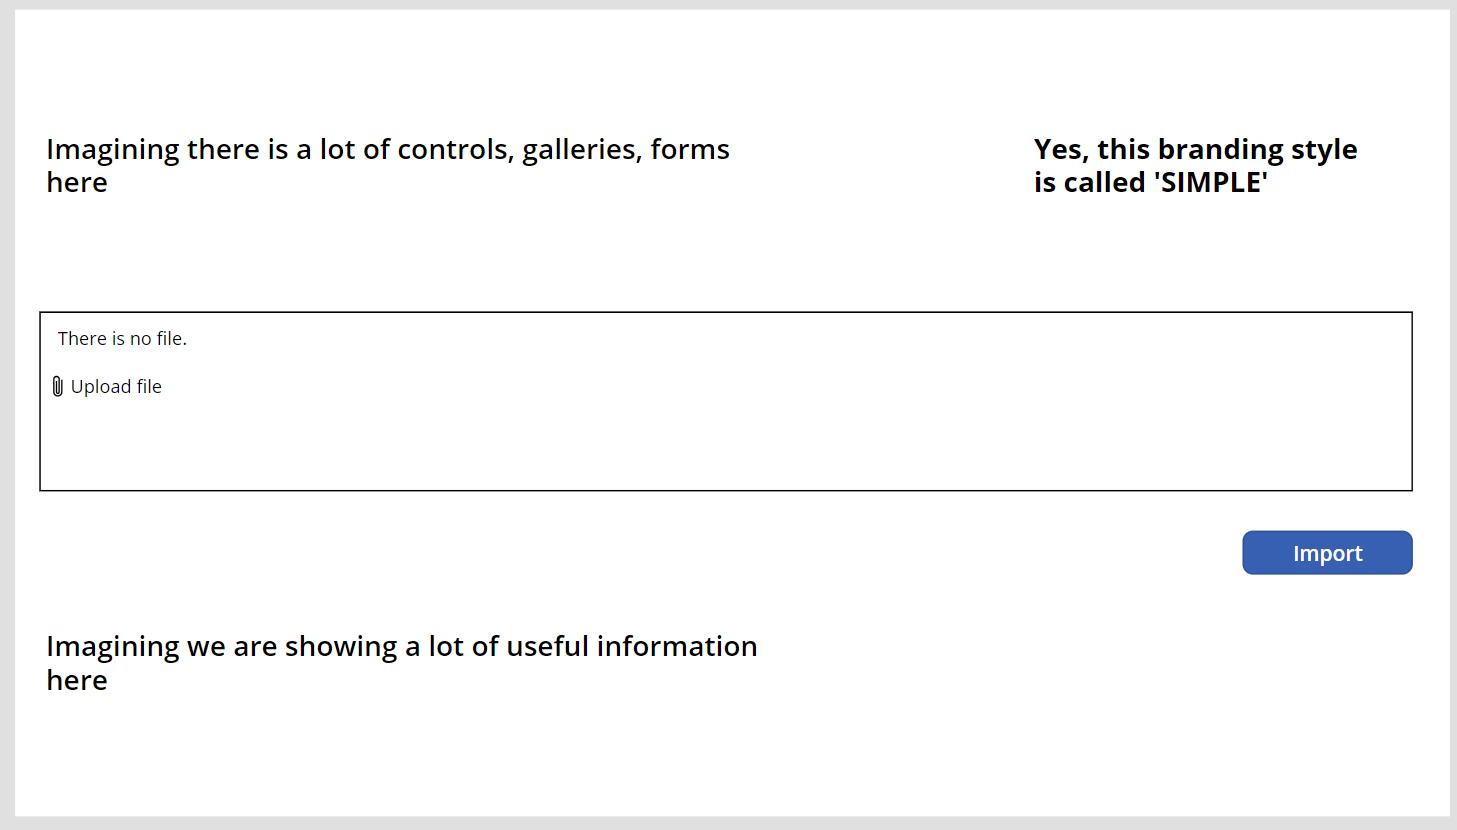
Note: at the moment, Attachment Control only exists in a form Control, click here for more detail.
Rename your attachment control to "Attachment":
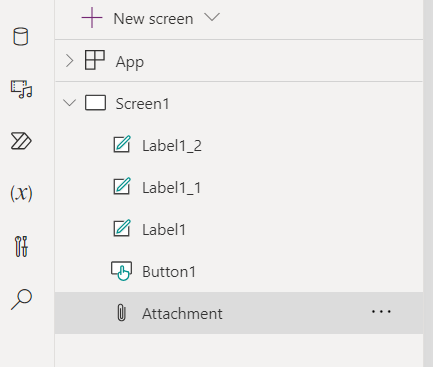
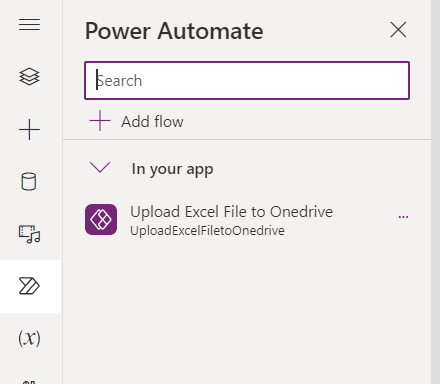
To trigger the workflow, firstly, add the workflow we've just created to the App:
Then add the following power fx script to the OnSelect property of the Import Button
UploadExcelFiletoOnedrive.Run(
    First('Attachment'.Attachments).Name,
    {
        file: {
            contentBytes: First('Attachment'.Attachments).Value,
            name: First('Attachment'.Attachments).Name
        }
    }
)
This script will trigger the cloud flow and pass the attachment name and value to it.
Note: The maximum allowed file size in attachment control is 1 MB. For a larger size of the file, we can advise users to directly upload the file to the file share and use a file share 'on create' trigger to start the workflow.
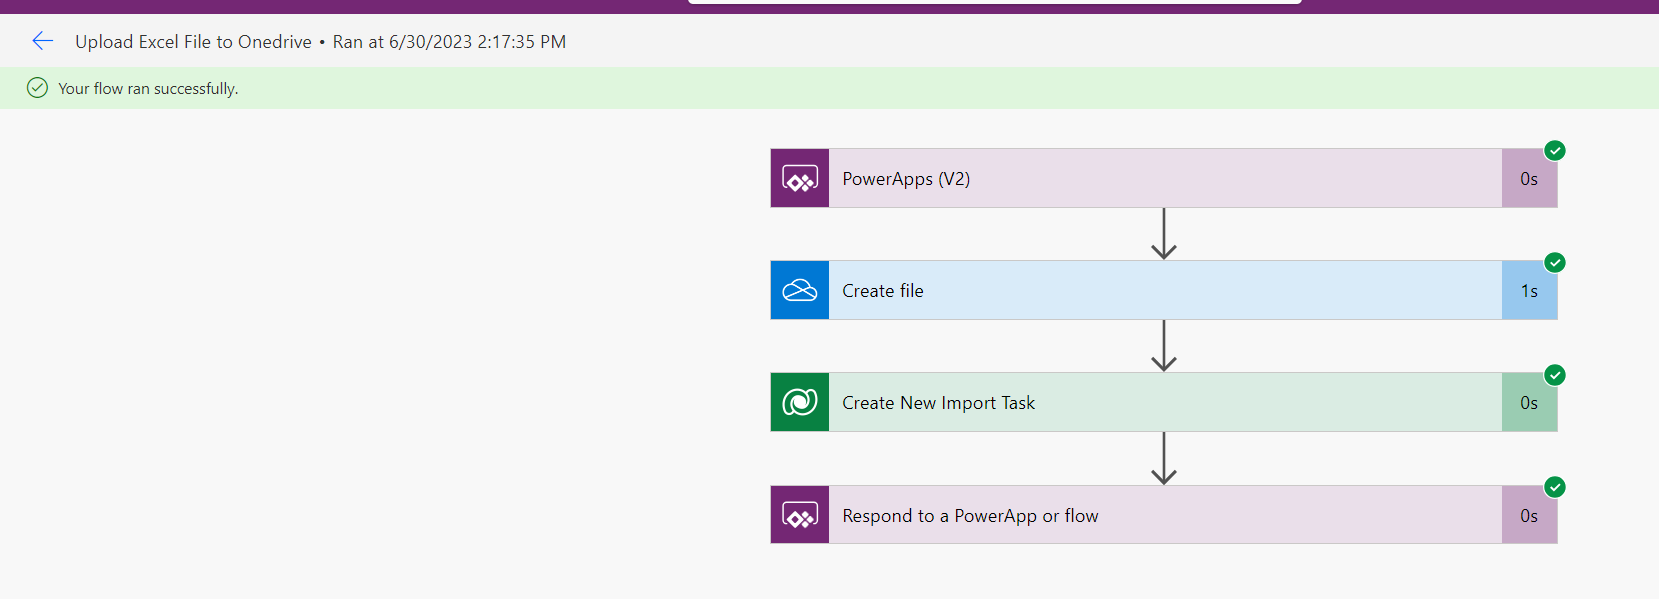
Now it's time to test the whole function. Attach the Excel file we've prepared and click on the Import button. The Upload Excel File to Onedrive workflow should be triggered followed by the Import Excel Data workflow:

Once the workflow finished running, you should find your data imported into the Target table successfully:
Limitation
Yes, every solution has its limitation and targeted use case, here I will list some of them to help you decide whether this is the right solution for you:
As you can see, each dataflow will only have one running instance. If we expect this to be a more frequently triggered function, we can duplicate the same dataflow and set up a mechanism to trigger the available one on user request. This way we can decrease the import wait time but it's not a long-term fix as it will increase maintenance effort.
The data refresh time for dataflow is not guaranteed especially when you are using shared capacities. It depends on the workload of the remote host and also the data input threshold of the target data source.
Global variables are not supported in the dataflow.
We can deploy dataflow by using Solution but extra configuration is required in the target environment. In other words, we can't automate the whole deployment process for the Power platform solution containing dataflow.
For other limitations, please refer to the Microsoft document here.
Please comment below if any questions or let me know if you want more content related to Power Query dataflow.
As always, Happy Sharing !!!!!🤝🤝🤝🤝🤝


